
How to Present a PowerPoint Presentation Online?
Introduction
More and more often you need to present to people who aren’t physically in the room. In Microsoft PowerPoint 2013 you can share your slides over the Internet using a free service called “Office Presentation Service”. To use it all you need is a registered Microsoft Account. Anyone who has a browser and an Internet connection who has been invited to the meeting can join. Let’s see how it works.
Overview of the presentation to present online
Here I have a presentation about our company and the services we offer, that I’m going to present over the Internet to a prospective client during our phone conference.
Before our phone conference, I want to prepare my slides for the online presentation. My presentation contains slides with text, images, animations and videos.
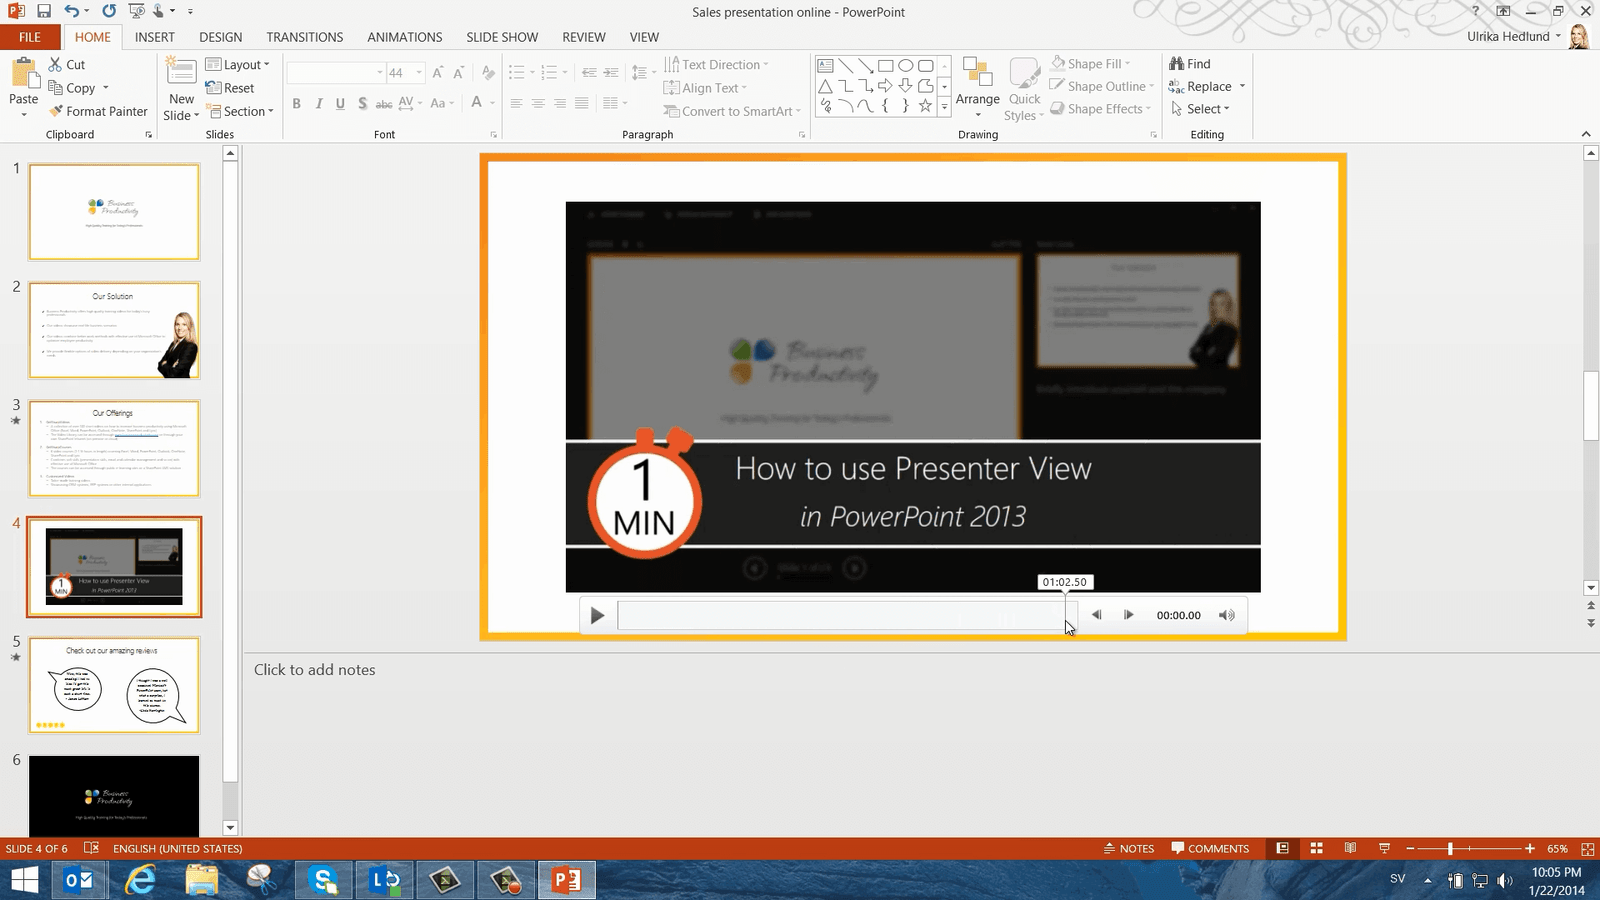
In the previous version of PowerPoint, you were not able to show videos online, they would just appear as still images. In PowerPoint 2013 Microsoft has introduced support for videos so now you can play videos with audio streamed over the Internet.
How to optimize videos for online view in PowerPoint 2013?
In this presentation, I have two videos, both of them are rather short so they should be ok. The videos can’t be too large for online presentations. The videos should be in an MP4 format for them to play properly online. To make sure these videos are in the proper format I’ll click “FILE” and then “Optimize Compatibility.”

This way PowerPoint will make sure that the video format is supported for viewing online. I can see that the second video in my presentation was optimized. I’ll click “Close” and then I’ll click “Compress Media” and select “Internet Quality” to see if I can reduce the size of my videos even more while keeping a quality that is sufficient for the Internet.
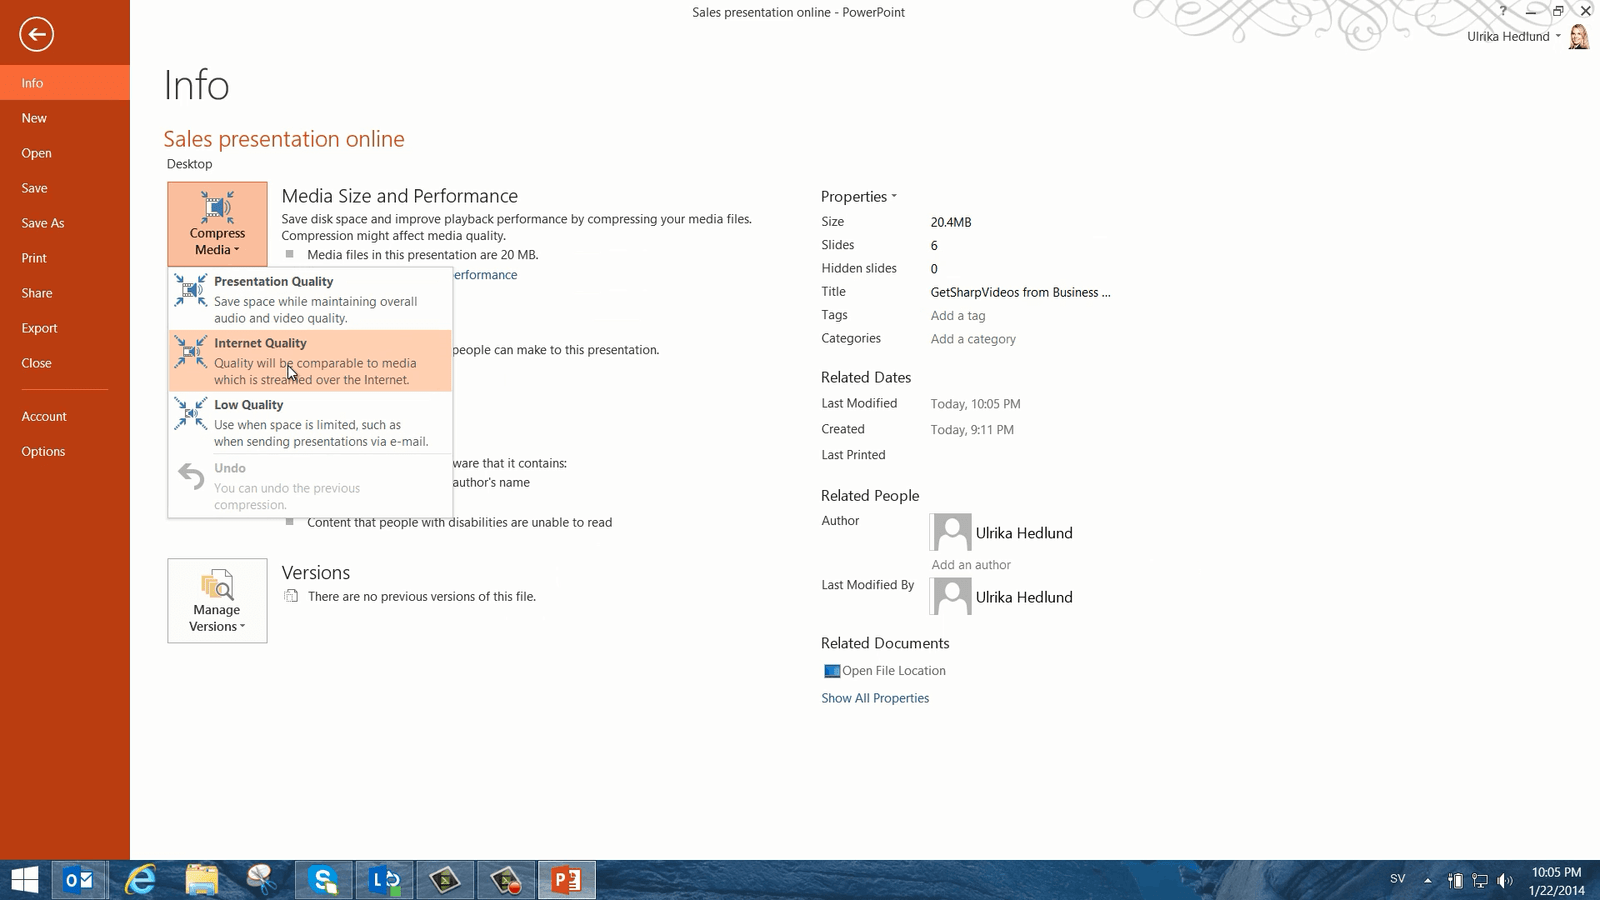
In this case, I wasn’t able to compress the videos a lot more, but it’s a good practice to always see if you can compress your videos. I’ll click “Close” and go back to my presentation.
How to embed fonts for online view in PowerPoint 2013?
When you deliver your presentation over the Internet to an online audience you should look out for non-typical fonts. In this slide, I’m using a font that is not available in the PowerPoint Web App which is used by the Office Presentation Service to display the presentation to the attendees.
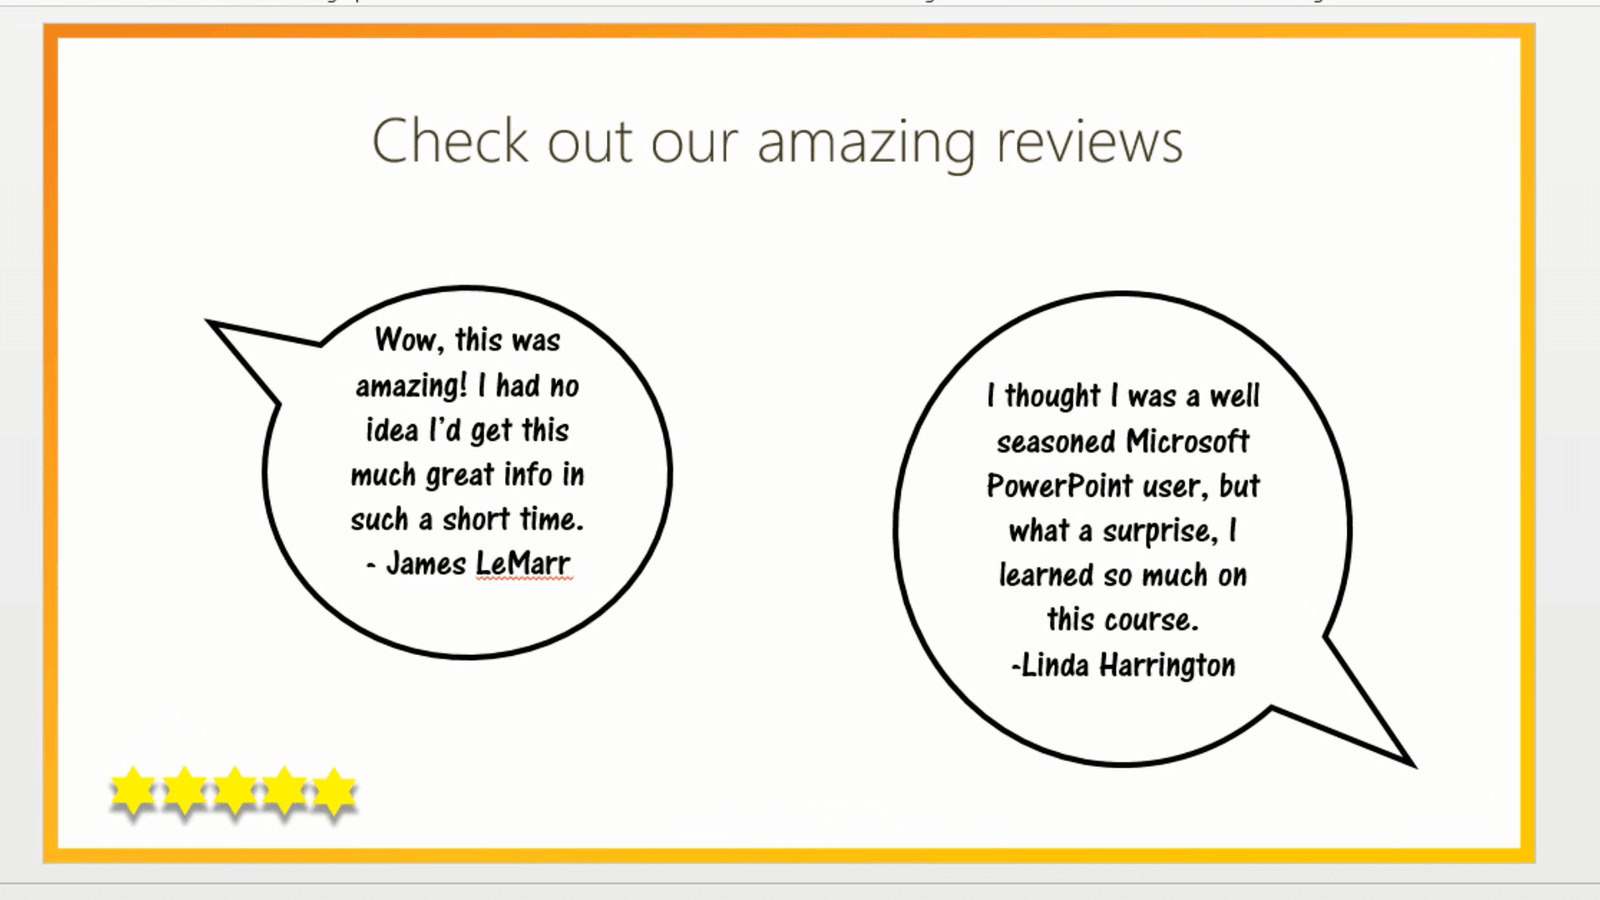
If the font is not available it will be replaced by another font, so the text in these speech bubbles would look like this instead. In order to ensure that your text looks exactly the same online as it does in your presentation, you can select to embed the fonts. To embed fonts into the presentation file, click “FILE”, “Options”, and then “Save”. Scroll down to the bottom and mark the option “Embed fonts in the file”. Leave the default option which is to “Embed only the characters used in the presentation” and then click “OK”.

Next time I press “Save” the fonts will be embedded into the file itself. This won’t work with fonts you have purchased that have restricted licensing rights, but it works fine for the fonts included in Office.
How to remove hidden data in your PowerPoint slides?
On almost every slide I have presentation notes. I want to share this presentation deck with my customer so I want to make sure it doesn’t contain any personal data. To see the document properties and to remove all the presentation notes from my slides I’ll click “FILE”. Here in the “Info” section, I can see all the properties of my document. There is nothing sensitive here so I can keep the document properties.

I do however want to remove the presentation notes. I’ll click “Check for Issues” and then “Inspect Document.” Here I can select which property data I want to inspect my document for. I’ll just mark all of the checkboxes to see what the presentation contains. Then I’ll click “Inspect.” Here I can see that the file contains “Document Properties and Personal Information” and “Presentation Notes”. I’ll click “Remove All” next to the “Presentation Notes”. Now I can safely share this presentation confident that it doesn’t contain any sensitive data.

There! Now I’m ready to upload the presentation to the Office Presentation Service.
How to Initiate the online presentation in PowerPoint 2013?
To get started with the online presentation, click the “SLIDE SHOW” tab, “Present Online” and then “Office Presentation Service”.

Anyone who has PowerPoint 2013 and a Microsoft account can use this services free of charge. All the attendees need is an updated browser and an Internet connection. Here you have the option to “Enable remote viewers to download the presentation”. In addition to being able to download the presentation, the viewers can also step through the slides independently, at their own pace.
If you don’t want your attendees to be able to download the presentation or view it independently just leave this option unmarked.

You are unable to change this setting once you’ve connected to the Office Presentation Service, so if you’re unsure it’s better to leave it unmarked. I’ll click “CONNECT” to start the upload of the presentation. I’ll have to wait until the entire slide deck with the video and embedded fonts is uploaded and processed. Since this takes a while it’s good to do this ahead of time, before the start of your presentation.
How to invite attendees to the presentation in PowerPoint 2013?
When the presentation has been uploaded I’m given three different options for how to share the presentation.

I’ll copy the link, open up an email that I’ve already prepared, paste in the link and send the email to my costumer.
In the top right corner of the screen, you can see what the presentation looks like for the online audience.

If the attendees click on the link before I’ve stated the presentation they will just see a black window with the text, “Waiting for the presentation to begin”.
How to Start an online presentation in PowerPoint 2013?
When it’s time for me to start presenting I’ll just click “START PRESENTATION”. The slide is shown to the online audience and depending on their Internet bandwidth there might be a slight delay. I’ll right-click and select “Show Presenter View” so that I can get a better overview of my presentation.

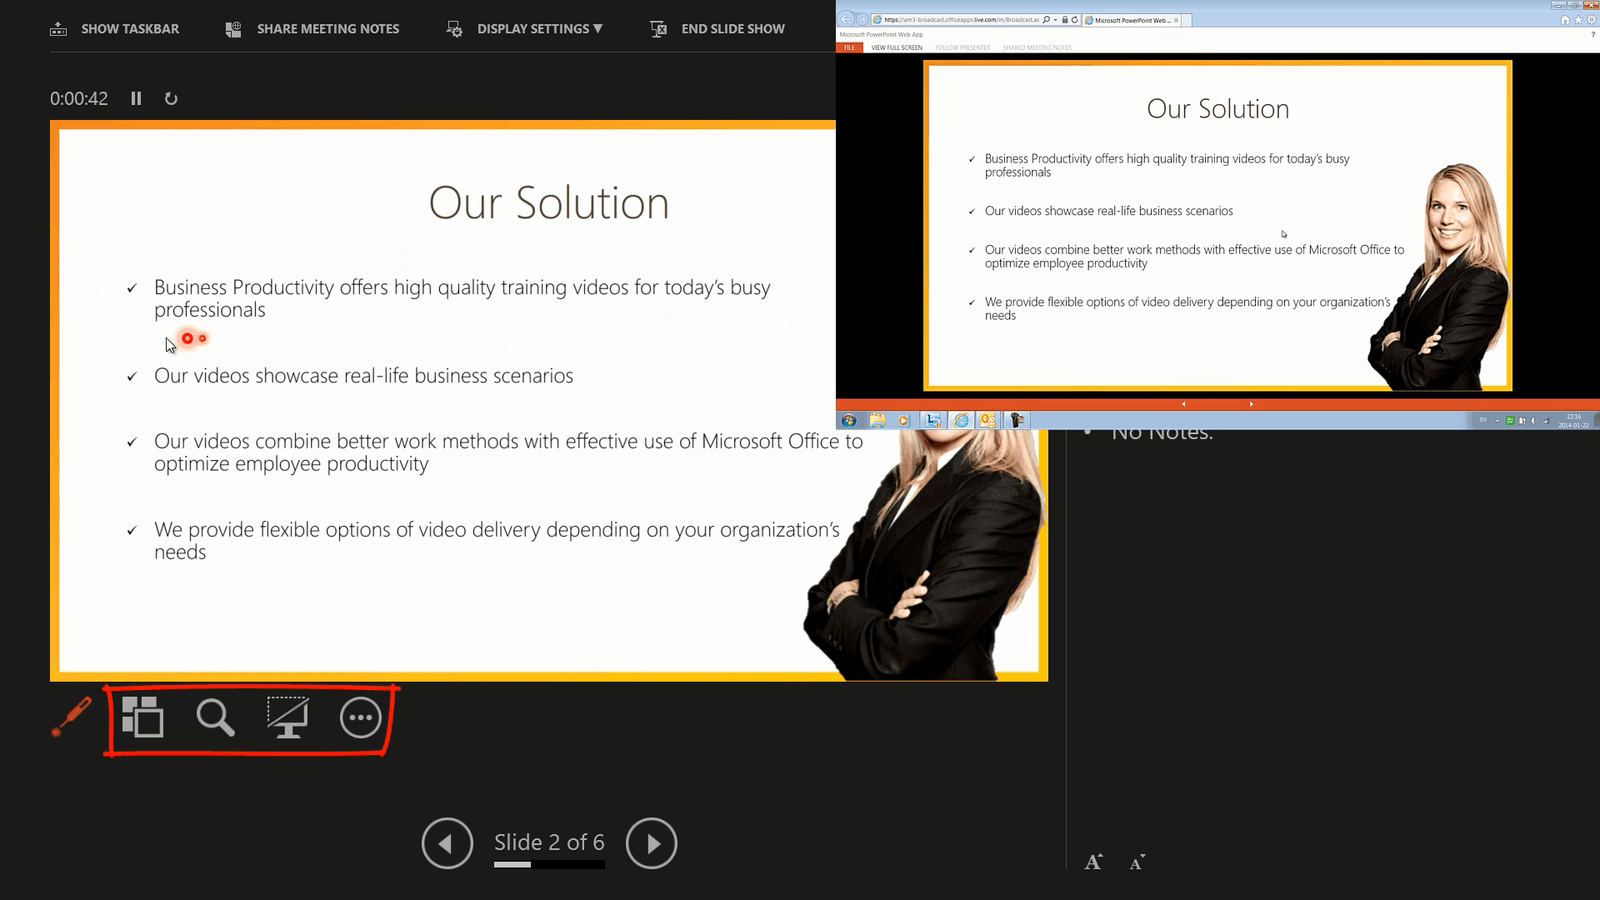
As you can see, this view is only visible to me, the audience sees only the slide.
Unlike when you present live, you can’t use the highlighting tools when you present online. The pens are greyed out, the laser pointer is available, but as you see it doesn’t show on the audience screen. The other tools in the Presenter View are available so that you can easily navigate your slides as you present.
How to view the attendees in an online PowerPoint presentation?
If you as a presenter move to fast for the online audience they can easily go back and forth in the presentation by pressing the navigation arrows at the bottom of the slide or using their keyboard. Doing this doesn’t interrupt the presenter or change anyone else’s view. If the viewer wants to get back to the slide that you as the presenter is currently showing they just click “Follow Presenter”.

Whether or not you have given the viewers the ability to browse the slides independently, all viewers have media controls on the videos in the presentation so that they can play and pause the videos.
How to Edit your slides while presenting online in PowerPoint 2013?
At any time during the presentation, you can go to the top menu in the presenter view and click “END SLIDE SHOW”. This does not end the online presentation. Your audience still sees the last slide you showed them.
If you need to add something to your presentation or edit the slides, you can do this during your online presentation. The audience will see the last slide you were showing. Here I’ll add an additional slide to make room for some questions at the end. To resume the presentation again I’ll press “Resume”. It takes a while to resume the online presentation so only do this if you feel that it’s absolutely necessary and if it doesn’t cause too much disruption to your presentation.
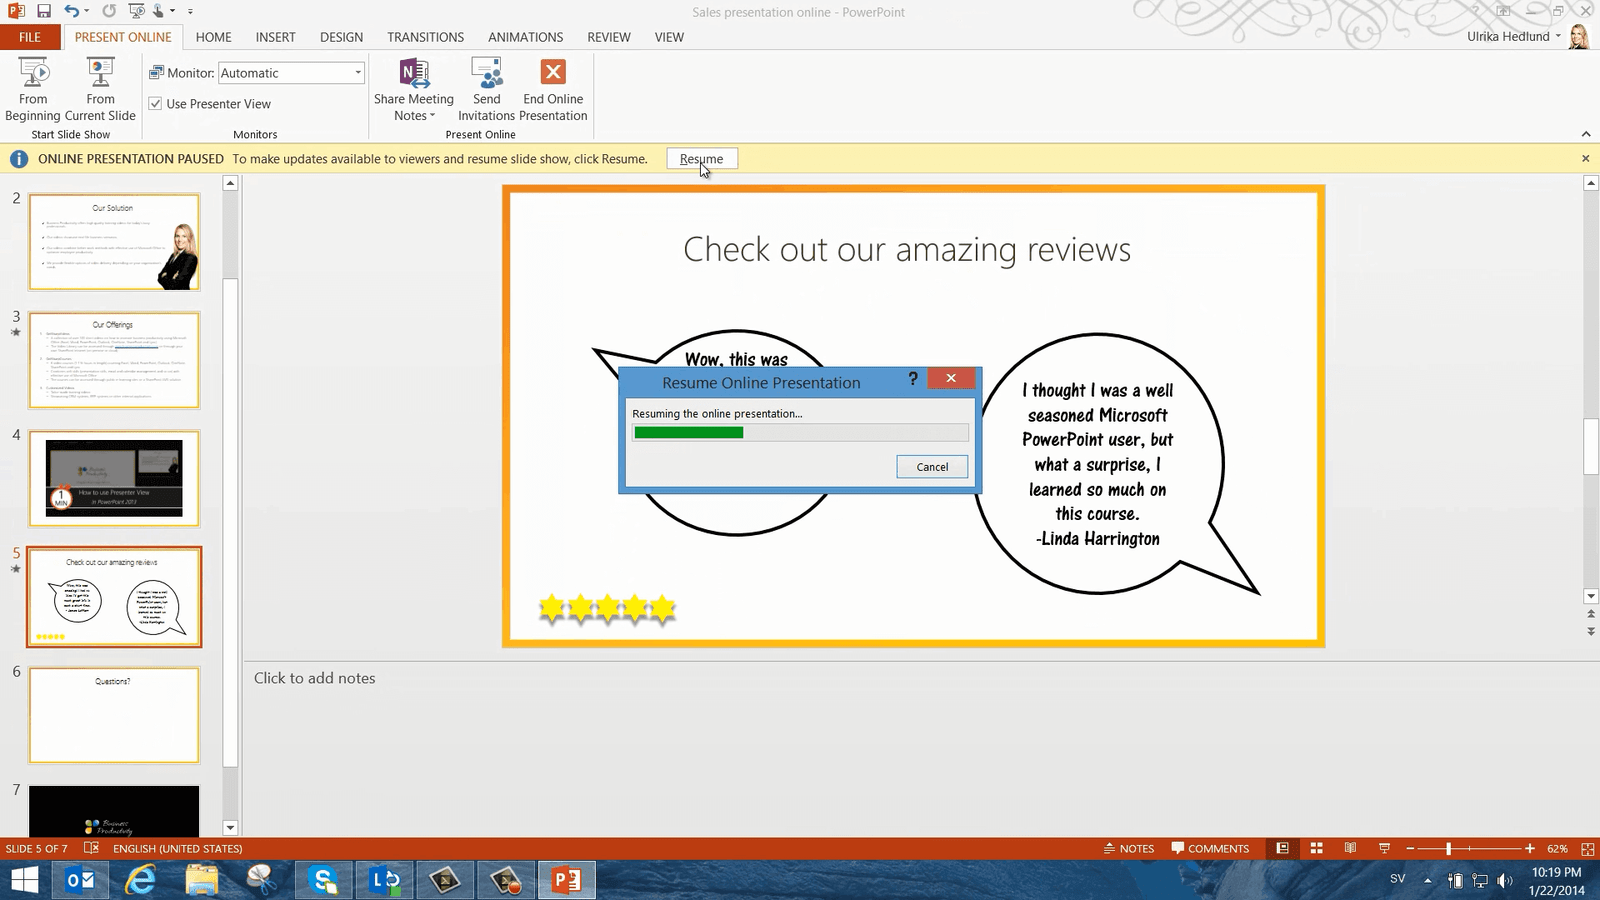
As you can see the additional slide has been added to the online presentation without the audience noticing that you just inserted the slide.
How to Download an online presentation in PowerPoint 2013?
Before you end the online presentation you should ask you online audience to download the presentation. They do this by clicking “FILE” and then “Download”. The full presentation with embedded fonts and videos will be downloaded.

When the audience has downloaded the presentation I’ll click “END SLIDE SHOW” and then “End Online Presentation”. I’ll get a warning message saying that everyone who is watching will be disconnected. To confirm I’ll press “End Online Presentation” again.

There! Now I have successfully delivered a presentation to an online audience over the Internet.
How to Use Media to Enhance your Presentations in PowerPoint 2013?
Introduction
No matter what type of presentation you’re delivering inserting videos into your slides help add life and movement into your presentation. Today it’s really easy to create your own video using your mobile phone or digital camera or you can browse the internet to find a video that’s suitable to reemphasize the message of your presentation. PowerPoint 2013 has a number of good video editing tools that can help you work with your videos. Let me show you how they work.
How to add music to your presentation in PowerPoint 2013?
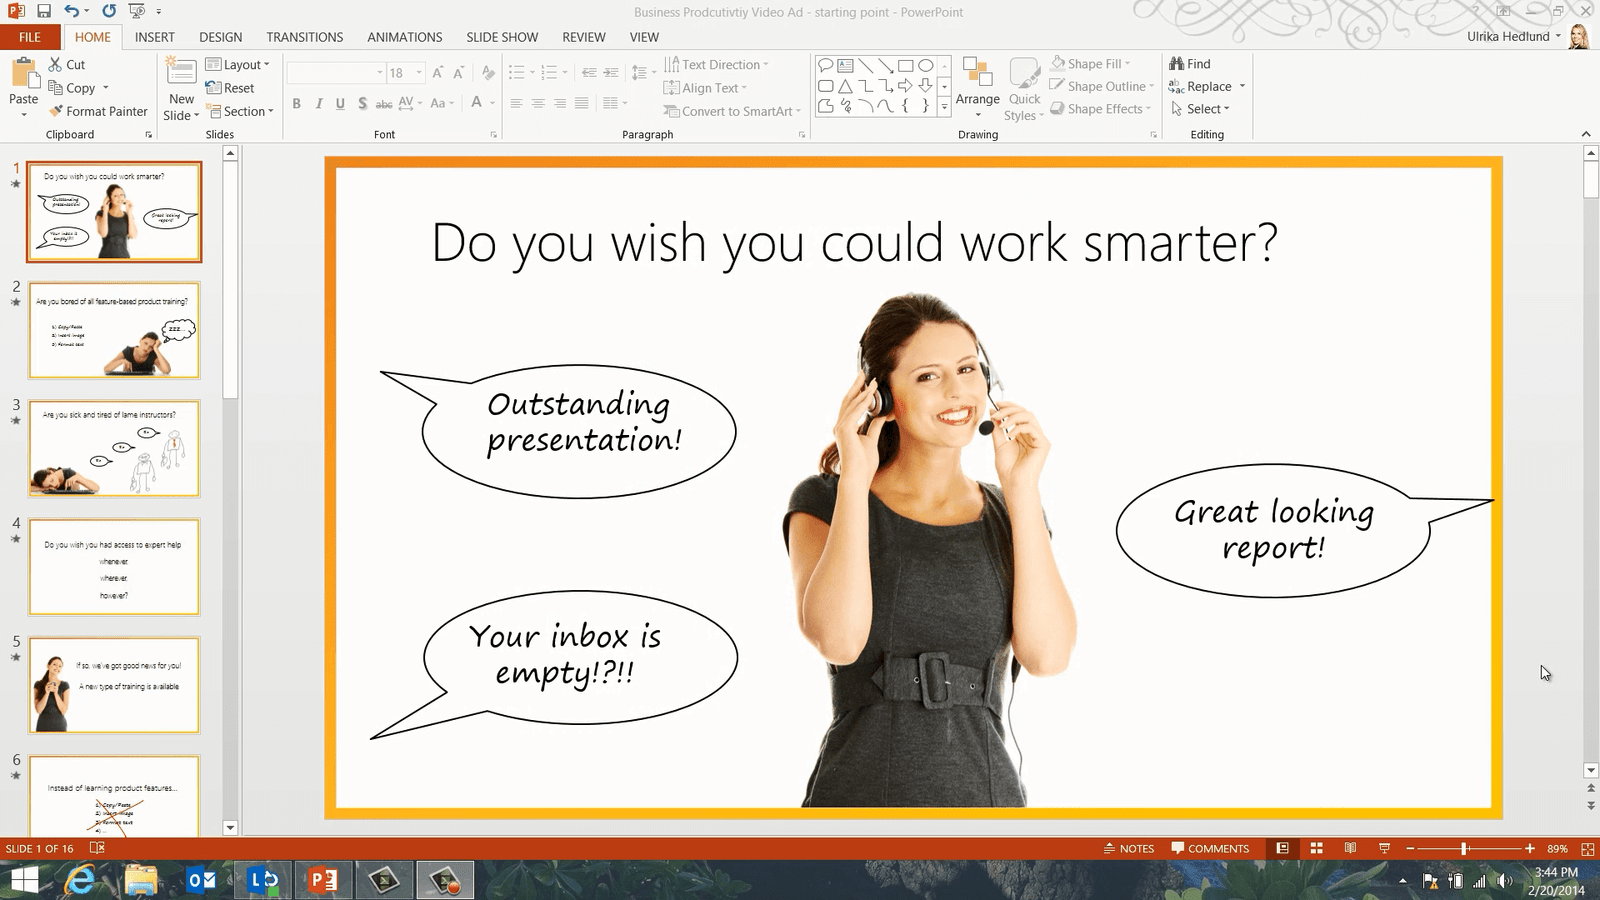
Here I have a presentation that I want to make into a video ad and upload to our YouTube channel. I ‘m going to add audio and videos to the presentation so that it comes more alive.
First I want to add some nice background music. To add background music to your presentation mark the slide where you want the music to start. I already have the first slide marked. Click “INSERT”, “Audio” and then select from where you want to insert the audio file. I’ll select “Audio on My PC”
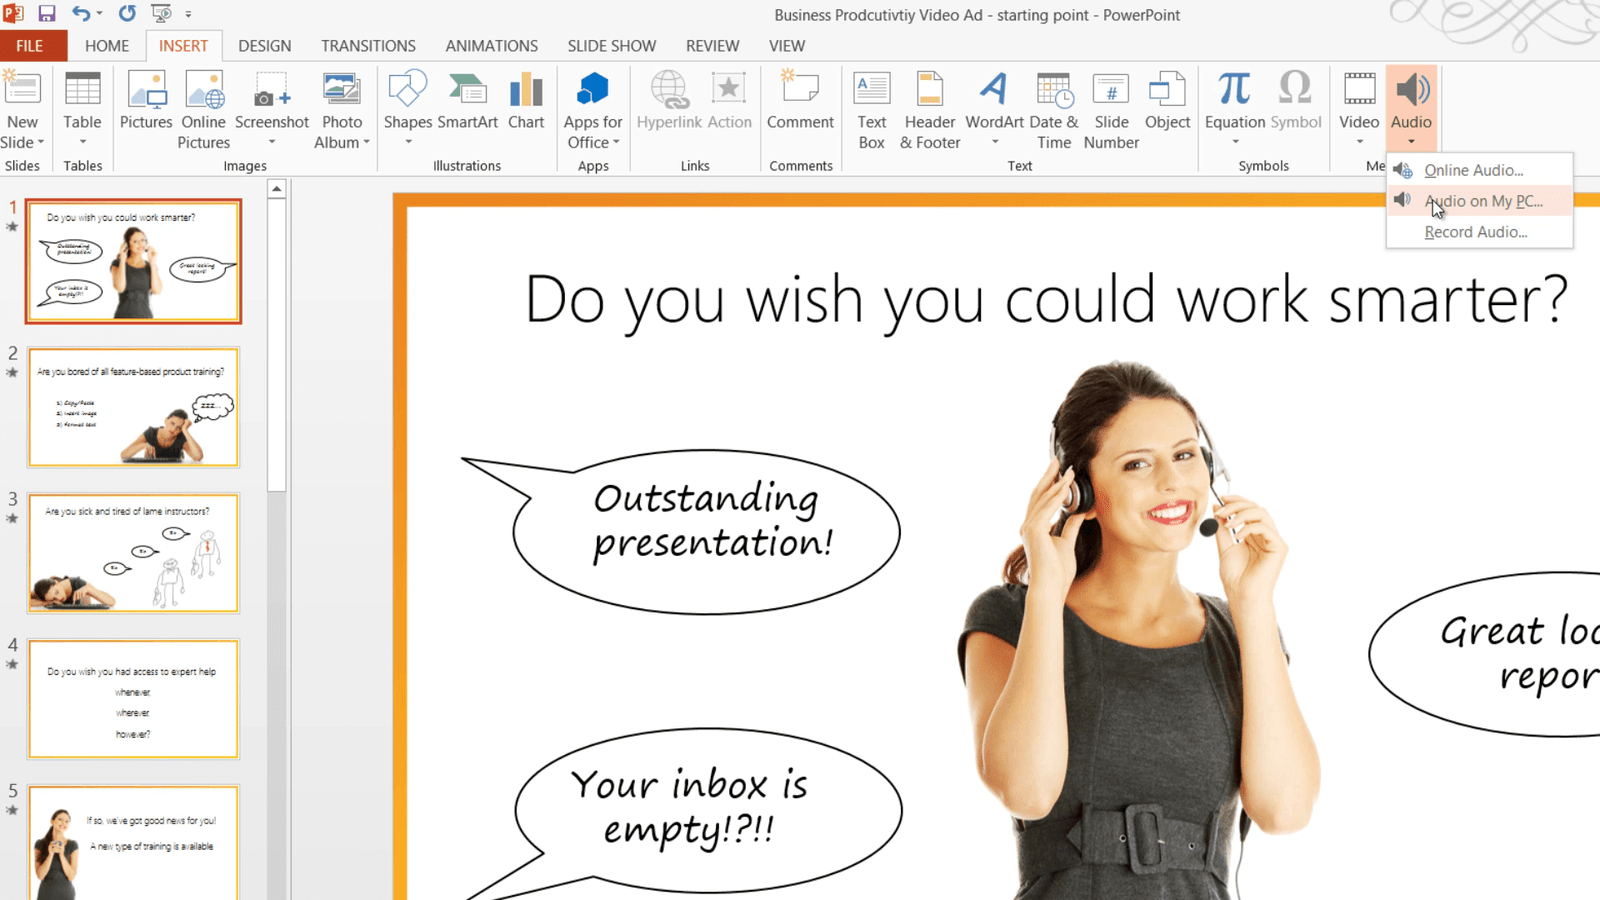
and select a melody that I have purchased and downloaded from the Internet and click “Insert”. On the “AUDIO TOOLS” “PLAYBACK” tab I’ll check the option to “Play Across Slides”. I’ll also mark the option to “Loop until Stopped”. This way the song will repeat until the presentation ends. I’ll click the “Volume” tab and change the volume to “Medium”. I’ll mark the option to “Hide During Show” so that the audio file isn’t visible and then in the “Start” drop-down I’ll select “Automatically” since I want the music to start playing when I start the slideshow.

I’ll click the “ANIMATIONS” tab and then open up the “Animation Pane”. Here I can see that the music has been placed last in the animation list, so I’ll just drag it to the top to make sure it starts right away.

There now let’s check this out in SlideShow mode. Perfect!
How to insert a video into your PowerPoint presentation?
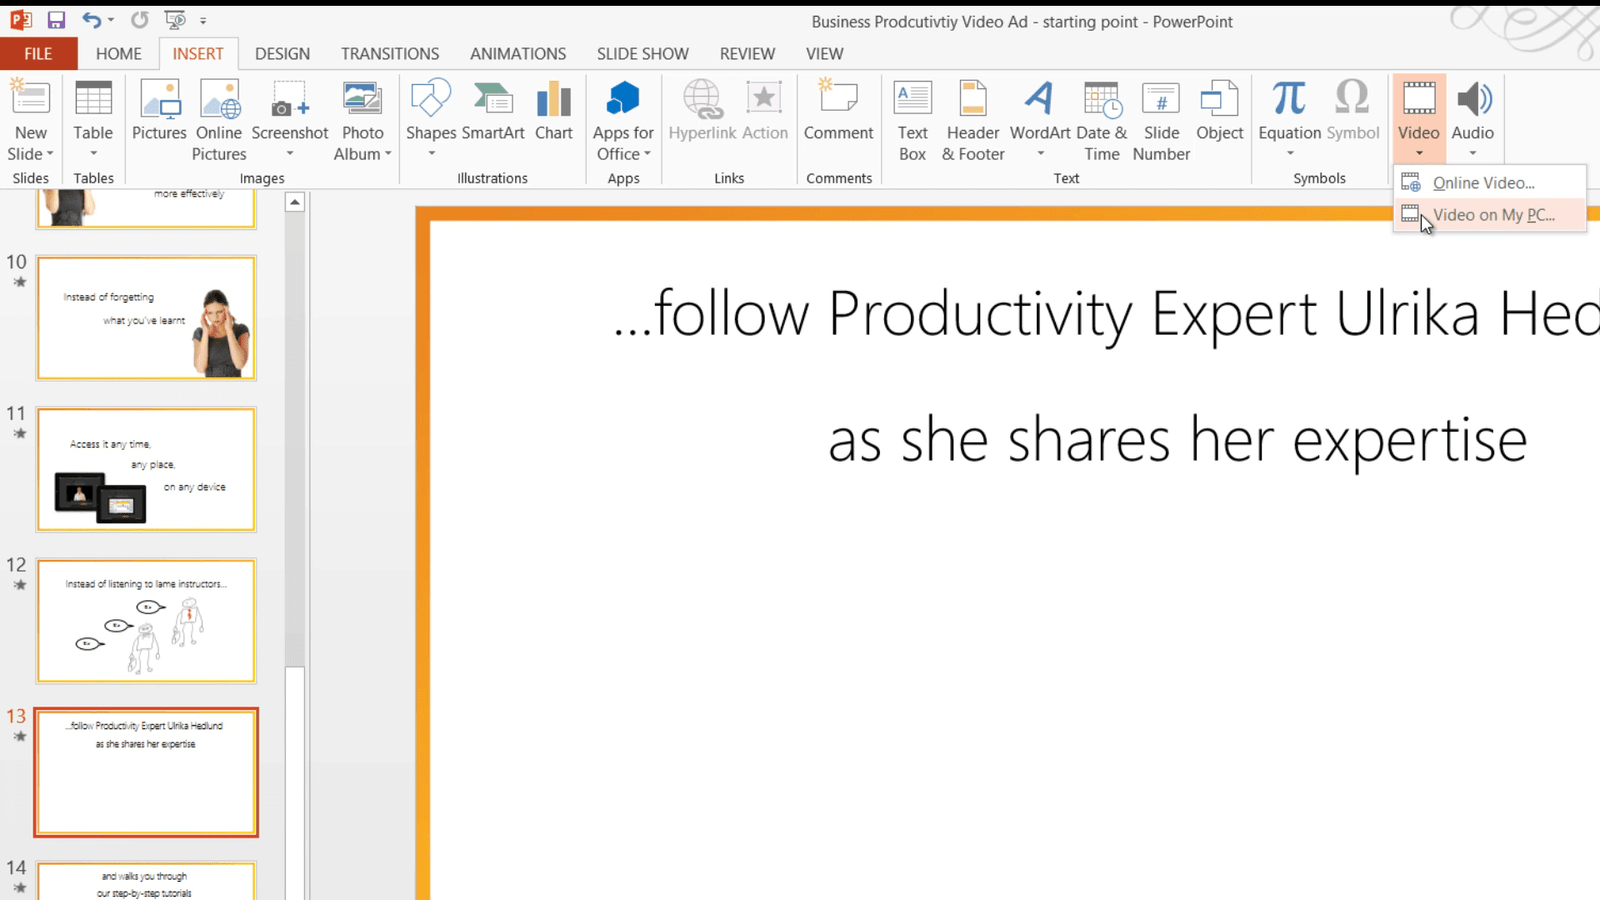
I’ll close down the “Animation Pane” and l go to the slide where I want to add a video. To insert a video go to the “INSERT” tab and click “Video”. I’ll select “Video on My PC” and select the video I want to insert.
To resize the video I’ll just grab one of the corners and move it to keep the proportions of the video. I’ll position the video where I want it in the slide and the alignment guides help me to find the center of the slide.
Then I click play. The video has our jingle and then a title slide before I start speaking which I want to remove, in other words, I want to trim the video.
How to trim your video in PowerPoint 2013?
To trim a video, have the video marked and click The “PLAYBACK” tab, and then “Trim Video”.

Here you will see a green and a red handlebar. Move the green handlebar to where you want the video to begin. Here I’ll move the green bar to when I begin speaking and I’ll move the red to where I want the video to end. To make sure the ending sounds ok I’ll click right before the red bar and click play. I can fine-tune the timing by using the up and down arrows. There that sounds good! So I’ll click Ok.
How to format your video in PowerPoint 2013?
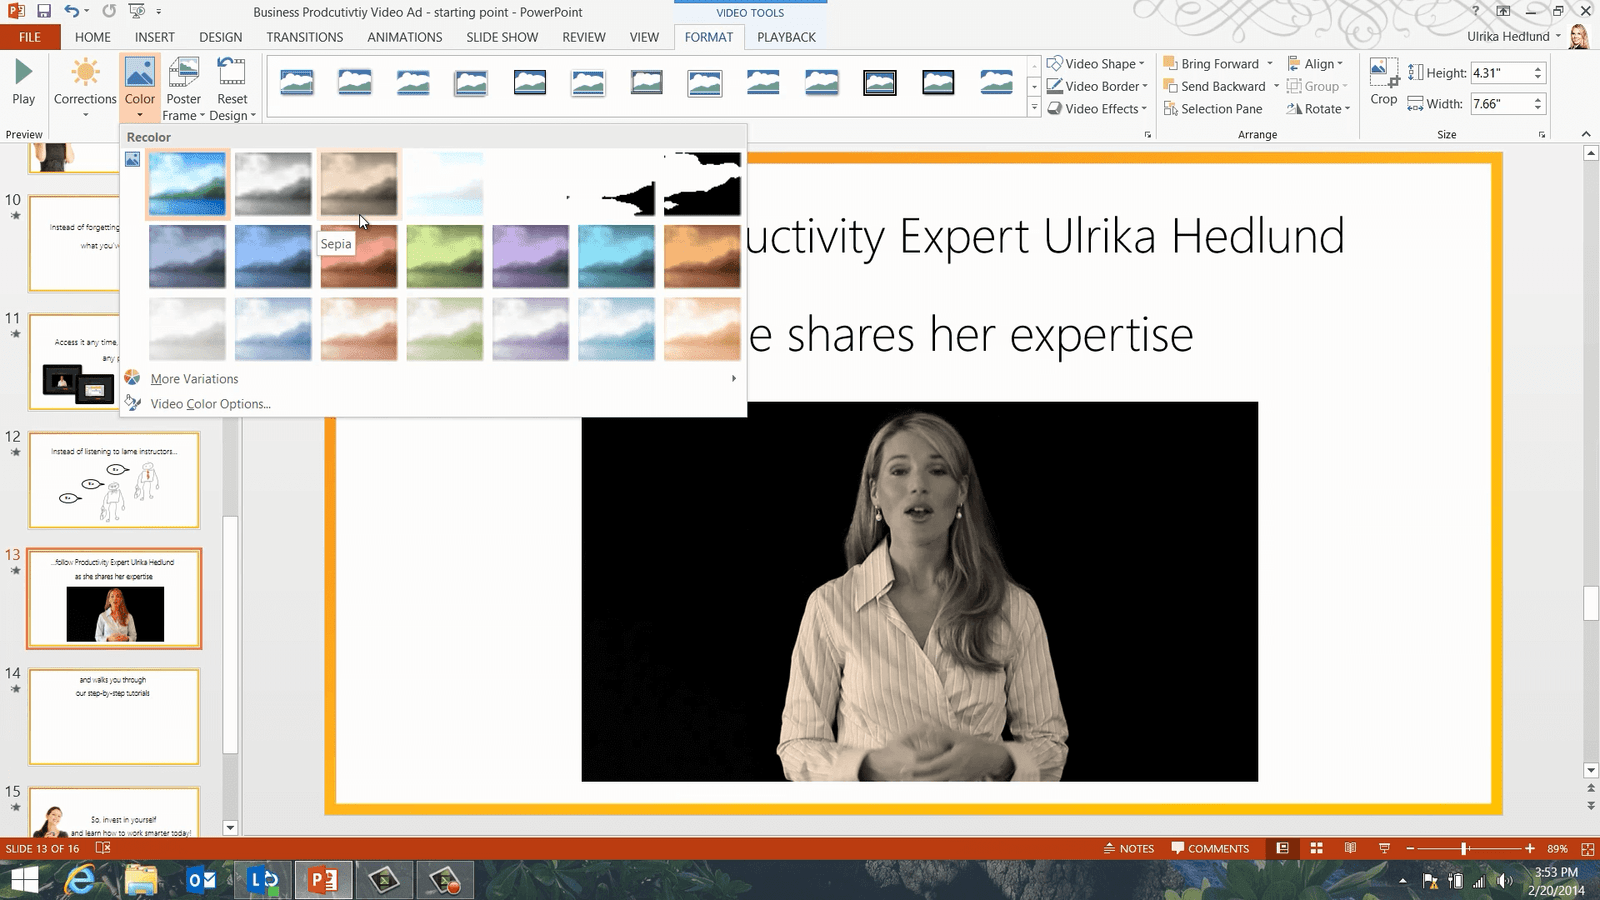
Now I want to make some changes to the formatting of the video. If you go to the “FORMAT” tab you have numerous options to format your video. You can make corrections to the brightness and contrast of the video itself, you can also change the color – perhaps you want the video to be black and white.
I want to keep the video as it is, but I want to add a frame to the video so that it looks like it’s playing on an LCD screen. There is a full gallery of designs to choose from, however, you need to be careful here because some of the frames make modifications to the video. As you can see if I apply this one the video becomes a bit lighter. To avoid that I’ll just add a normal border by clicking “Video Border” and selecting a grey color for the border. I’ll click “Video Border” again and increase the weight of the line.

Then I’ll click “Video Effects”, “Shadow” and select an “Outer Shadow”. There now I’ve made the changes without affecting the actual video.
How to set playback options in PowerPoint 2013?
Now I need to decide how this video should be played. I’ll go to the “PLAYBACK” tab. I don’t want the video to show until it starts playing so I’ll mark the option to “Hide While Not Playing”. In the “Start” drop-down I’ll select “Automatically”.

I’ll click the “ANIMATIONS” tab and open up the “Animation Pane” to see the order of the animations.
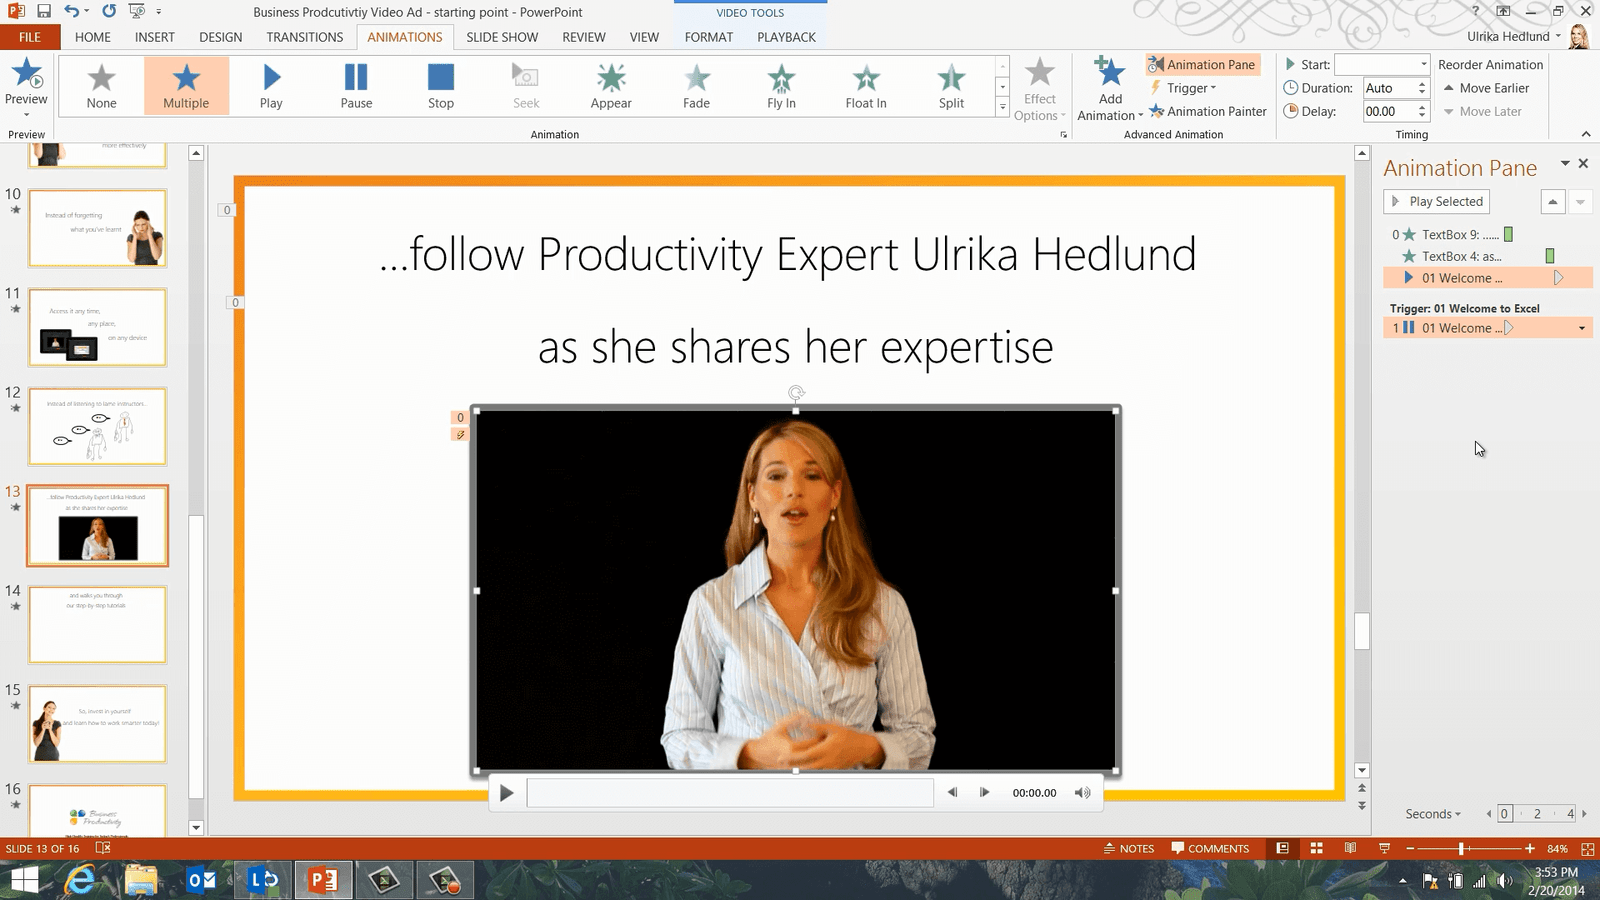
The video will play automatically after the text appears, which is the way I want it. Let me see what this looks like in SlideShow mode. Perfect!
How to change the video image in PowerPoint 2013?
I’ll close down the “Animation Pane” and go to the next slide where I want to insert one more video. I’ll click “INSERT”, “Video” and select “Video on My PC” and insert my second video. I want this video to have the same size and the same position as the video on the previous slide.
I’ll go back to the first video I inserted to see the size. To open up the Format Video property pane I’ll click the little arrow in the “Size” section.
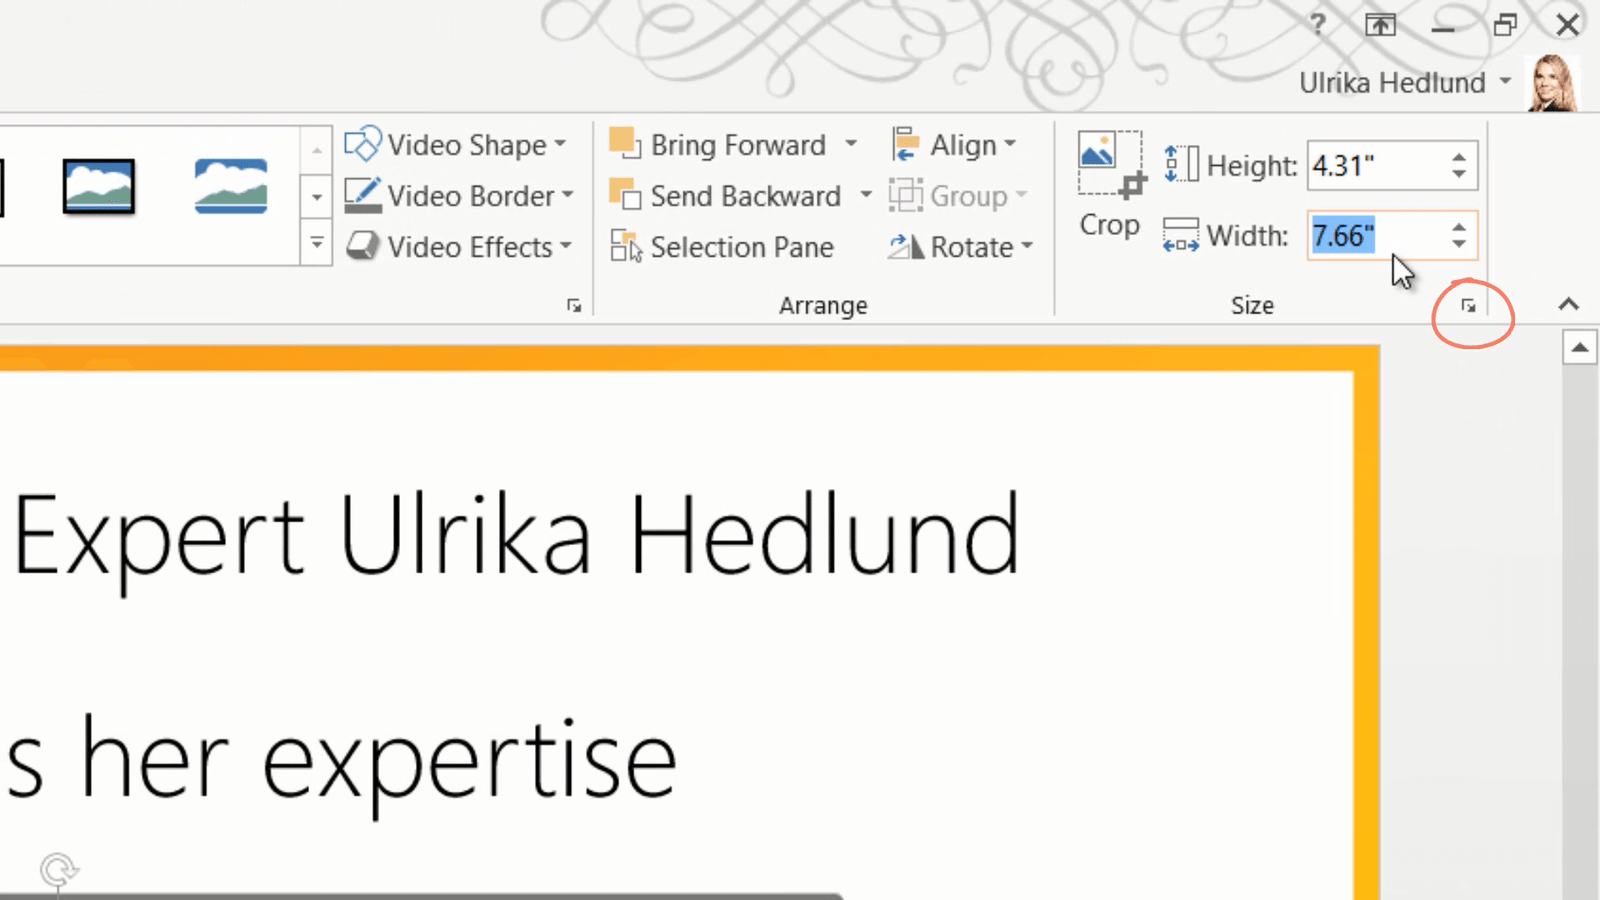
Here I’ll copy the height of the video by pressing “CTRL C” then I go back to my second video, open up the size properties and paste in the same height by pressing “CTRL V”.

Now I’ll go back to the first video again and open the properties for the position. Again I’ll copy over the properties of the positioning from the first video to the second video. There! Now they are in the exact same place. I also want the video to have the same formatting with the frame and the shadow. I’ll go back to the previous slide, mark the video and on the “HOME” tab I’ll click “Format Painter”. I’ll go back to my second video and mark it. There! Now I just have to do something about this video image. I’ll go to the “FORMAT” tab and click “Poster Frame”.

Here you can select to take a still image from somewhere else in the video or insert “Image from File”. I’ll click “Browse” and select the image I want. There now my image is applied to the video. Now I need to modify the playback options. I’ll go to the “PLAYBACK” tab and select to Start Automatically.
How to use bookmarks in PowerPoint 2013?
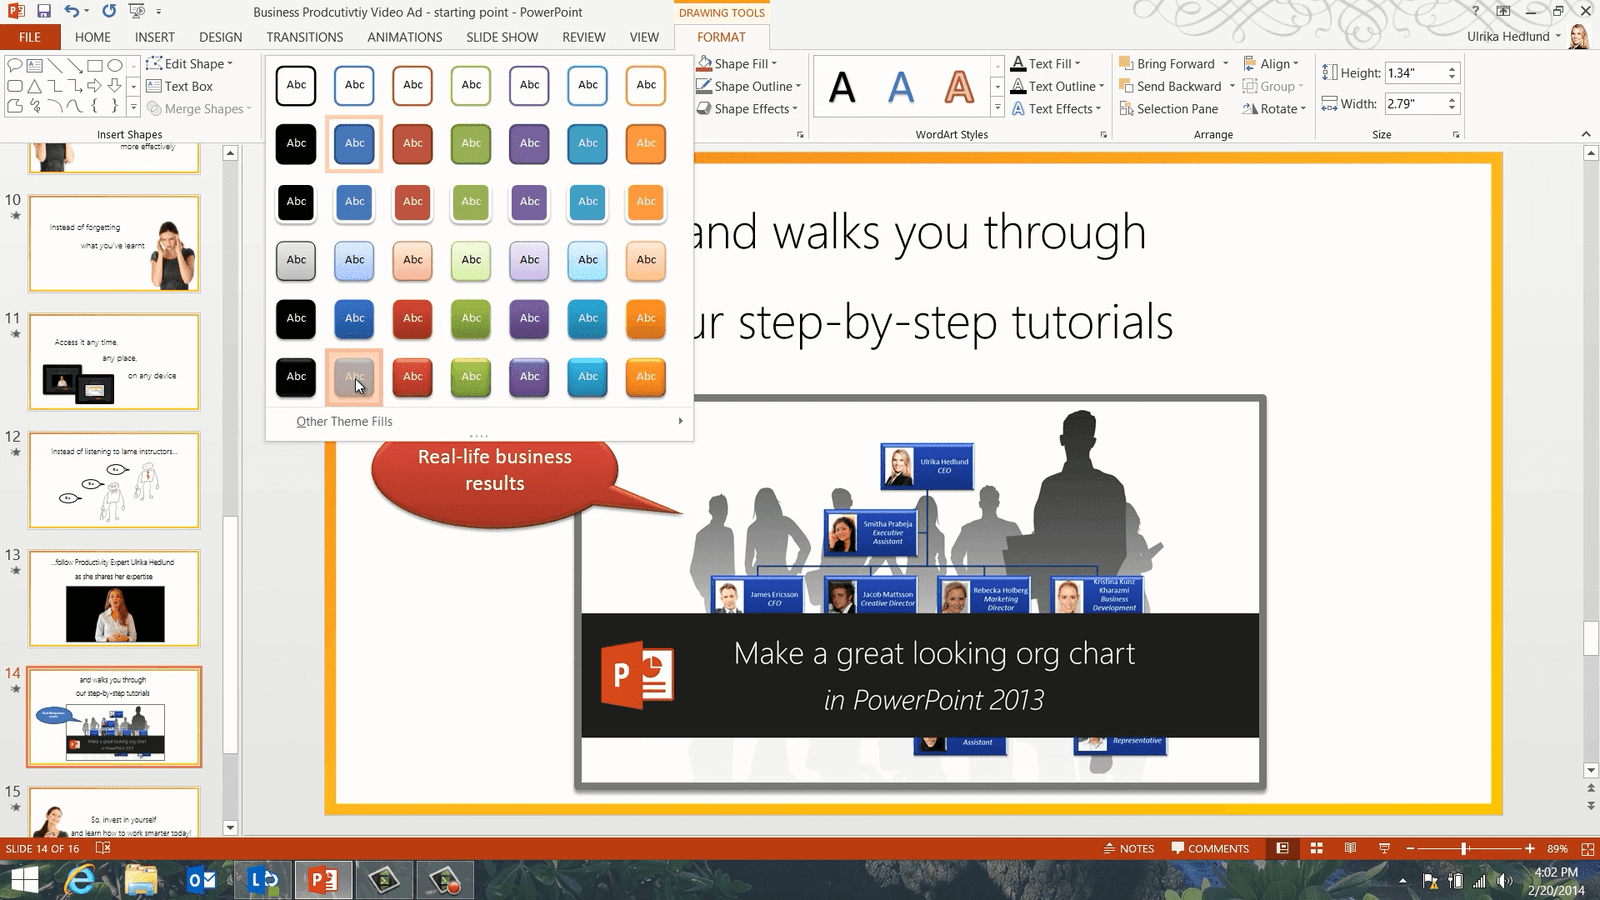
About 17 seconds into the video I want to add a speech bubble with text highlighting that our videos showcase real-life business results. To insert a speech bubble I’ll click “INSERT” “Shapes” and then select a callout speech bubble. I’ll draw the speech bubble and then move the pointer. I’ll right-click and select to ”Edit text”. I’ll add the text “Real-life business results” and apply a nice design.
In order for the speech bubble to appear at the right time, I need to add bookmarks to my video. To add bookmarks to your video, mark the video and go to the “PLAYBACK” tab.
I’ll go to the part of the video where I want the speech bubble to appear and click “Play” and then “Add Bookmark”.

I’ll click “Play” again and then I’ll add the second bookmark when I want the speech bubble to disappear. Now I can apply the animations to my speech bubble. I’ll mark the speech bubble and click the “ANIMATIONS” tab.
I’ll open up the “Animation Pane” to see the order of the animations. I’ll click “Add Animation” and apply a “Zoom” entrance animation. I’ll click the “Trigger” button and select “On Bookmark” and then “Bookmark 1”.
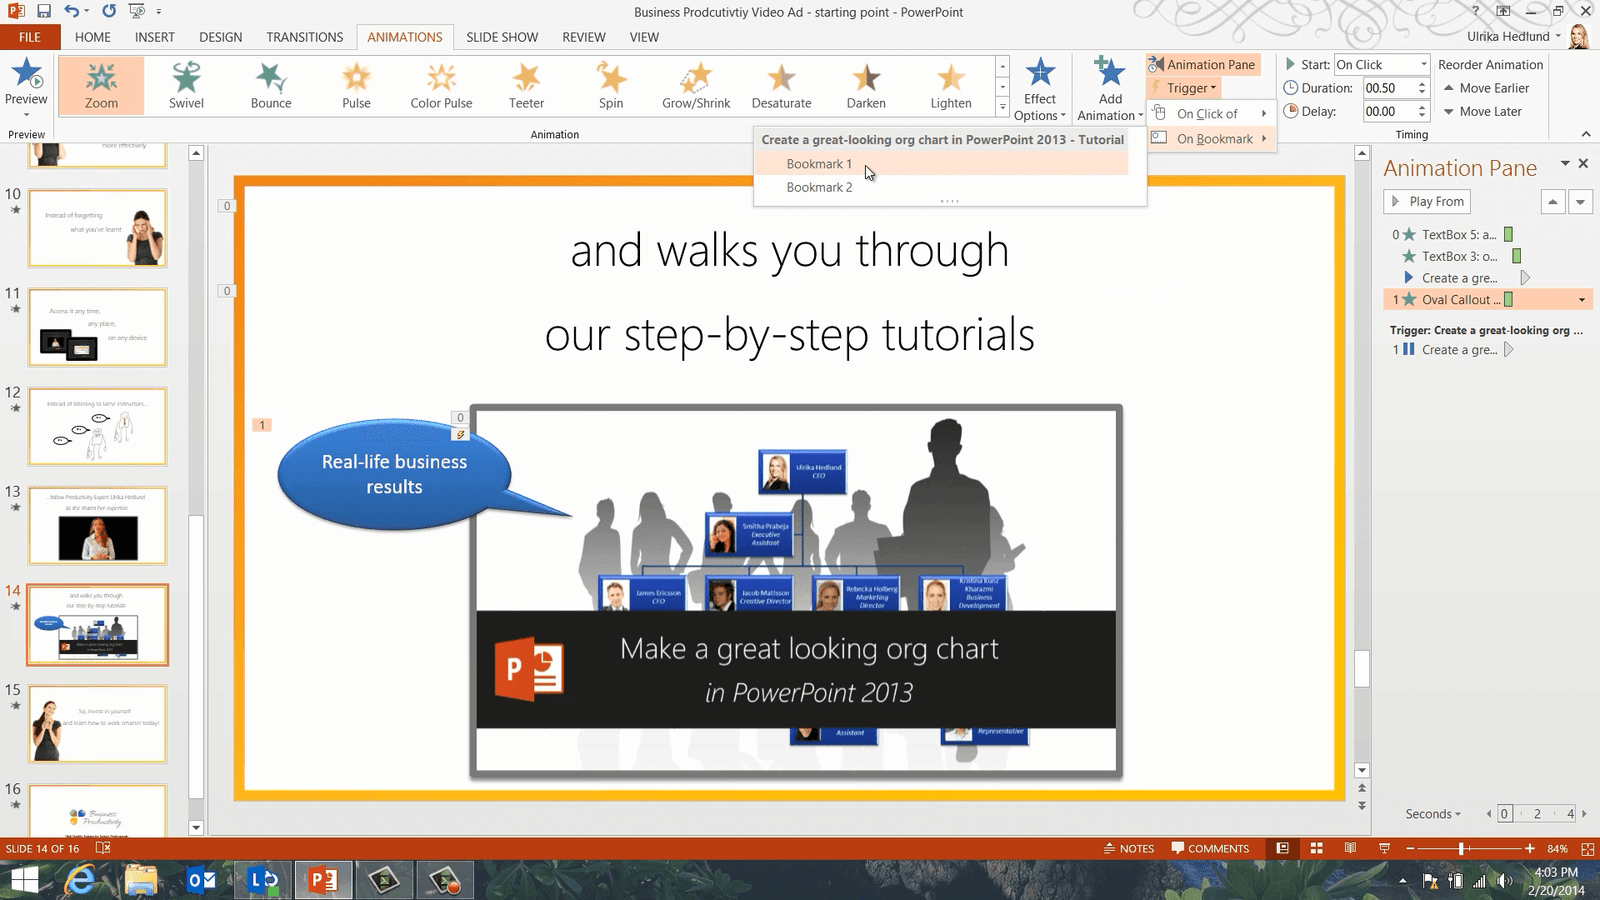
I’ll click “Add Animation” again and select a “Fade” exit animation. I’ll click “Trigger” “On Bookmark” and “Bookmark 2”.
Now let’s see what this looks like. I’ll fast forward to the point in the video where the bookmarks are, and there is my speech bubble and then it fades away. Great!
How to save the PowerPoint presentation as a video?
Now for the final step. I’ll close down the “Animation Pane” and go back to the beginning of my presentation. To make a video from this presentation I first need to record the timings of the animations. I’ll go to the “SLIDE SHOW” tab, and click “Record Slide Show” “Start Recording from Beginning”.

I’ll deselect the option to record “Narration and laser pointer” and then I’ll click “Start Recording”. Now PowerPoint tracks when in time I press to move forward in the presentation. When I’ve walked through the entire presentation I’ll click “Yes” to save the recorded timings. I’ll save the presentation then go to the “FILE” tab, click” Export” and then “Create a Video”. I’ll keep the default quality which is for high definition displays. I’ll also choose to use my recorded timings. Now I’ll click “Create Video”.

I’ll save the movie into my videos folder and click “Save”. Now it’s being exported into an MPEG-4 video file that I can later upload to our YouTube channel.
How to Insert YouTube videos in PowerPoint 2013?
When PowerPoint 2013 was first released on the “INSERT” tab you could click “Video”, “Online Video” and then select to insert a video directly from YouTube.
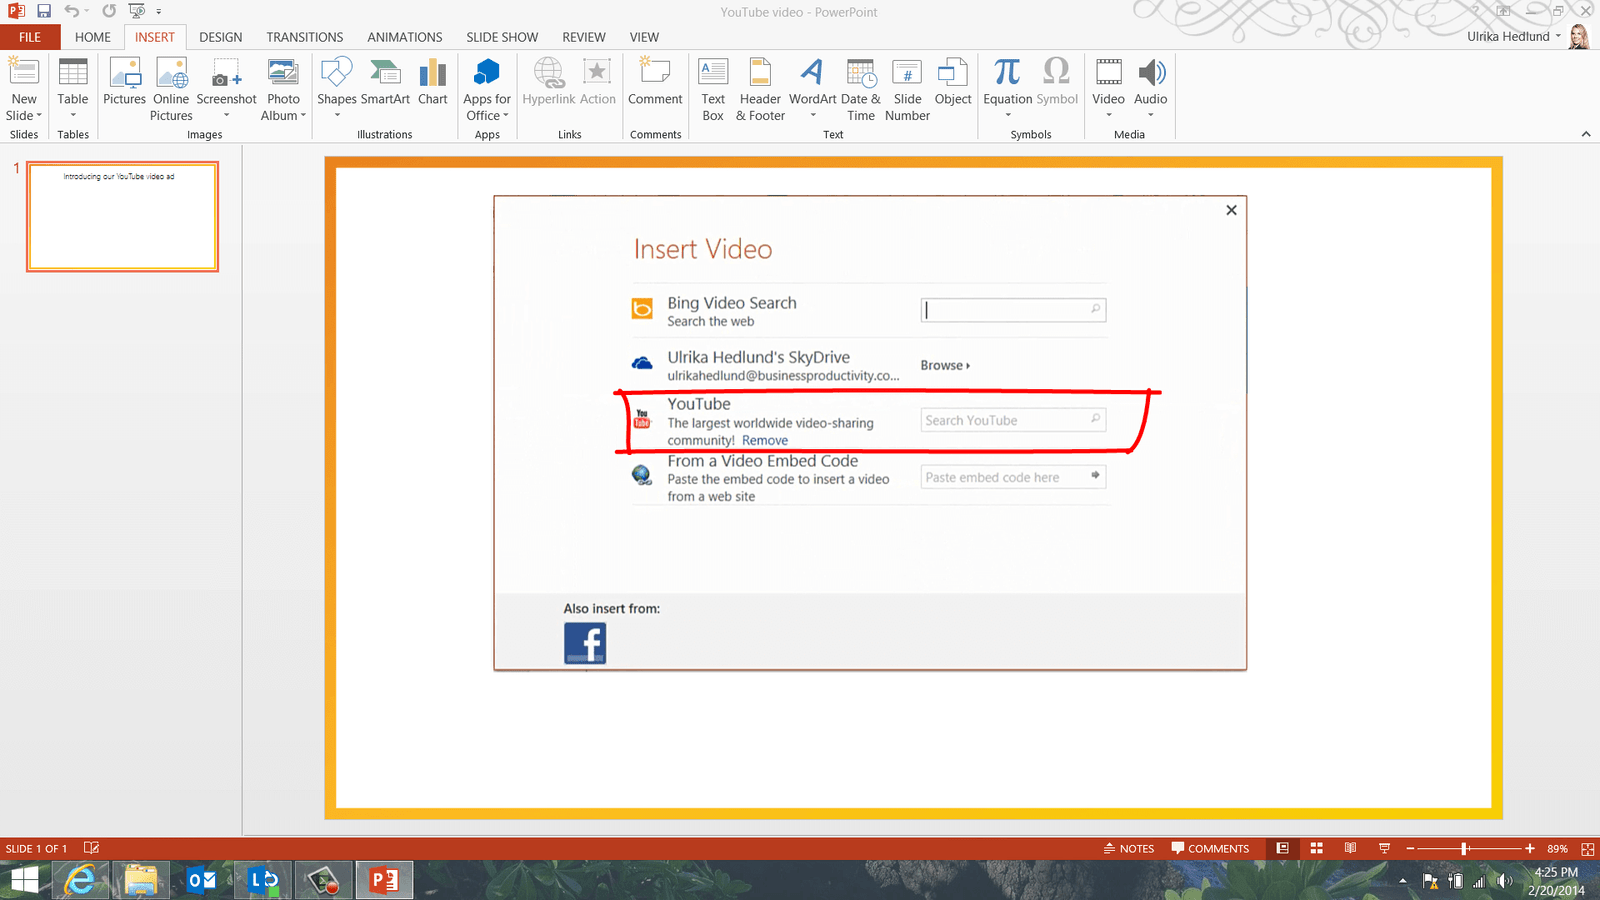
However, due to some changes in the YouTube application interface, this stopped working so Microsoft removed this capability from PowerPoint. Today if you click “INSERT”, “Video” and select “Online Video” YouTube no longer exists a source option. Microsoft has said that they are working on a fix, but until then there is a workaround that you can try. This isn’t something I recommend for beginners, but if you really want to have a YouTube video in your presentation you can try this out. Open up the presentation and the slide where you want to insert the YouTube video. Click “FILE”, “Options” and then “Customize Ribbon.” Mark the checkbox named “Developer” and then click “OK”.
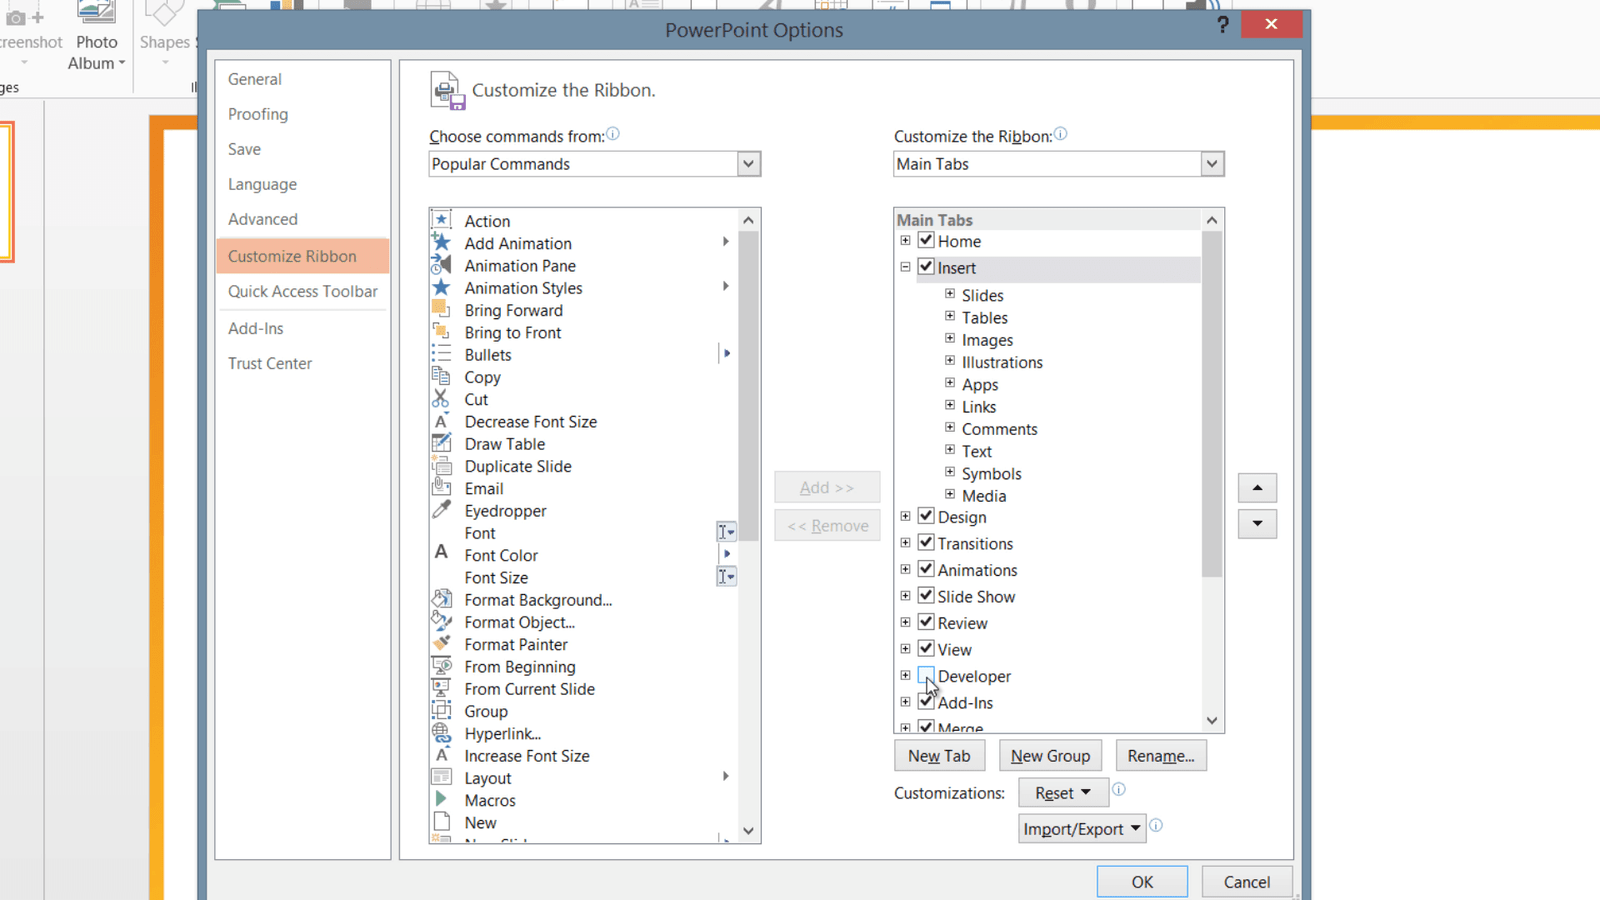
You will see that an additional tab called “DEVELOPER” has been added to the ribbon.

Click on the “DEVELOPER” tab and then click the “More Controls” icon. Scroll down or press “S” on your keyboard to the “Shockwave Flash Object”. Mark it and click “OK”.

Draw a box on your slide as big as you want the video. I’ll position the video in the center of the slide and the alignment guide helps me to find the center.

Open the website where you have the YouTube video. I’ll take the video we recently created in PowerPoint. I’ll mark the web address and right click and select copy then I’ll go back to the slide where I want to insert the video. I’ll click “Properties” and in the “Movie” properties text box I’ll paste in the YouTube video URL.

Now I’ll delete the word “watch” and the question mark, and then I’ll replace the equal sign after the “v” with a forward slash so that it looks like this. : http://www.youtube.com/v/jY3HxC7i1dw. If you want the video to start automatically add the text &autoplay=1. I’ll delete it since I want the video to play when I click it. I’ll close down the property box and save my presentation, and then see what it looks like in slideshow mode. I’ll click “PLAY” and now the video is playing on my slide. A temporary workaround until an easier option is available.
How to Tell A Story with Pictures in PowerPoint 2013?
Introduction
A presentation is always more appealing to the audience if it has pictures in it. If you find the right pictures they can really help to tell a story.
PowerPoint 2013 has a number of picture tools that can help you enhance the images in your presentation. Now I’m going to show you how you can use these tools to recolor your images, to apply artistic effects and finally how you can use the new alignment tools to position your images perfectly.
Here I have a presentation about Dubai as a destination for a company off-site. In its current form, the presentation only contains text and it isn’t very selling. Now I’m going to show you how you can make the presentation look like this by using pictures and the picture tools in Microsoft PowerPoint 2013.
How to Change the color and brightness of an image in PowerPoint 2013?
Instead of having text on this first slide I want to show a picture of a camel in the desert. First I’ll delete the text by just marking the content holder and pressing “delete”. To insert a picture that’s on your computer, you can either press the “Pictures” icon on the slide, or go to the “INSERT” tab, and then click “Pictures”. Here I’ll select a photograph I’ve taken in the desert. I’ll resize it a little bit so that it covers the entire slide. Even though the colors are great, I want to make the sky even bluer and the sand more striking orange. To change the color saturation of an image mark the picture so that the “PICTURE TOOLS” appear, in the “Adjust” section click “Color”. Here you get a live preview of what different color saturation will look like. I’ll select the “200%” saturation.

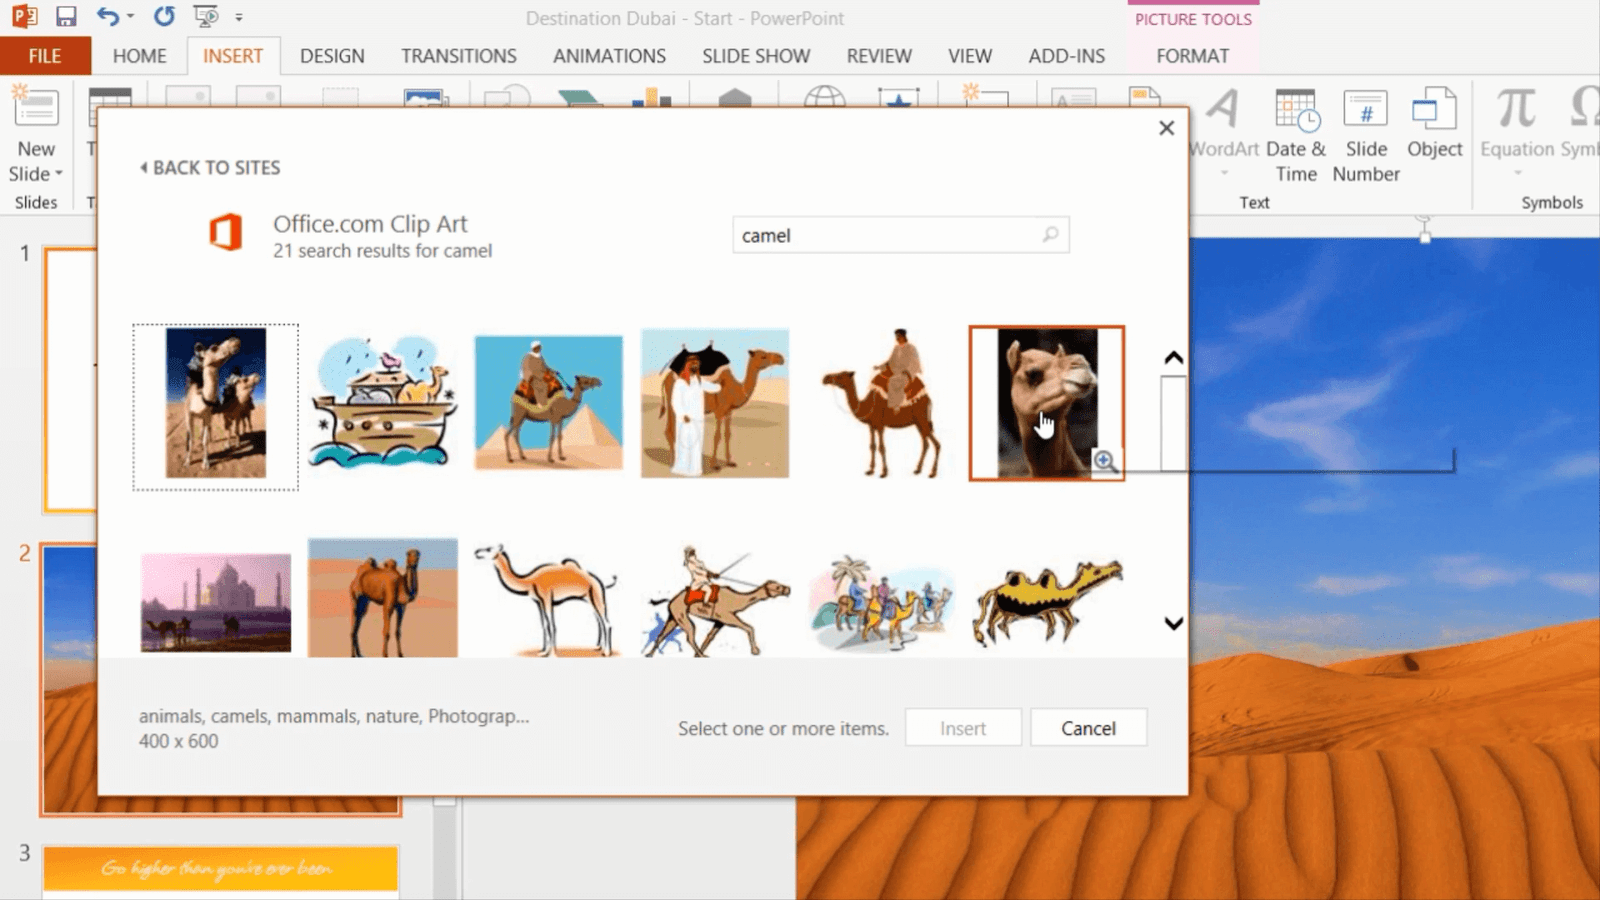
How to insert pictures from ClipArt in PowerPoint 2013?
Now I need to find a picture of a camel in Microsoft Clipart. To insert an image from Clipart go to the “INSERT” tab and click “Online Pictures”. Here you have a number of online image resources to choose from. Here I’ll select Office.com Clipart as my picture source. I’ll do a search for “Camel” and as you can see I get various results from the Clip Art library. I’ll select this photograph. To insert it into my slides I’ll just click “Insert”.
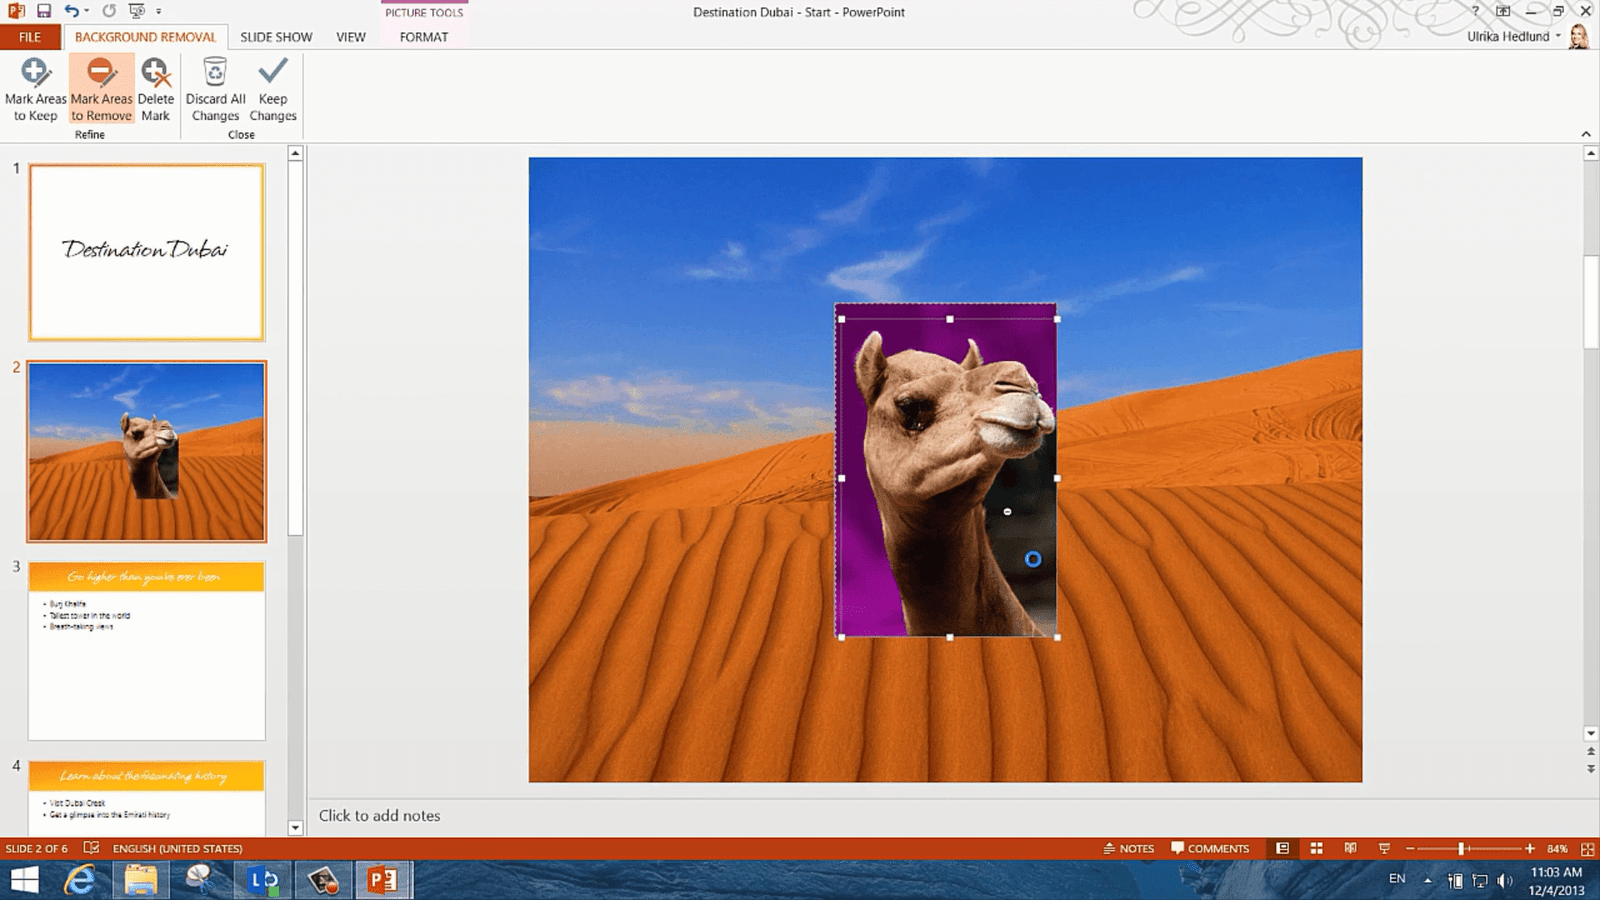
How to Remove the background from an image in PowerPoint 2013?
In order for this camel to melt in, I need to remove the background from the image. To remove the background from an image, mark the picture so that the “PICTURE TOOLS” appear. In the “Adjust” section click “Remove Background”. Everything that’s colored purple will be removed from the picture. Resize the square so that it outlines only the part of the picture you want to keep. To mark an area to be removed, click “Mark Areas to Remove” and keep clicking until the area is colored purple. When everything you want to remove from the picture is colored purple click “Keep Changes.” And there you go! Now I’ll just move the camel to the side and make it a bit larger by pulling the top left corner.
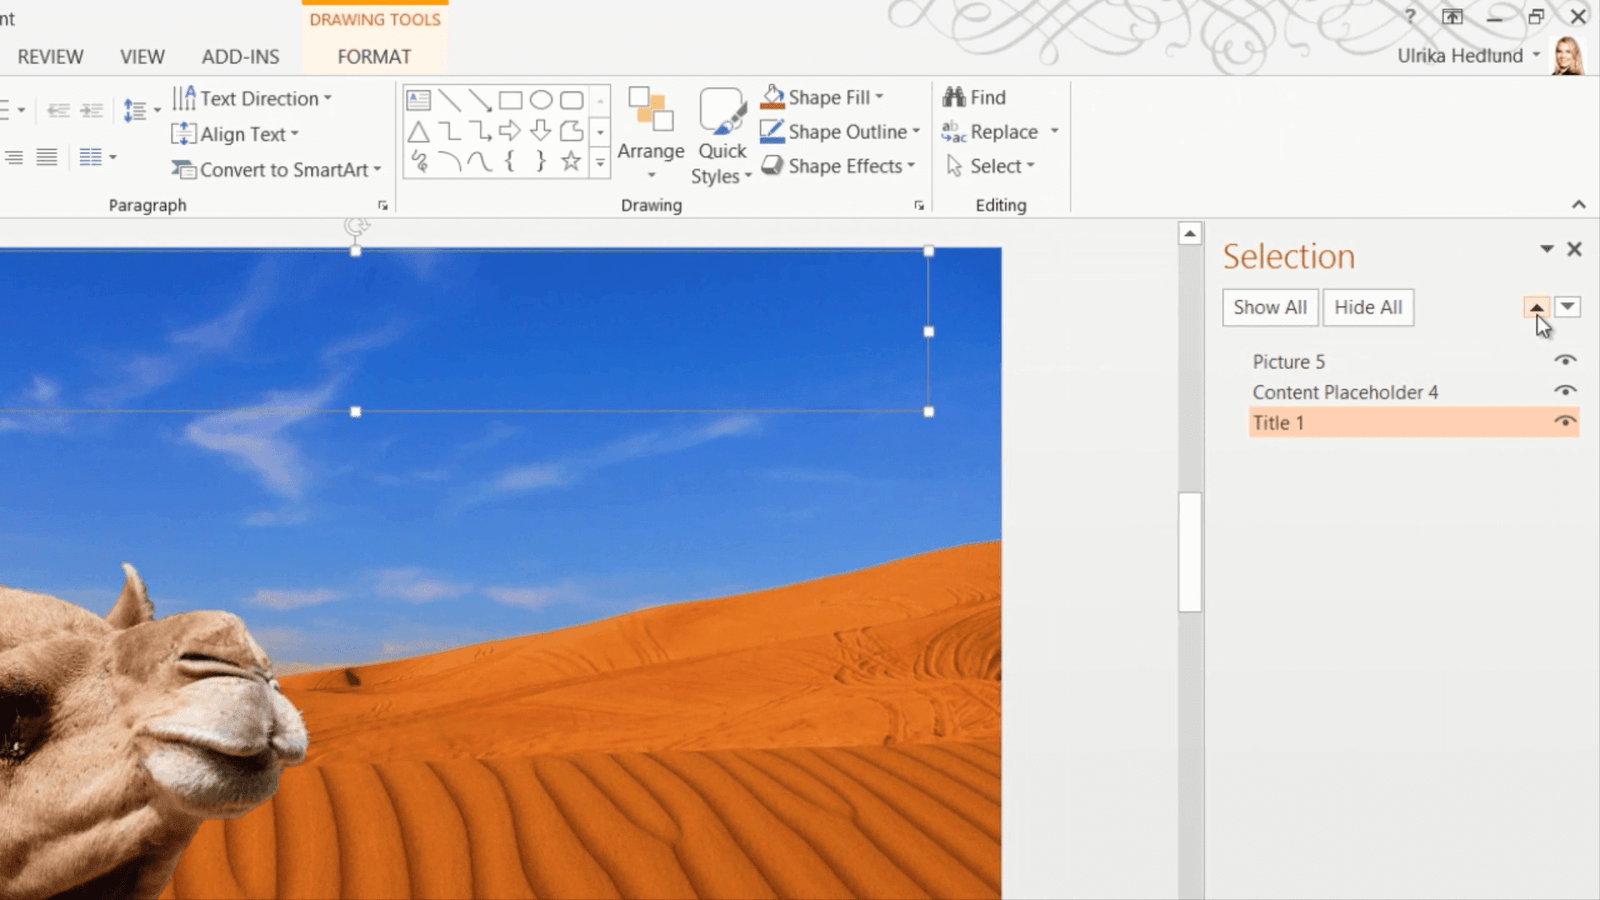
Now I need to re-arrange the order of the picture so that my title text appears. On the “PICTURE TOOLS” “FORMAT” tab, in the “Arrange” section I’ll click “Selection Pane”. I’ll mark the title and move it up to the top layer by clicking the up arrow.
I’ll mark the title, resize the text box and move it to the bottom of the slide. Perfect!
How to insert pictures from the Internet in PowerPoint 2013?
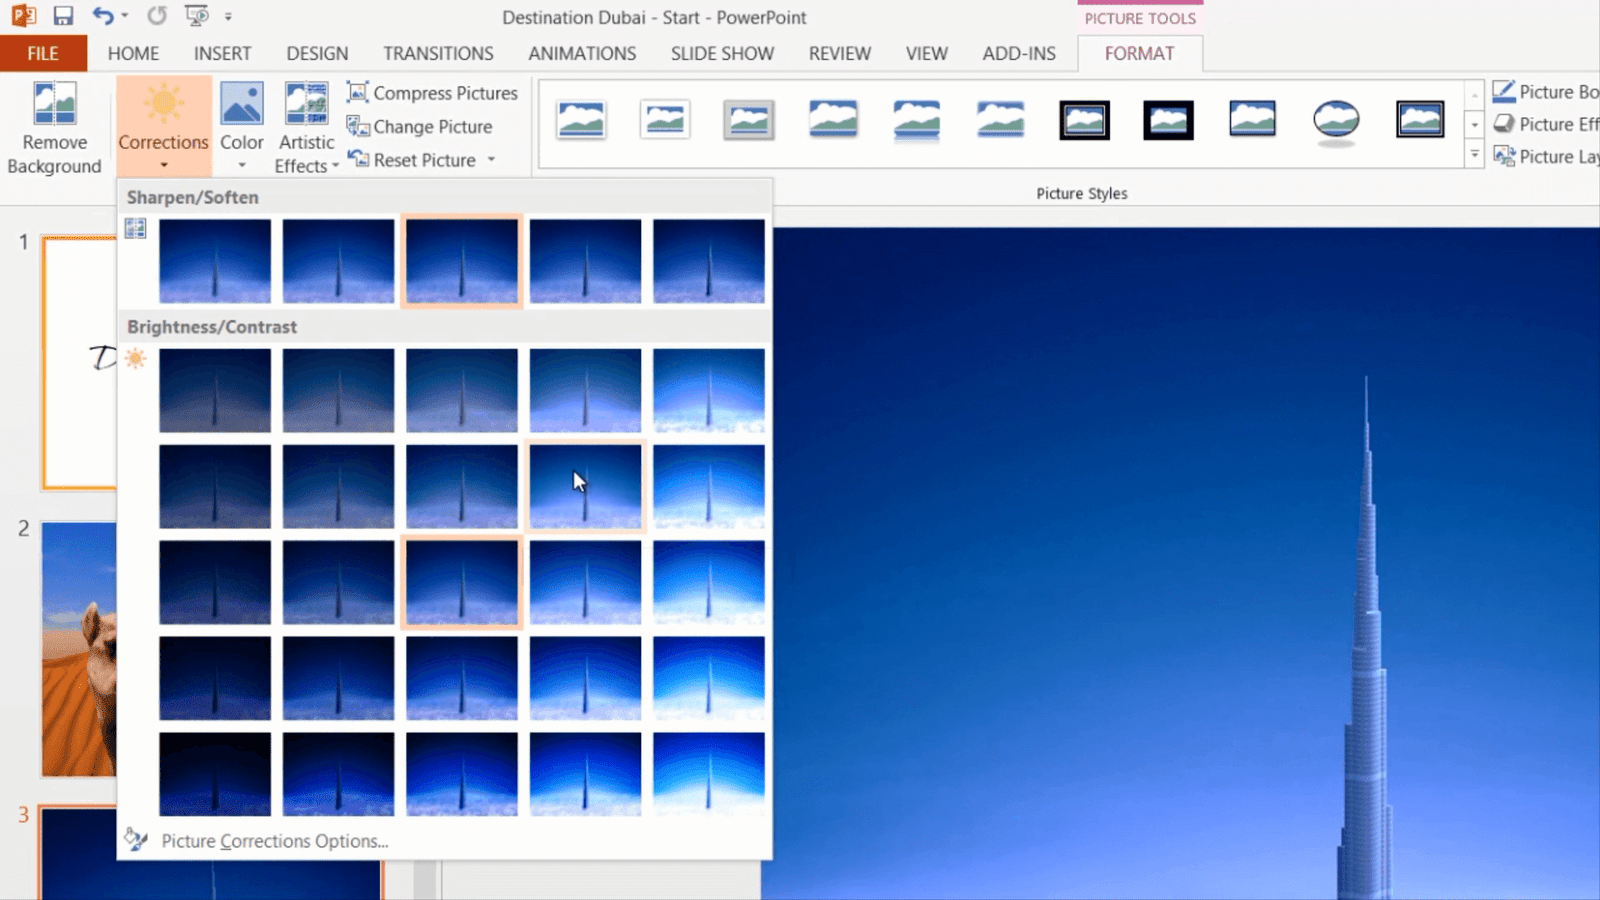
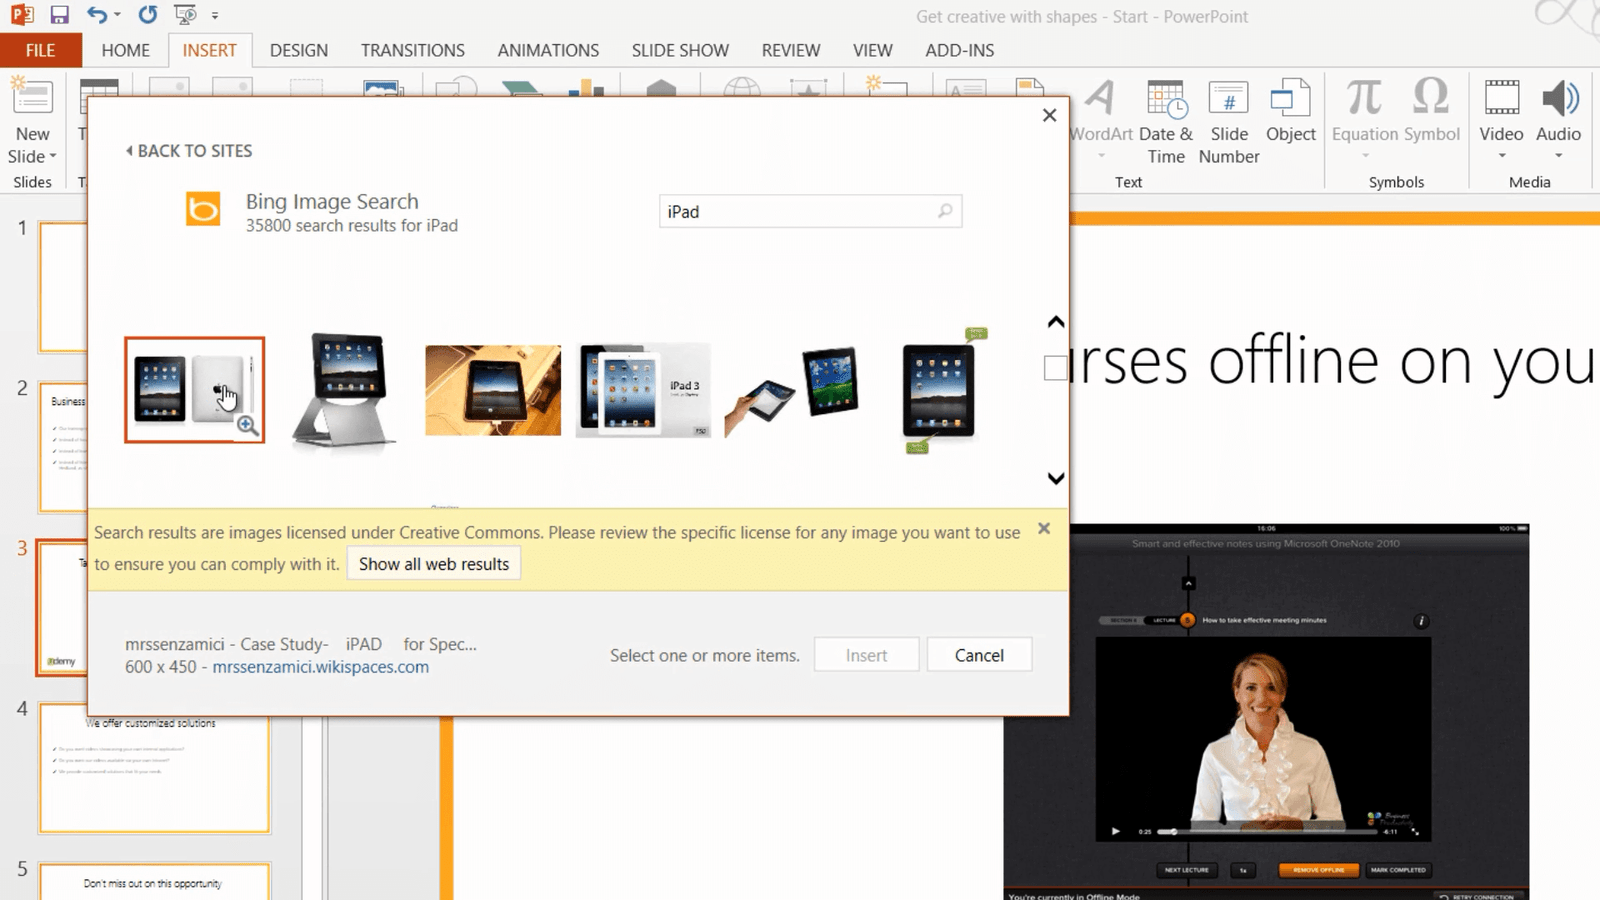
In this next slide, I want to insert a picture of Burj Khalifa from Vladstudio. To insert a picture from the Internet I’ll click “Online Pictures”. Here I’ll select Bing as the picture source. I’ll type Burj Khalifa Vladstudio. At first, nothing comes up. This is because Bing first only provides search results licensed under Creative Commons, meaning that you can use the image free of charge without having to worry about copyrights. If I click “show all web results” I’ll see all the images available on the Internet. I get a warning that images might be subject to copyright. In this case, I have already contacted the photographer who has given his consent to use the image as long as we give credit to Vladstudio. Here is the image I want to use, so I’ll mark it and insert it into my slide.
Again, I’ll change the size so that it covers the full slide. Now I want to change the brightness of the photograph to make it a bit brighter. To change the brightness of an image, mark the image so that the “PICTURE TOOLS” appear. In the “Adjust” section click “Corrections”. Here I get a Live Preview of what different Brightness and Contrast settings look like. Here I’ll choose to increase the brightness by 20%.
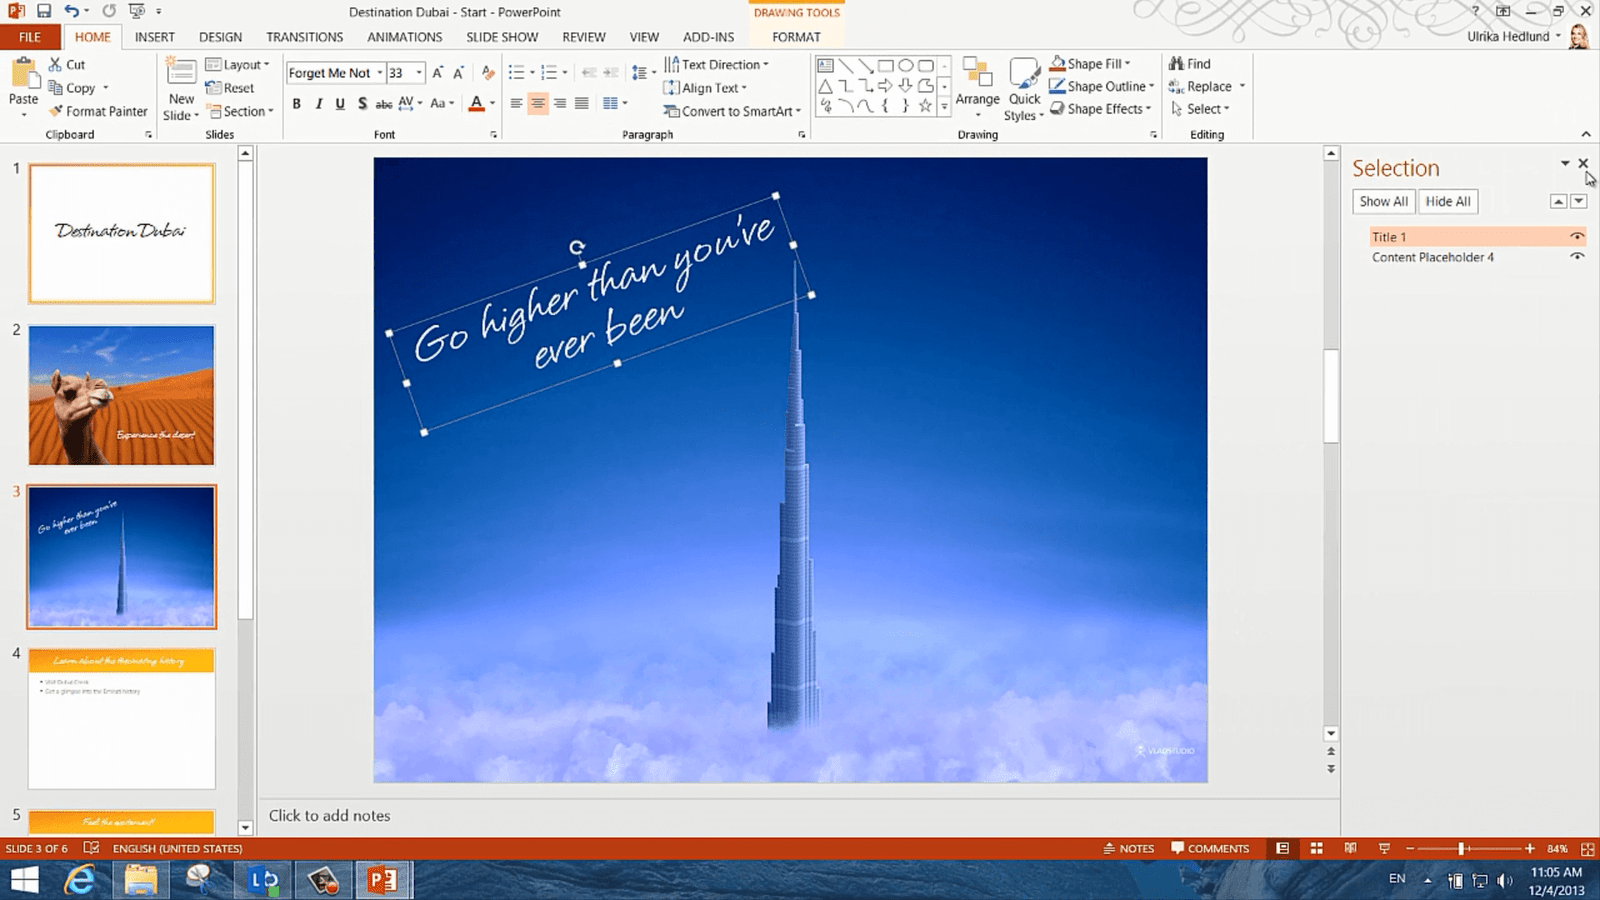
Again I’ll open up the “Selection Pane” and move the title up one layer. I’ll resize the text box, move it down a bit and rotate it by grabbing the rotation wheel by holding down the left mouse button and pull it to the left. There! Now that looks great!
How to use Artistic Effects in PowerPoint 2013?
In this third slide about the history of Dubai, I want to insert a picture of Dubai Creek that looks a bit old. I’ll insert a picture from the Internet. I’ll click Online Picture and search for it on Bing. I’ll select this picture of Dubai Creek and “Insert”. On the “PICTURE TOOLS” “FORMAT” tab I’ll click “Crop” and then I’ll move the handles to crop the picture to focus in on the center of the image. I reposition the picture and make it larger to cover the full slide.
Now I want to make it black and white. To make a picture black and white mark the picture so that the “PICTURE TOOLS” appear, in the “Adjust” section click “Color”. Here I’ll select a Saturation of 0% to remove all color. Now I want to add an artistic effect to make it feel a bit more old. I’ll click “Artistic Effects” and here you have a number of different effects that you can apply. The “Pencil Grayscale” sketch is great if you want to make a picture look hand drawn. The “Blur” effect is great if you want to censor something like a license plate or a face. In this case, I’m going to use the “Film Grain” effect to get and old feeling.

I’ll open up the “Selection pane”, move up the title and change the title to black to make it easier to read. There! That looks nice!
How to add colored shapes to images in PowerPoint 2013?
On this slide, I’ll insert a photograph that I have taken of the Atlantis water park. Just like before I’ll resize the picture so that it covers the full slide. I’ll open up the “Selection Pane” and move the title text up a layer and then I move it to the bottom of the picture. Here I want to add a dark layer so that the text becomes more visible. I’ll click “INSERT” and then “Shapes”. I’ll select a rectangular shape and draw it across the bottom of my picture. I’ll move the rectangle down a layer so that it doesn’t cover the text. I’ll close down the “Selection Pane” and right-click and select “Format Shape” to bring up the “Format Shape” panel. In the “FILL” section I’ll select “Gradient fill”. I’ll select a “Linear” gradient and then pick the direction “Linear Up”. I’ll change the color to black for both “Gradient stops” and then I’ll select the top gradient stop and increase the transparency to 100%. Next, I’ll go to the “LINE” settings and change it to “No Line”. There, now the bottom part of my picture is darker and I can clearly see the text.

How to arrange and align multiple pictures in PowerPoint 2013?
On the final slide, I’ll insert lots of pictures. I’ll click “INSERT”, “Pictures” and then I’ll mark one picture and press the keyboard shortcut “CTRL-A” to select all pictures in the folder. I’ll change the size of all images to 1.88 inches width. I’ll just move these images up a bit and remove the text and the content holder. I want to arrange these images into a grid. In previous versions of PowerPoint that was really tricky. In PowerPoint 2013 Microsoft has introduced alignment guides, little orange lines that help position objects. They clearly show you where you should position your objects so that they are perfectly aligned. I’ll mark all images, right-click and select to group them as one object. Now I’ll move the entire picture grid and I can see from the alignment guide when I’m in the center of the slide.

And there we go, in just a few minutes we have created a great-looking presentation with beautiful images that really tell the story of Dubai.
How to Present with Confidence Using PowerPoint 2013?
Introduction
In order to feel confident when you are presenting you need to know how to effectively navigate your slides. In PowerPoint 2013 Microsoft has greatly enhanced the “Presenter View” which enables you to see more information about your slides as you are presenting. PowerPoint 2013 has also been designed for touchscreen devices so now you can present to an audience in more relaxed settings. Let me show you!
How to prepare your PowerPoint presentation for Slide Show?
Before you present your slides to your audience there are a few things that you should review. First of all, if you need support in what to say during your presentation make sure to add slide notes. These should be brief and ideally in bullet form so that they are easy to read when you are presenting.
You might have some additional back up slides that you don’t want to show during the presentation. To keep slides in your presentation, but to exclude them from the slideshow you can hide them. I’ll hold down Shift, mark the first slide in the range and then the last. To hide them I can just right-click and select Hide Slide, or I can click the “Slide Show” tab and select “Hide Slide” from the main menu.
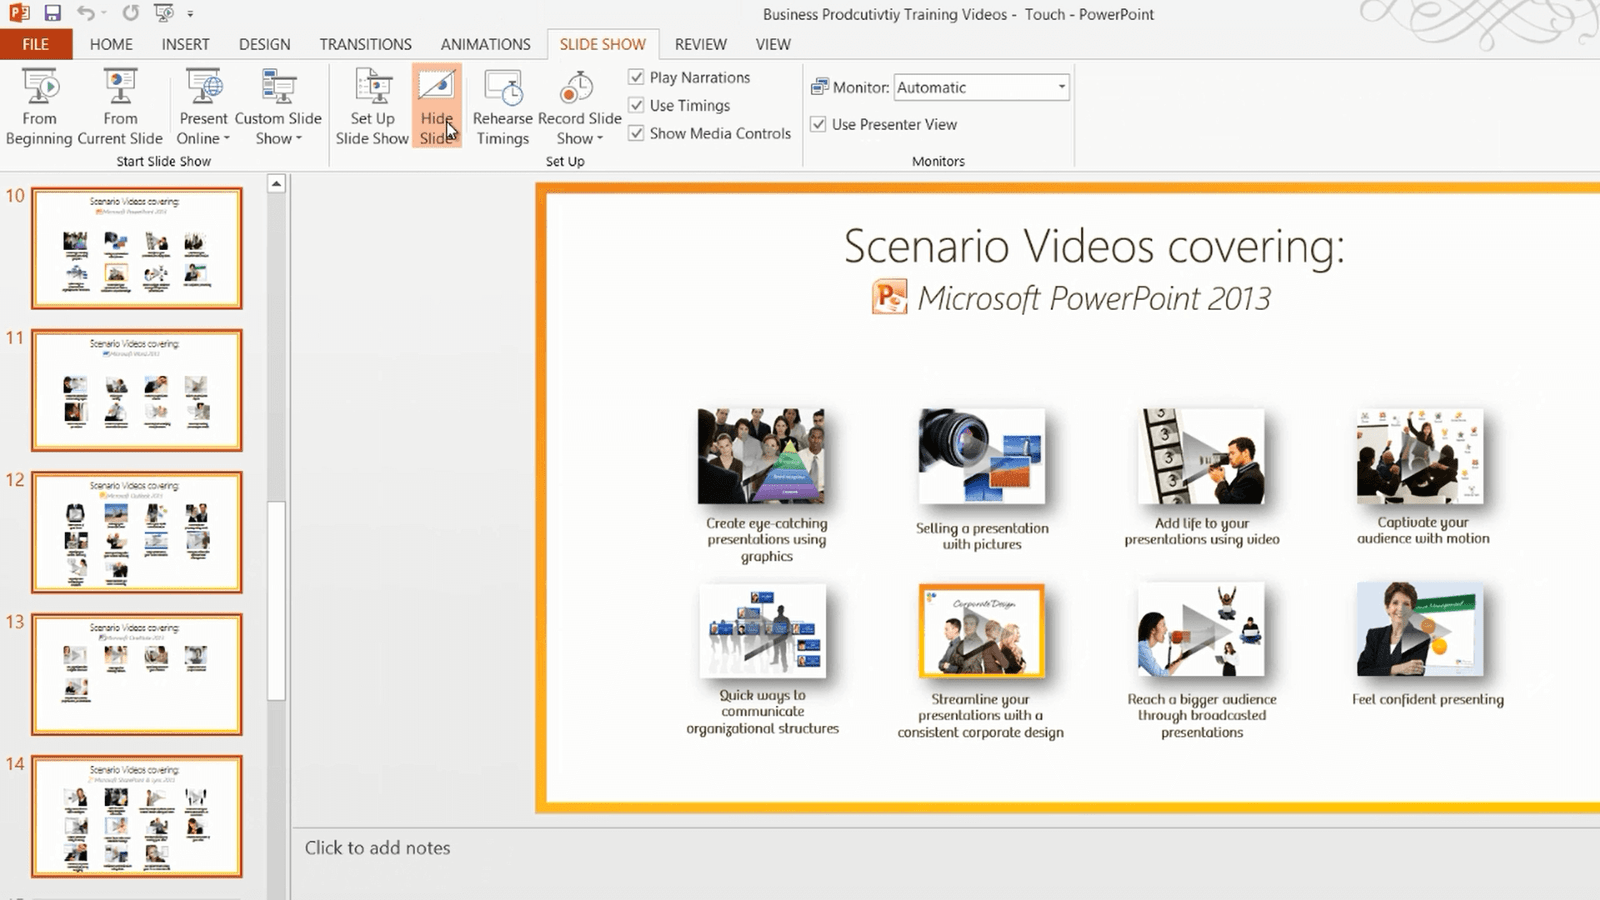
There the slides have now been marked as hidden.
To make sure you don’t have any recorded timings on the slides to make the presentation run on its own, click “Record Slide Show” and then “Clear”, “Clear Timings on All Slides”.
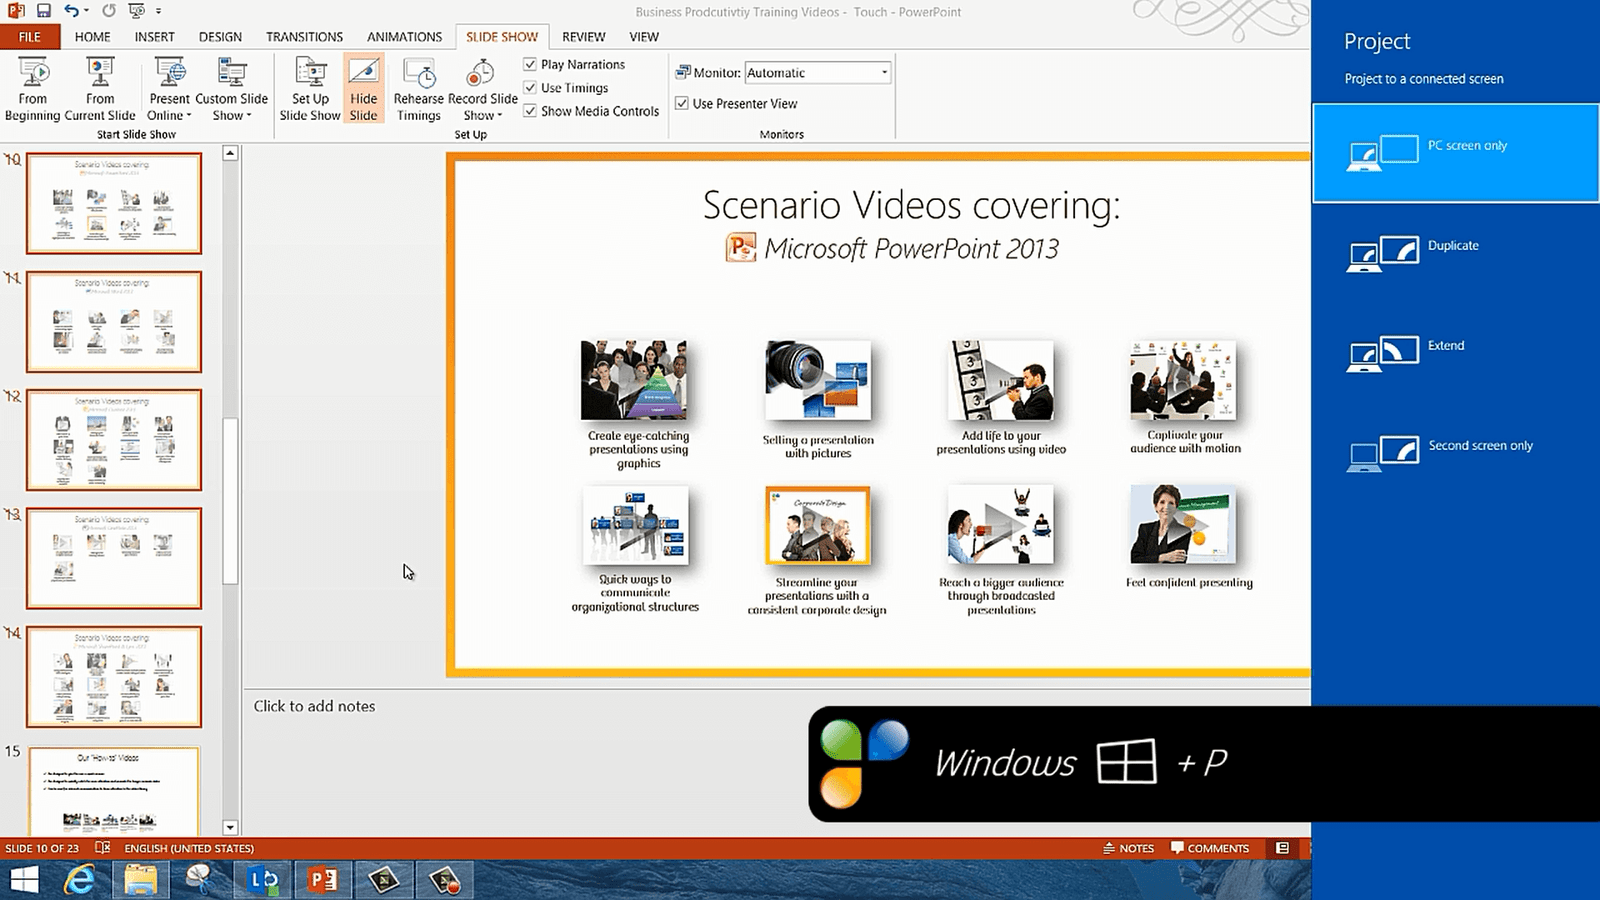
How to project your PowerPoint presentation to a projector?
Often when you present you connect your computer to a projector or external display. Your computer might automatically detect the projector or screen, otherwise, if you are running Windows 7 or later you can use the keyboard shortcut Windows key + P. Select “Duplicate” to see the same thing on your computer as on the projected screen.
How to Use “Presenter view” in PowerPoint 2013?
Under the “Slide Show” tab, the option to use “Presenter View” is checked by default, so every time you connect a projector or external screen to your computer and start your presentation you will get the Presenter View. To start your slide show click the little slide show icon in the status bar or “Start From Beginning” under the Slide Show tab or you can press F5 on your keyboard.

If you don’t have a projector connected to your computer, and you want to practice using the Presenter view you can use the keyboard shortcut ALT + F5. Using the “Presenter View” you can show the full slides to your audience, while you see a more informative presentation view.

In PowerPoint 2013 the background color of the Presenter View has changed from light grey to black, this is so that you won’t get distracted by the light if you are presenting in a dark room and so that the light won’t reflect back on you and give your face a weird glow.
In the presenter view, you see things that are important for you as a presenter. Here you can see the current slide, the next slide and the slide notes. You can see the elapsed time and the current time. You can change the size of the various windows. Here I’ll increase the size of the next slide so that I can see it better. I’ll also increase the text size of my slide notes.
Now I can easily step forward in my presentation clicking the arrows with my mouse or using the keyboard buttons space, Enter or arrow right or down.
How to Highlight something in your PowerPoint slide? (03:19)
To highlight something in your slide, click the pen icon and select what kind of highlighter you want to use, you can use a yellow highlighting pen to mark the text, or you can select to use your mouse as a laser pointer. Click the pen icon again and select “Laser Pointer”. You can also use a keyboard shortcut by pressing CTRL while holding down the left mouse button as you point. Click the pointer icon and select “Laser Pointer” again to turn it off.

How to Navigate through your slides in PowerPoint 2013?
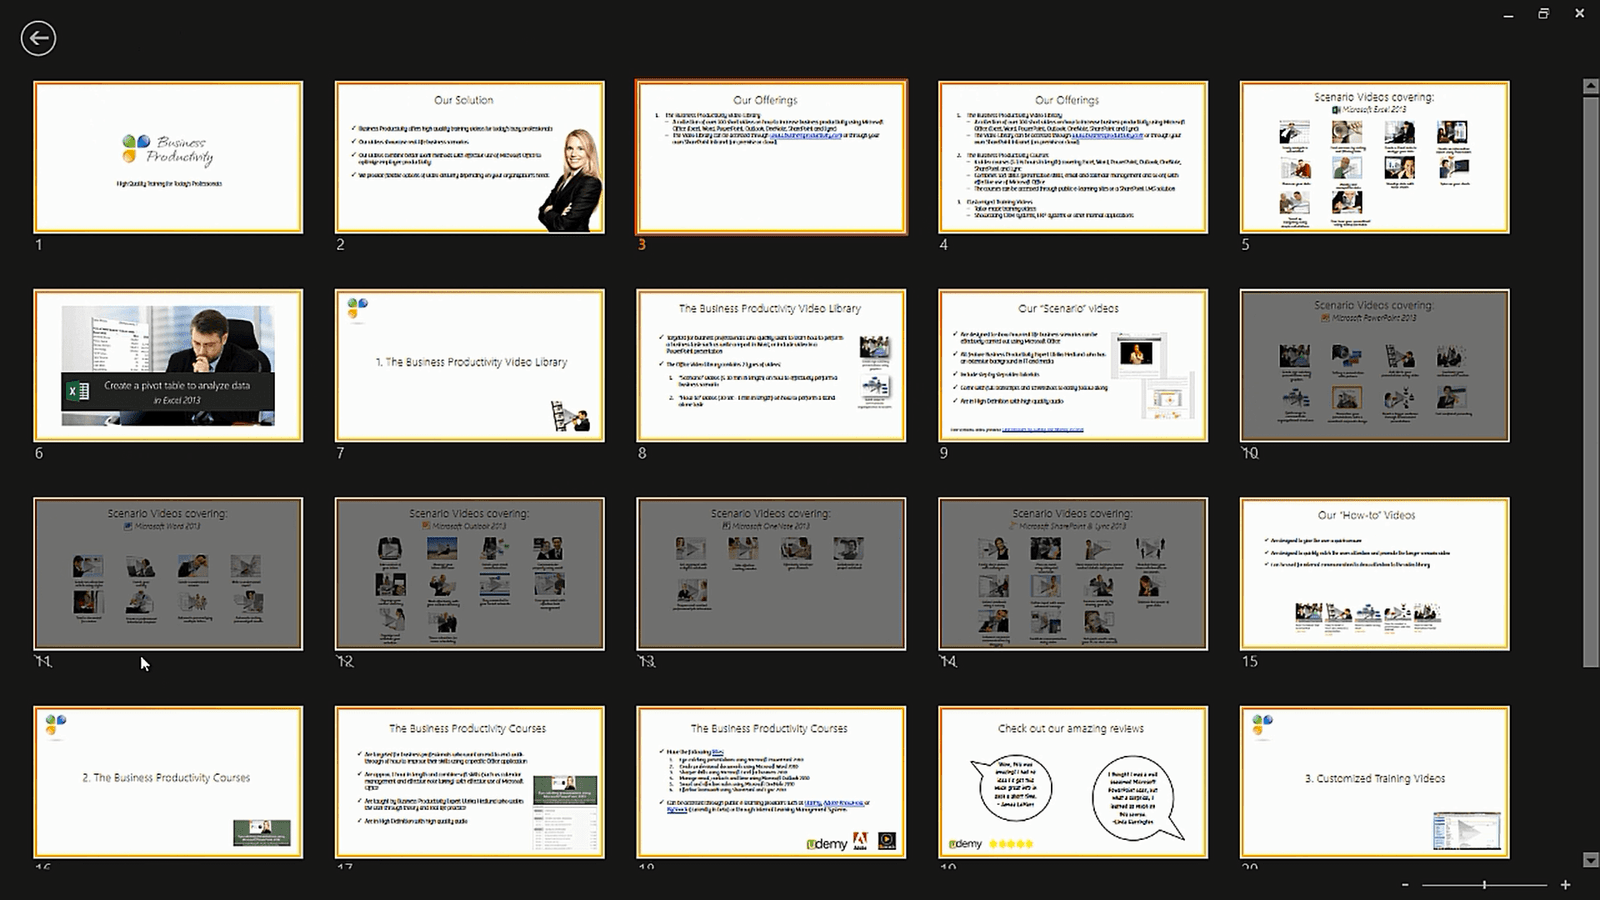
When you are giving a presentation you need to be flexible so that you can respond to the audience’s questions. To navigate to another slide in your presentation while in Presenter View click “See all slides”. You will see little thumbnails of your slides. Only you as the presenter will see the thumbnail view, your audience will still see the current slide. Here I can easily see all my slides, even the ones that I have hidden. Just mark the slide you want to show to your audience.
In this slide, the text might be difficult for the audience to read. To zoom in, I’ll click “Zoom”. Click the area of the slide you want to zoom in on and then you can use the hand to move across the slide. To zoom out again click the “Zoom” button again.
How to make your slide turn black/white in PowerPoint 2013?
Sometimes you want your audience to focus their attention on you, not your slide. Click the “Black or unblack slide show” icon to make your slide go black, another way to do this is to press “B” for black on your keyboard. You can also make the slide white, to do that, click the ellipsis icon and select, “Screen”, and then “White Screen” or you can press “W” on your keyboard. This might be useful if you, for instance, want to use the light from the projector to draw something on the whiteboard. To show your slides just press the same icon again or press any key on your keyboard.
Sometimes you want to show something to your audience that you might not have in your presentation. To access other applications on your computer, without exiting the presentation you can open up the taskbar. To open up the taskbar, go to the very top in Presenter View and click “Show taskbar”, this will be visible to the audience as well. The taskbar will appear on top of your slide for everyone to see and then you can easily open up what you want to show them, be it a video on YouTube or another document. At any point, you can end your presentation by clicking “End Slide Show” in the top menu.
How to Present without using Presenter View in PowerPoint 2013?
If you’re not using Presenter View when you present, you can still access a lot of the same functionality. To see the same thing as your audience, click the ellipsis and select “Hide Presenter View”. If you move your mouse cursor you will see little round icons at the bottom left hand of your screen. Click the ellipsis button to see more options. You can also right-click on the slide to see the various options available to you. To navigate my slides in this view I’ll click “See All Slides” from the menu. Note that unlike in Presenter view when only you see the thumbnails when you select “See All Slides” in this view, your audience can also see all the slides in your presentation.
How to Present on a touch device in PowerPoint 2013?
PowerPoint 2013 has been designed to support presenting on devices with touch screens. Presenting using touch is a little bit different.
If you haven’t already done so, you should enable “Touch” mode in PowerPoint 2013. To do this click the Touch/Mouse mode icon in the Quick Access Toolbar. With touch mode enabled, there is more space between menu items which makes it easier to use PowerPoint with your fingers.

To move back and forth in your presentation on your touch device you can use your finger and swipe on the screen. To move forward in your presentation swipe from right to left, to move back swipe from left to right. To access the presentation menu in the bottom left corner just tap anywhere on the screen. Here you can use the arrows to step back and forth.
To see all your slides zoom out by pulling your fingers together vertically. Tap on the slide you want to show. To zoom in, pinch and move your fingers out. To zoom out again pinch your fingers together. Another way to zoom in is to double-tap, double tap again to zoom about.
How to Write on your slides with a digital stylus in PowerPoint 2013?
If you have a device that comes with a digital stylus you can use it to draw and write in your presentation. Using my pen I can easily draw on my slide to explain things to the audience or illustrate something in more detail. To change color or pen type, I just position my pen in the bottom left corner to access the menu. Here I’ll select a highlighting pen to highlight my text.
How to play videos in touch mode in PowerPoint 2013?
To play a video in touchscreen mode just tap with your finger anywhere in the video. To pause, tap again. To fast forward touch anywhere on the progress bar to move to that point in time in the video. If you want to switch slides before the video has finished, tap and hold on the video until the presentation menu bar appears and then click the forward or back arrow.
How to End your PowerPoint presentation?
To end your presentation just tap and select “End Presentation” in the menu. Here you will be asked whether or not you want to keep your ink annotations. I’ll click “Discard”. Now you know how to present with confidence using PowerPoint 2013 whether it’s on a traditional computer or a touchscreen device.
How to Create an Org Chart in PowerPoint 2013?
Introduction
Businesses go through re-organizations quite often, so you’ll probably include org charts in a number of your presentations. Instead of using just text to communicate organizational structures, it really helps to use graphics. If your organization isn’t too big, you can use SmartArt to create great looking org charts in PowerPoint 2013. Let me show you!
Introducing Org Charts using SmartArt
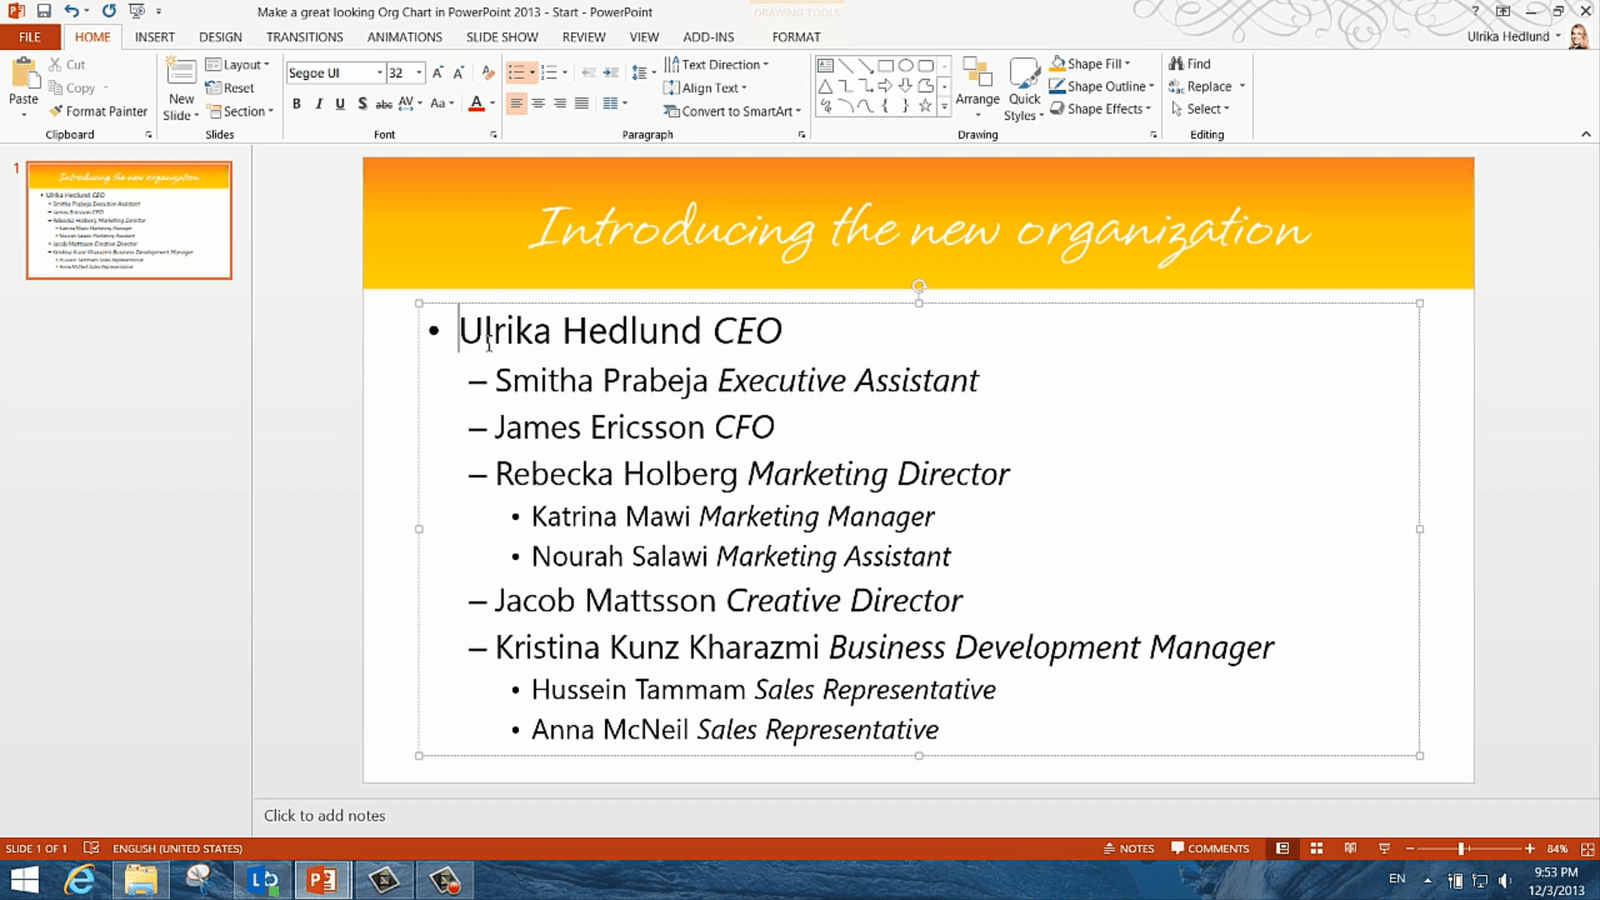
Here I have a slide with the names and job titles of the people in our organization. Instead of including this slide with text, I’m going to use SmartArt to make the slide look like this instead.
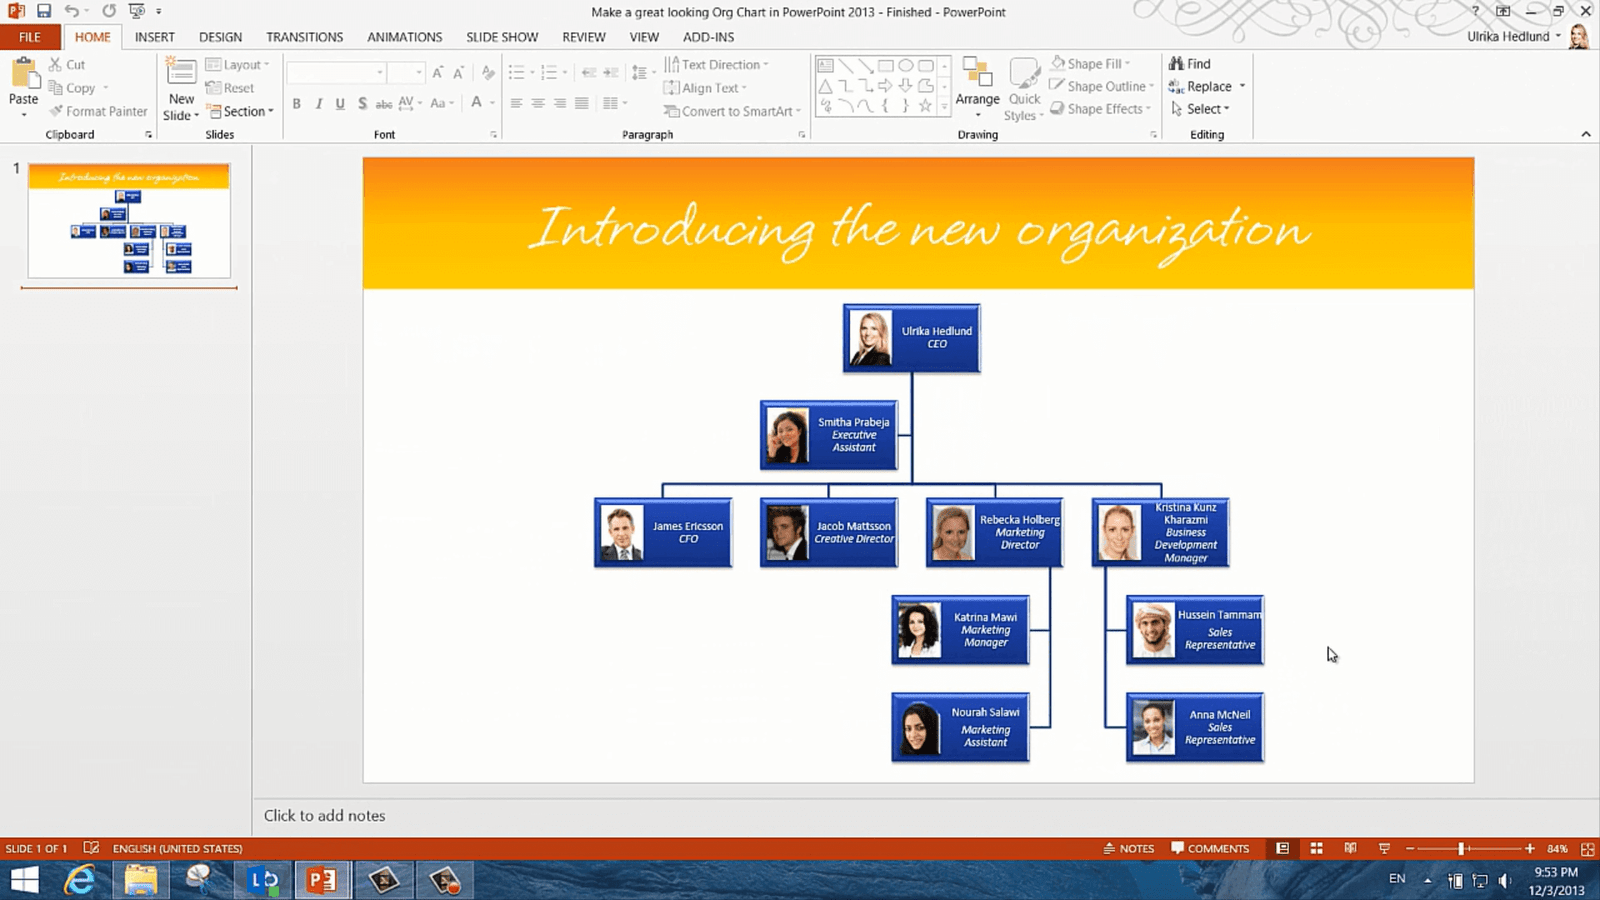
As you can see, this is much easier to digest and right away I get a good overview of the organizational structure.
Let’s go back to our original slide. Here I have Smitha, my assistant, James our CFO, Rebecka our Marketing Director, Jacob our Creative Director and Kristina our Business Development Manager. I’ve also included Rebecka’s and Kristina’s teams.
To convert this text into an org chart I’ll mark the text, right-click and select “Convert to SmartArt.
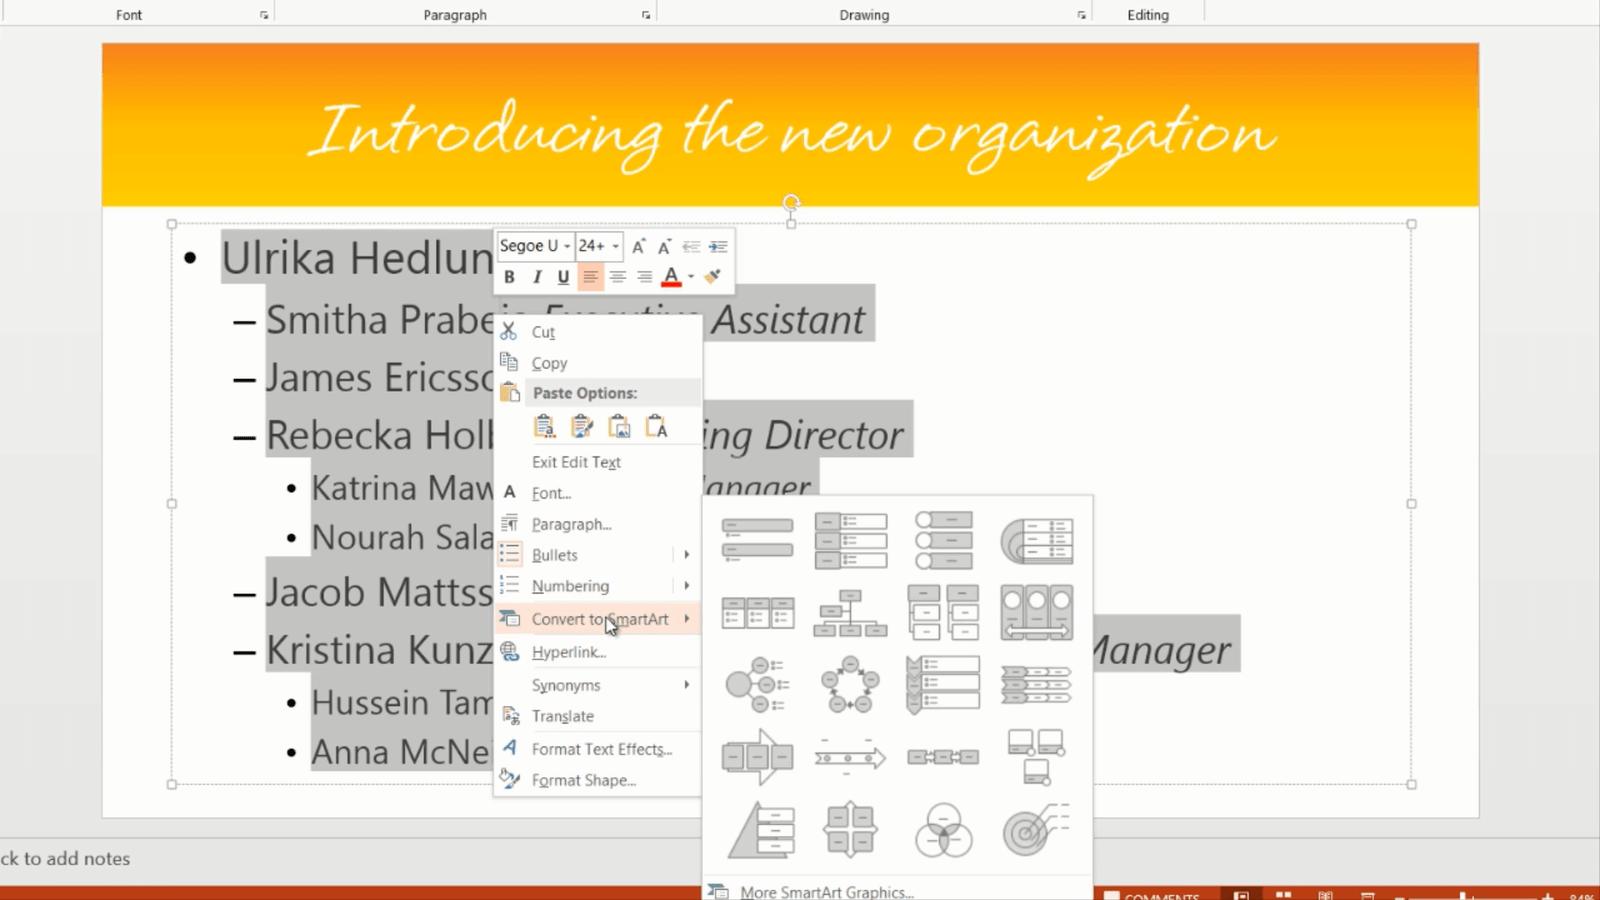
’ll select “More SmartArt Graphics” and here I’ll select the Hierarchy group. I’ll select the Picture Organization Chart and click “OK”. I strongly recommend that you include profile pictures in your org chart.
How to Re-arrange shapes in an org chart in PowerPoint 2013?
Before I add profile pictures I want to rearrange the org chart a little bit. First I want to move Smitha, my Assistant so that she is right below me. To do this I’ll mark the information about Smitha and cut it by pressing the keyboard shortcut CTRL+X, then I’ll mark my shape. On the “SmartArt Tools” Design tab I’ll go to the “Create Graphic” section and click “Add shape”.
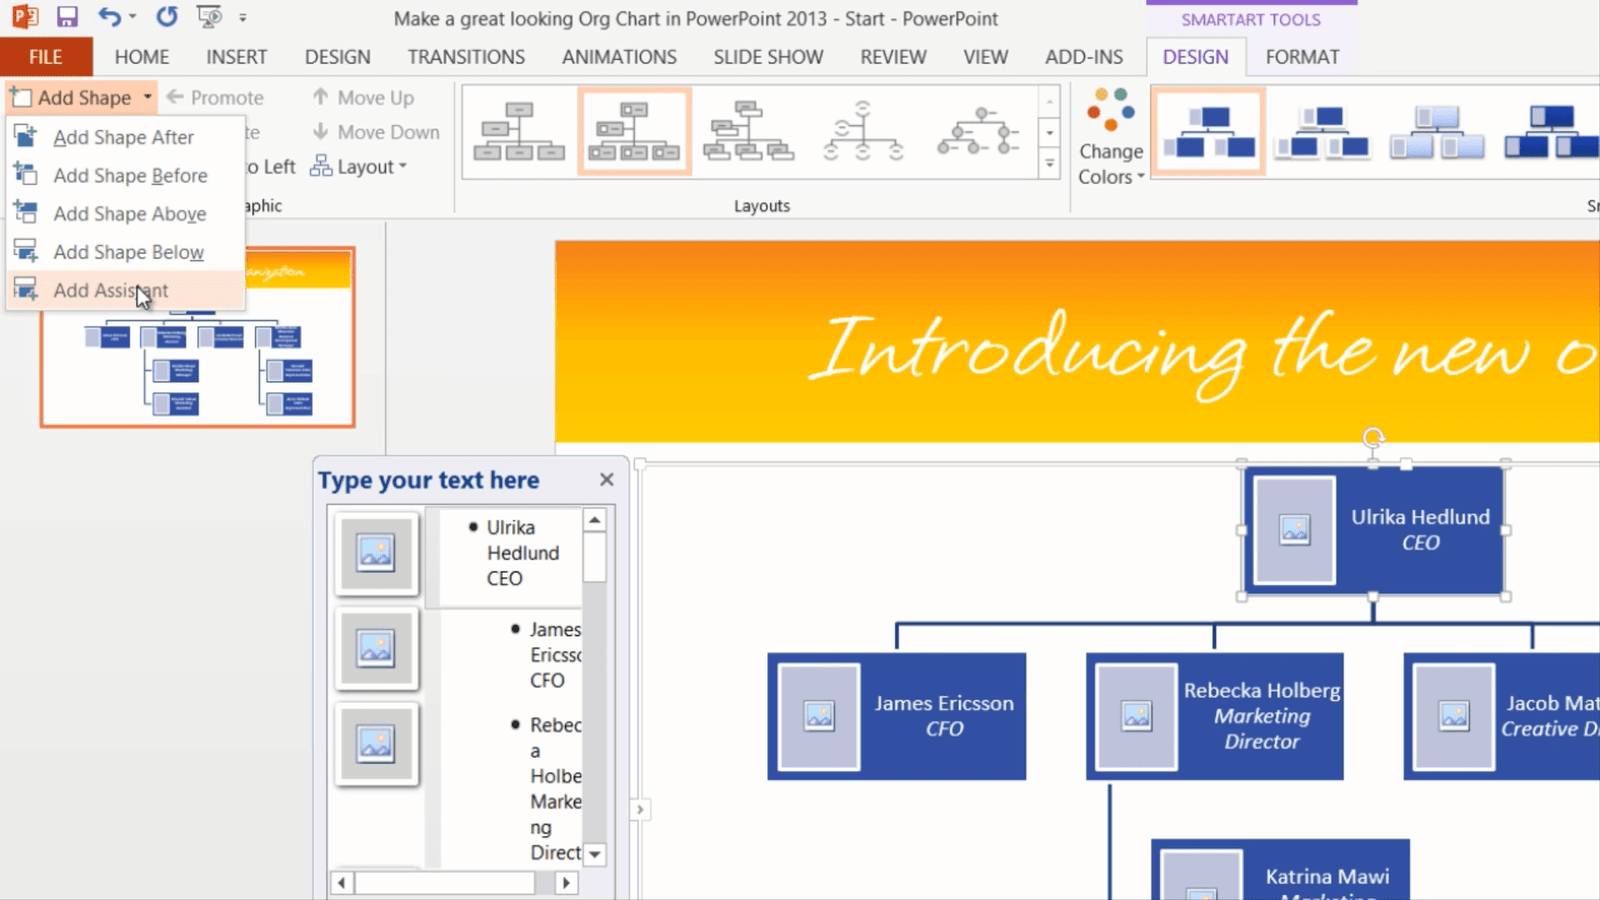
Here I’ll select an assistant shape. I’ll insert the shape and then paste in the information about Smitha again by clicking CTRL+V, and there she is now in the appropriate position. I also want to move Jacob so that he is next to James. To do that I’ll mark the box with Jacob and in the SmartArt Tools Design tab I’ll click “Move Up”. To change the balance I’ll also change the direction of the Marketing team branch, I’ll mark the Manager for the branch, click “Layout” and select “Left Hanging”.

How to add profile pictures in an org chart in PowerPoint 2013?
Now I want to add profile pictures. To add a profile picture I’ll just click the image. Many business professionals today have their profile pictures available on the Internet on the online network LinkedIn. In the Bing source, I’ll write “LinkedIn Ulrika Hedlund”. At first, I won’t get any results because PowerPoint is only returning pictures that are in the public domain.

I’ll click “Show all web results” to see everything since I’m not worried about copyrights in this particular scenario. Now the pictures show up, so I’ll just mark it and click “Insert”. I’ll do the same for all people in our organization.
How to Add a design to an org chart in PowerPoint 2013?
To finish it off I just want to add a nice design, so I’ll go to the “SmartArt Tools Design” tab and go to the gallery and chose a nice finishing.

And there we go a great looking org chart that I can share with my team!
How to make Creative Shapes in PowerPoint 2013?
Introduction
There are millions of images available on the Internet that you can use to make your presentations more interesting. In addition to this, you have unlimited options of drawing your own shapes. In PowerPoint 2013 you can get even more creative forming your own shapes by merging them together. Now I’ll show you how you can use shapes in PowerPoint 2013 to make your slides even more attractive.
Overview of the final result
Here I have a sales presentation about our video trainings. I’m going to use images, shapes and shadows to make some of these slides a bit more interesting. On this slide, I want to add an iPad frame and add a reflection to the picture.

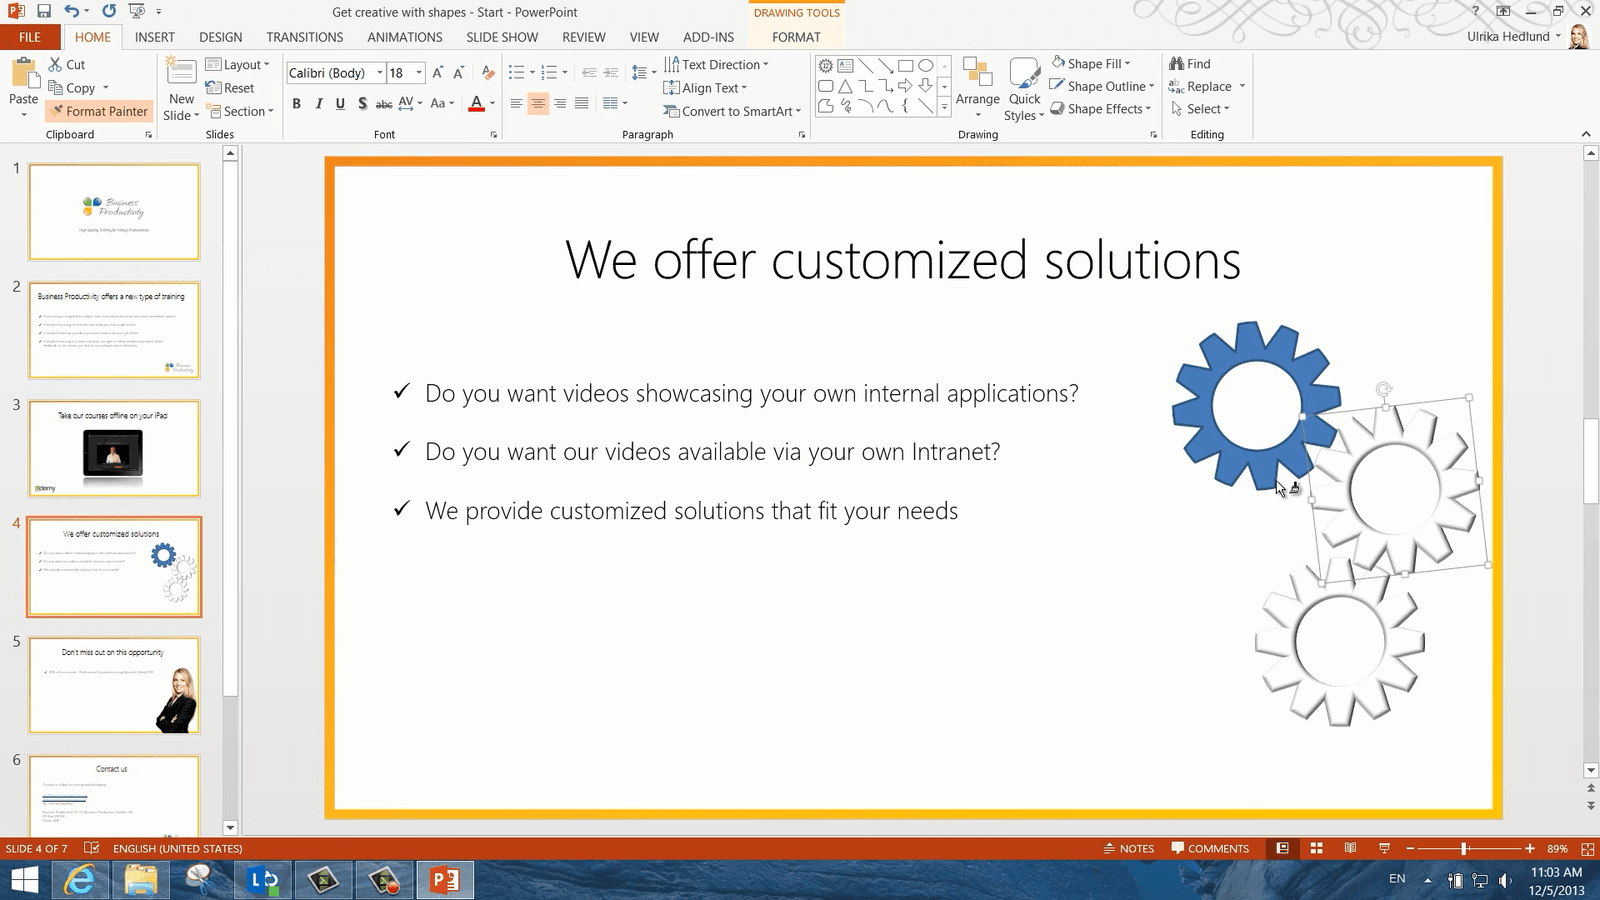
On this slide, I want to add gear wheels to symbolize our customized training solutions

and on this third slide, I want to create a more selling ad that looks like this.

How to Crop images to a certain shape in PowerPoint 2013?
Let’s start with the first slide. Here I have a screenshot taken from my iPad but I’d like to show the actual image of the iPad, so I’ll search for it online. I’ll click “INSERT”, “Online Pictures” and then type in iPad in the “Bing” image source. I’ll select this image and click “Insert”.
First I need to crop it. Under the “PICTURE TOOLS”, under “FORMAT” tab, I’ll click “Crop” and then I’ll move the handlebars so that they are side by side with the picture.
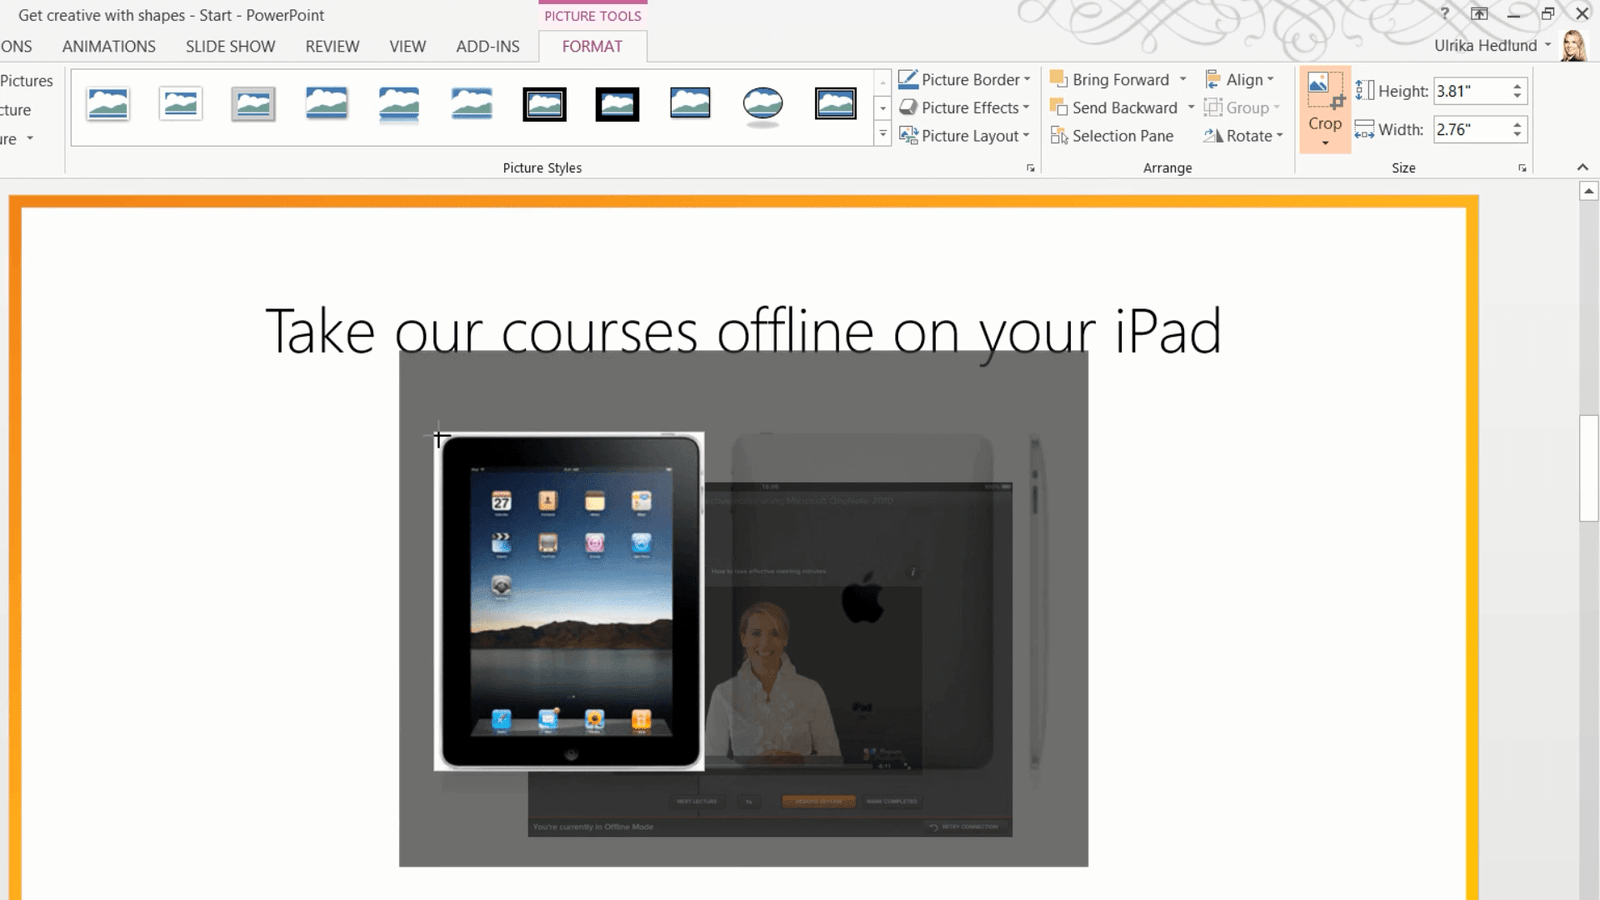
However, the iPad has rounded corners but the crop shape is square. If you want to crop objects into other forms than just rectangles you can use “Crop to shape”. Mark the object, on the “FORMAT” tab, click “Crop” and then “Crop to shape”. Here I’ll select a rectangle with rounded corners. I’ll move the little yellow marker to change the sharpness of the rounded corner. And there! Now the iPad has been cropped to its proper shape.

Now I’ll rotate the picture by going to the “FORMAT” tab, “Arrange” and then clicking “Rotate 90 degrees”. I’ll send it back one layer by clicking “Send Backward” and then “Send to Back”. I’ll make it a little bit bigger by pulling the bottom right corner. If you hold down “Shift” when you resize you make sure to keep the proportions of your picture. I’ll fit in my screenshot into the picture of the iPad, mark both objects, right click and select to “Group” them into one single object, then I’ll just reposition the image a bit.
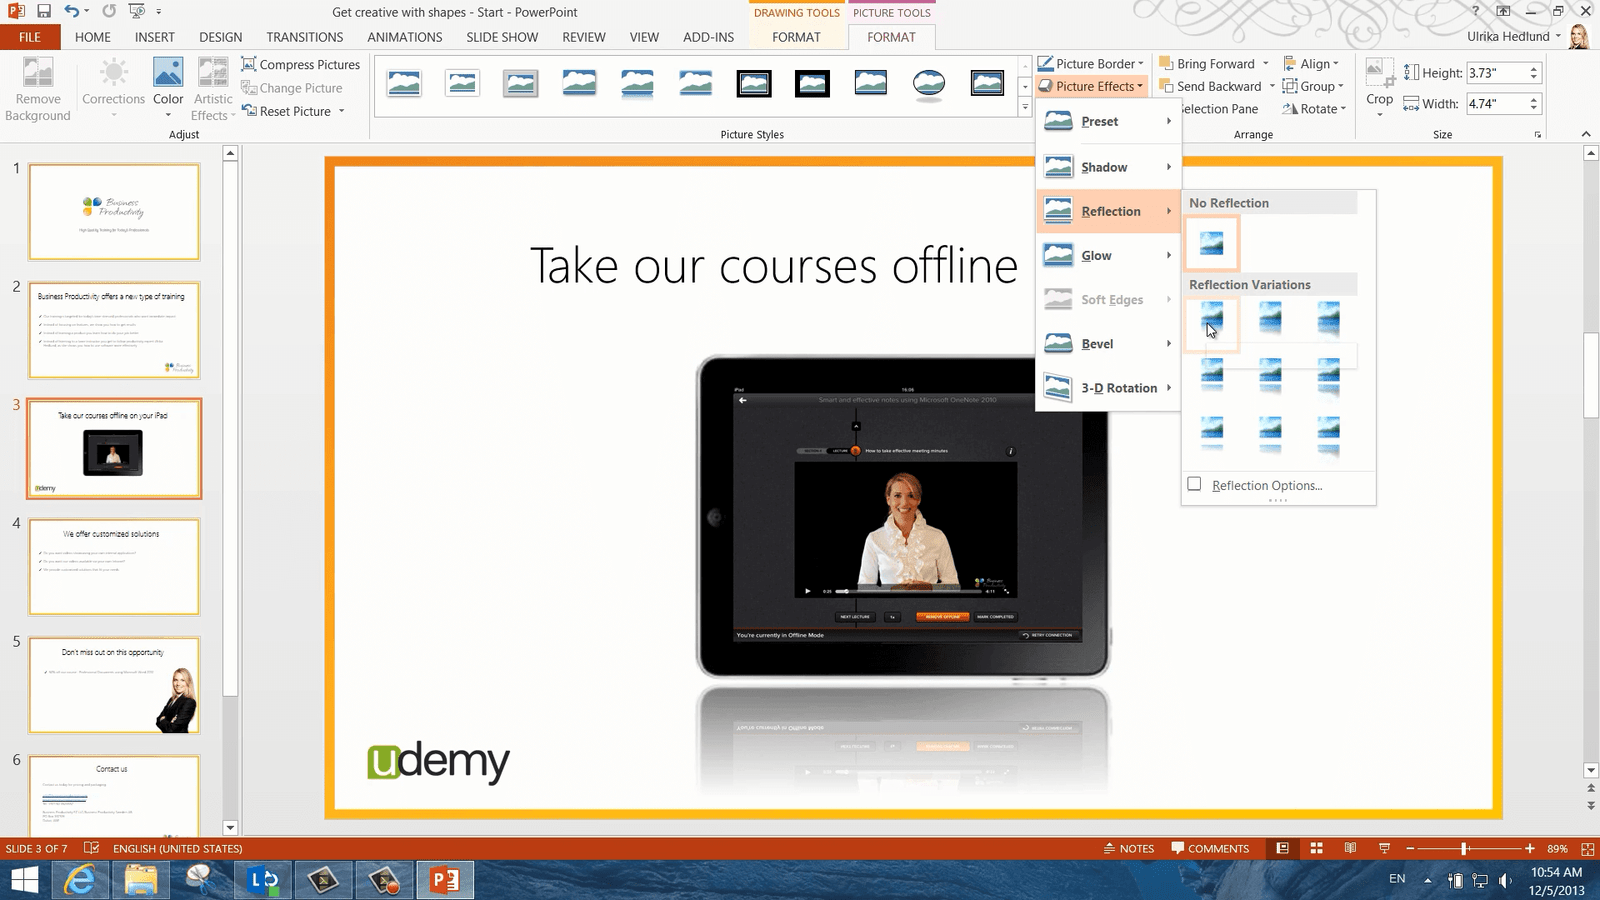
How to add reflections to an object in PowerPoint 2013?
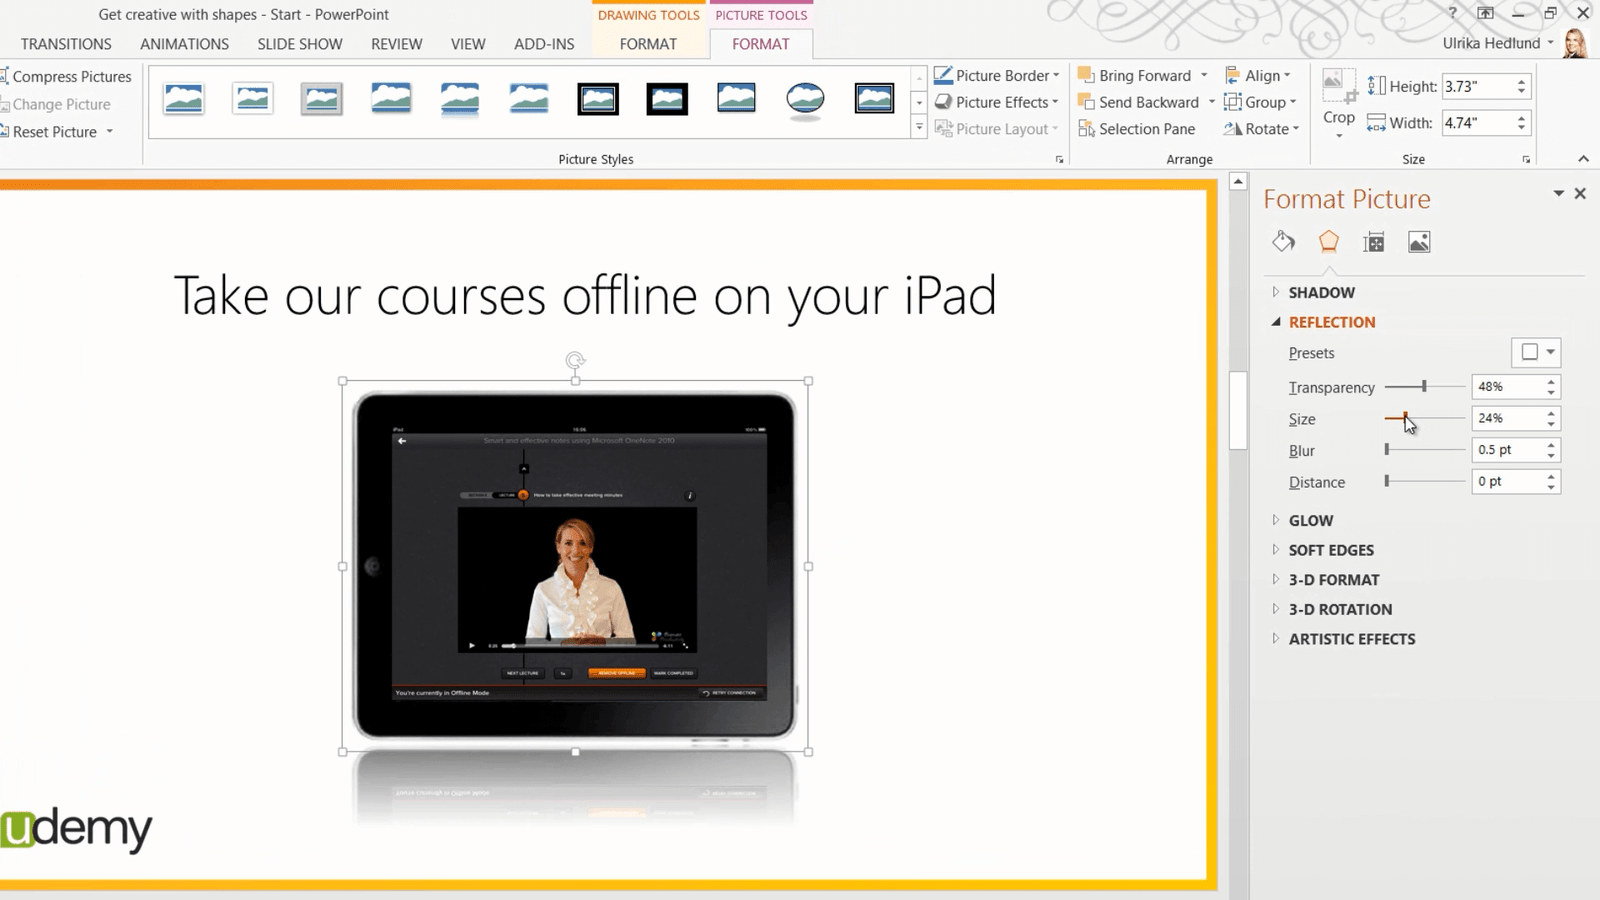
Now I want to add a reflection effect. To add a reflection to an object mark the object so that the “PICTURE TOOLS” appear. Click “Picture Effects” and then select “Reflection”. Here I get a live preview of what different options look like. I’ll select this one but I want to make the reflection a bit smaller.
To change the reflection settings, right-click and select “Format Picture”. The “FORMAT” pane appears where you can modify the settings of your picture. I’ll expand the “REFLECTION” section and here I’ll choose to change the size of the reflection to make it a bit smaller. There that looks good!
How to Merge shapes together in PowerPoint 2013?
On this next slide, I want to add gear wheels but I haven’t found a good picture on the Internet so I’ll just create my own shapes. In PowerPoint 2013 you have more advanced options to create your own shapes by merging shapes together. I’ll click “INSERT”, “Shapes” and then I’ll start with a 12 pointed star. I’ll hold down “Shift” when I draw to keep the proportions. I’ll make the rays a bit more pointy by moving the yellow marker down.

Next, I’ll insert a circle to cut off the edges of the star. To make the circle perfectly round I’ll hold down “Shift”. The new alignment guides in PowerPoint 2013 help me position the circle, so when I see a cross I know that I’m in the center of the star. Now I’ll mark both shapes, and under the “DRAWING TOOLS”, “FORMAT” tab in the “Insert Shapes” section I’ll click “Merge Shapes”. Here you have a number of different options for how to combine your shapes. You get a live preview of what happens to your shape. Here I’ll select “Intersect”.

Then I’ll insert one more circle. Now I want to cut out a circle in the middle. Again I’ll position the circle in the middle, mark both objects and then click “Merge Shapes” and this time I’ll select “Subtract”. And there is my gear wheel.
I’ll make it a bit smaller and then I’ll copy it by pressing the keyboard shortcut “CTRL+ C” and then paste it in with “CTRL + V”. In order to align the wheels, I need to rotate the top one a bit. To rotate an object grab the rotation wheel by holding down the left mouse button and turn it to either side.

I’ll move it a bit more to fit it in better. Again I’ll press “CTRL C” and then “CTRL V” to paste in one more wheel. I’ll align it on the other side and then I’ll move all the wheels to the right side of my slide.
Now I want to change the visual effect of the gear wheels. I’ll mark one of the wheels and click “Shape Effects”, “Bevel” and then select the rounded “3-D-effect”. Now I’ll change the color of the shape to white as well as the outline. Now I want to copy the same formatting to all shapes. On the “HOME” tab I’ll click “Format Painter” if I click it quickly twice the little paintbrush appears and I can apply the same formatting to multiple objects. I’ll just click on to the two wheels to give them the same formatting.
To remove the format paintbrush I’ll just click “Format Painter” again. There!
How to Edit the points of a shape in PowerPoint 2013?
Now on this third slide, I want to create a nicer Ad for the 50% off promotion. I’ll click “INSERT”, “Shapes” and then I’ll select a rectangle. I’ll draw a rectangle but I want it to be more curvy. To change a shape to make it curvier I’ll click “Edit Shape” and then “Edit Points”. I’ll place my mouse pointer on the line that I want to edit and then I’ll hold down the left mouse button and pull to the right. You will see two blue lines that show the direction of the curves. I can change the angle of the lines to change the curve.

There that looks good! I’ll mark the shape again and go to the “Shape Styles” gallery to apply a nice orange effect. To add a shadow to my shape I’ll click “Shape Effects”, “Shadow” and select this diagonal shadow. Now I need to insert the text. I’ll click “INSERT” and then “Text Box”. I’ll draw the text box over my shape and type 50%. I’ll mark the text and change the font to “Arabic Typesetting” and then I’ll change the size to make it really big. Finally, I’ll change the color to white and move the text up a bit. I’ll insert a second text box with the text OFF and resize the text by clicking “Decrease Font Size” on the “HOME” tab. There! Now I want to insert a screen clipping from this web page of our PowerPoint course on Udemy. To insert a screen clip in your presentation, click “INSERT”, “Screenshot” and then select “Screen clipping”, and here I’ll just mark the part of the web page that I want to insert into my slide.

How to Add 3D effects in PowerPoint 2013?
I want to change the angle of the image so I’ll click “Picture Effects”, “3-D Rotation” and then I can hover over the different options to get a live preview of the results. I’ll select one with just a little bit of angle.

I want to increase the angle a little bit so I’ll right-click on the picture and click “Format Picture”. I’ll expand the “3-D-ROTATION” settings and increase the X-axis rotation a little bit.

There that’s perfect! Now I want to apply the same 3-D-effect to this picture of me. I’ll mark the screenshot, go to the “HOME” tab and click “Format Painter”, and then I’ll click my picture. I’ll click “Arrange” and bring the picture up one layer. And after a little bit of fine-tuning here we go!
In just a few minutes we have used our creativity and the tools in PowerPoint 2013 to make this sales presentation a lot more interesting!
How to Create A Design Template in PowerPoint 2013?
Introduction
PowerPoint 2013 comes with a number of new themes that you can use for your presentation but quite often you are going to want to use your own corporate theme. In PowerPoint 2013 there is a new coloring tool called the “Eyedropper” which makes it much easier to pick the exact color from your logo and add it to your presentation design. Now I’ll show you how you can use the “Slide Master” and the coloring tools to create your own professional corporate design.
Overview of themes in PowerPoint 2013
Here I have the beginning of a company meeting presentation where no corporate theme has been applied. I want to create an attractive corporate theme that I can use so that the presentation will look like this.

On the title slide I want our corporate logo, and throughout the presentation, I want to use our corporate fonts and colors.
How to Use the Built-In Themes in PowerPoint 2013?
Every time you create a new presentation in PowerPoint 2013 you are presented with numerous themes that you can use for your presentation. You can preview the theme and try different color layouts and you can click to see what various slides in the presentation would look like using the theme. If you like one of these themes you can use it as a starting point for your own corporate design. In this case I’m going to start from a blank design. I’ll click on the “DESIGN” tab to see the starting point. Even though I’ve created a presentation using a blank design it actually uses a theme called “Office theme”.

How to Create Your Own Theme in PowerPoint 2013 with the Slide Master?
To create my own corporate theme I´m going to open up the “Slide Master”. To open up the “Slide Master”, go to the “VIEW” tab, and then click “Slide Master”.
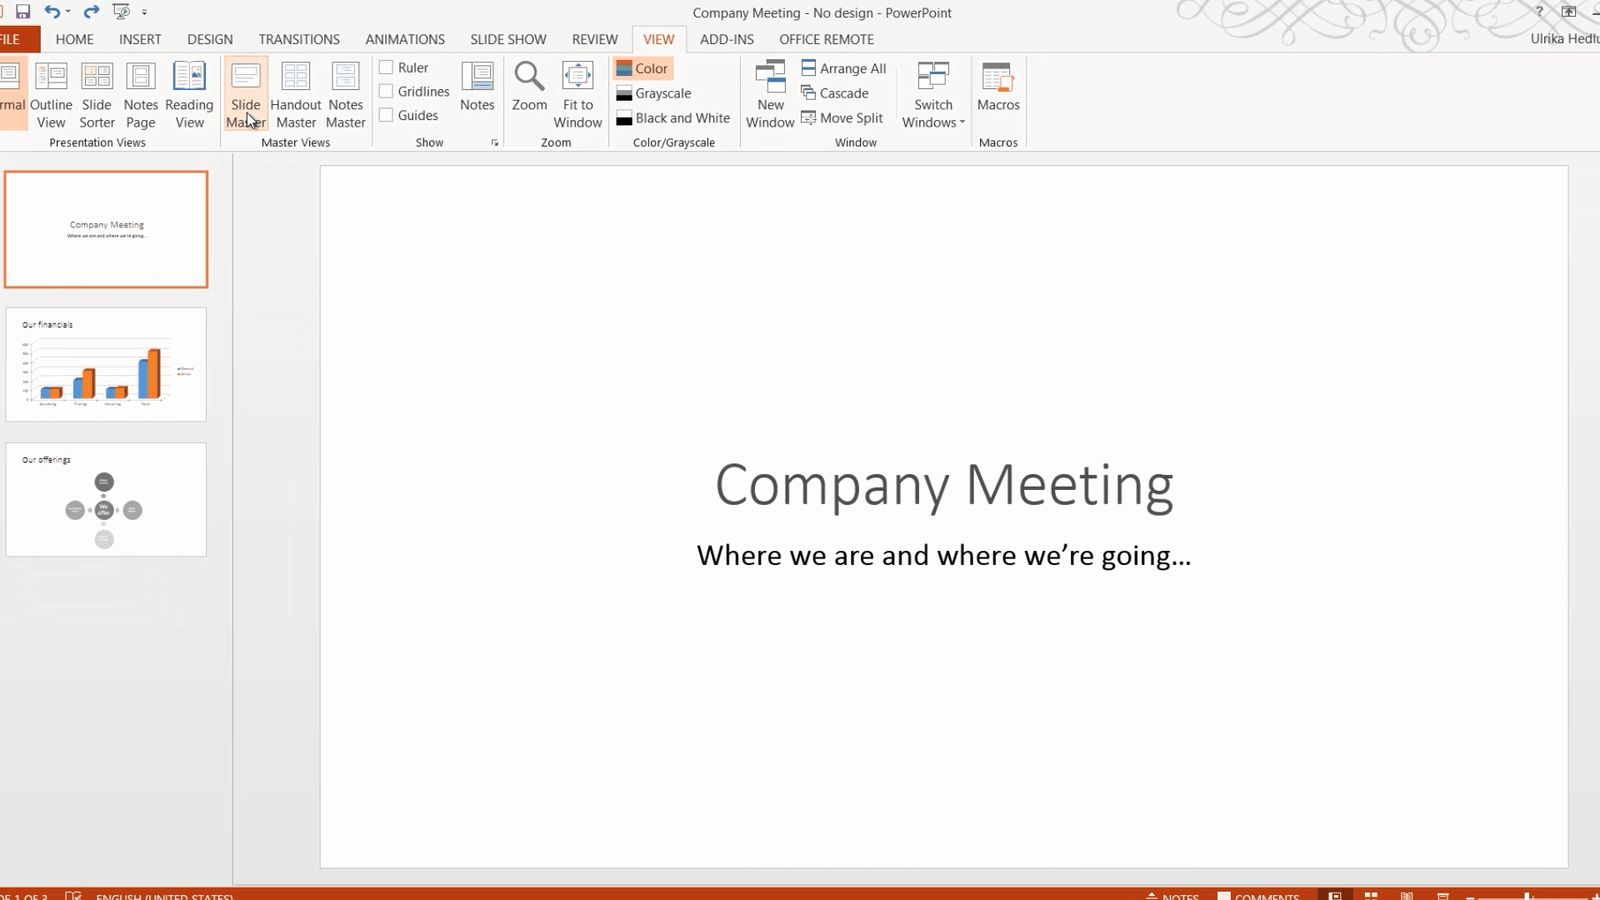
You can think of the “Slide Master” as the backbone of your presentation. Whatever changes you make to the “Slide Master” will be applied to your presentation.
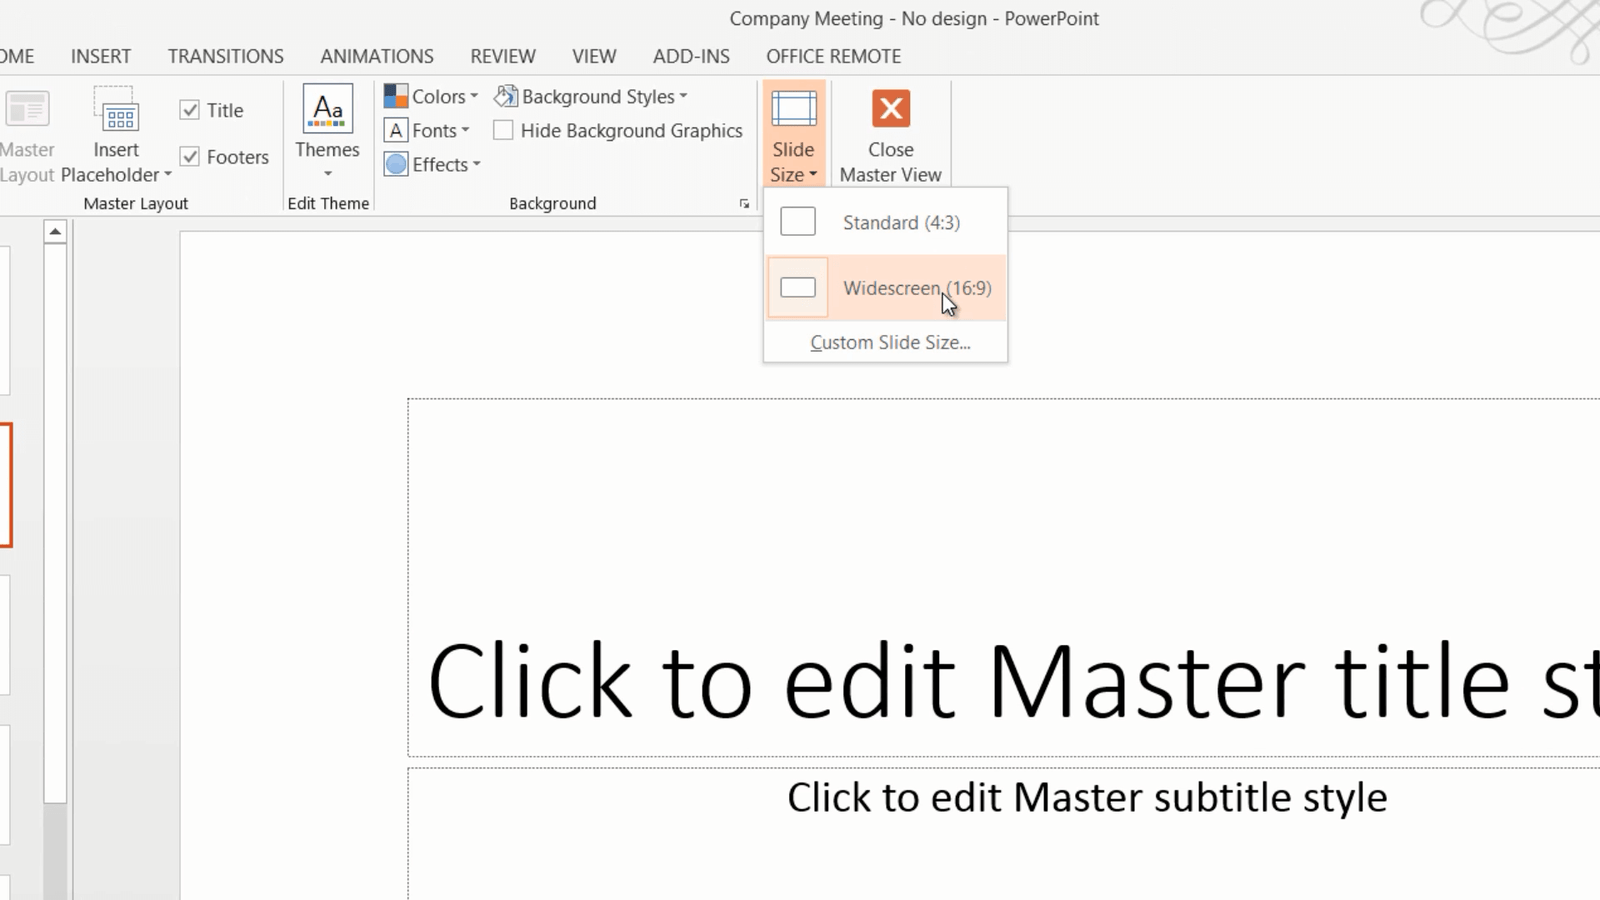
In PowerPoint 2013 the default slide layout is “Widescreen” if you normally use a projector that doesn’t support “Widescreen” you can change the layout to “Standard”.
The Slide Master contains a number of different Slide Layouts. This one is for the Title slide, this one for the Content slide and so on. I’ll go to the top slide which is the Master slide.
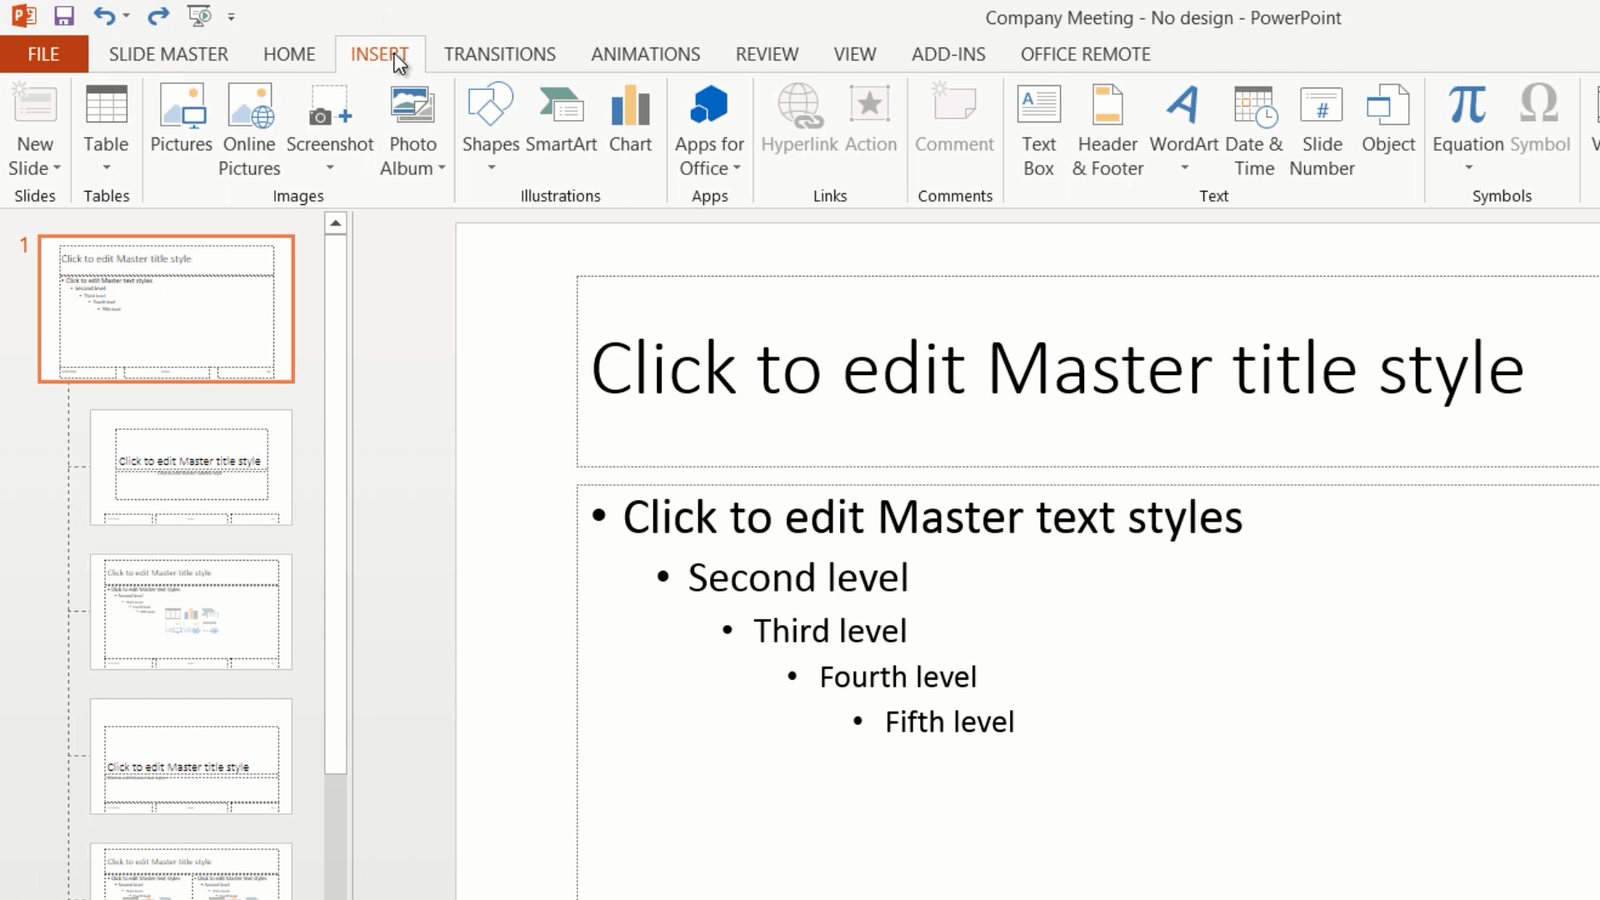
Whatever I apply here will be replicated to all other slide layouts. I’ll click “Insert”, “Pictures” and then select our company logo flower.

I’ll place the flower in the top right corner of the Slide Master. As you can see automatically all of the different slide layouts are updated.

How to Use Shapes in your PowerPoint Design?
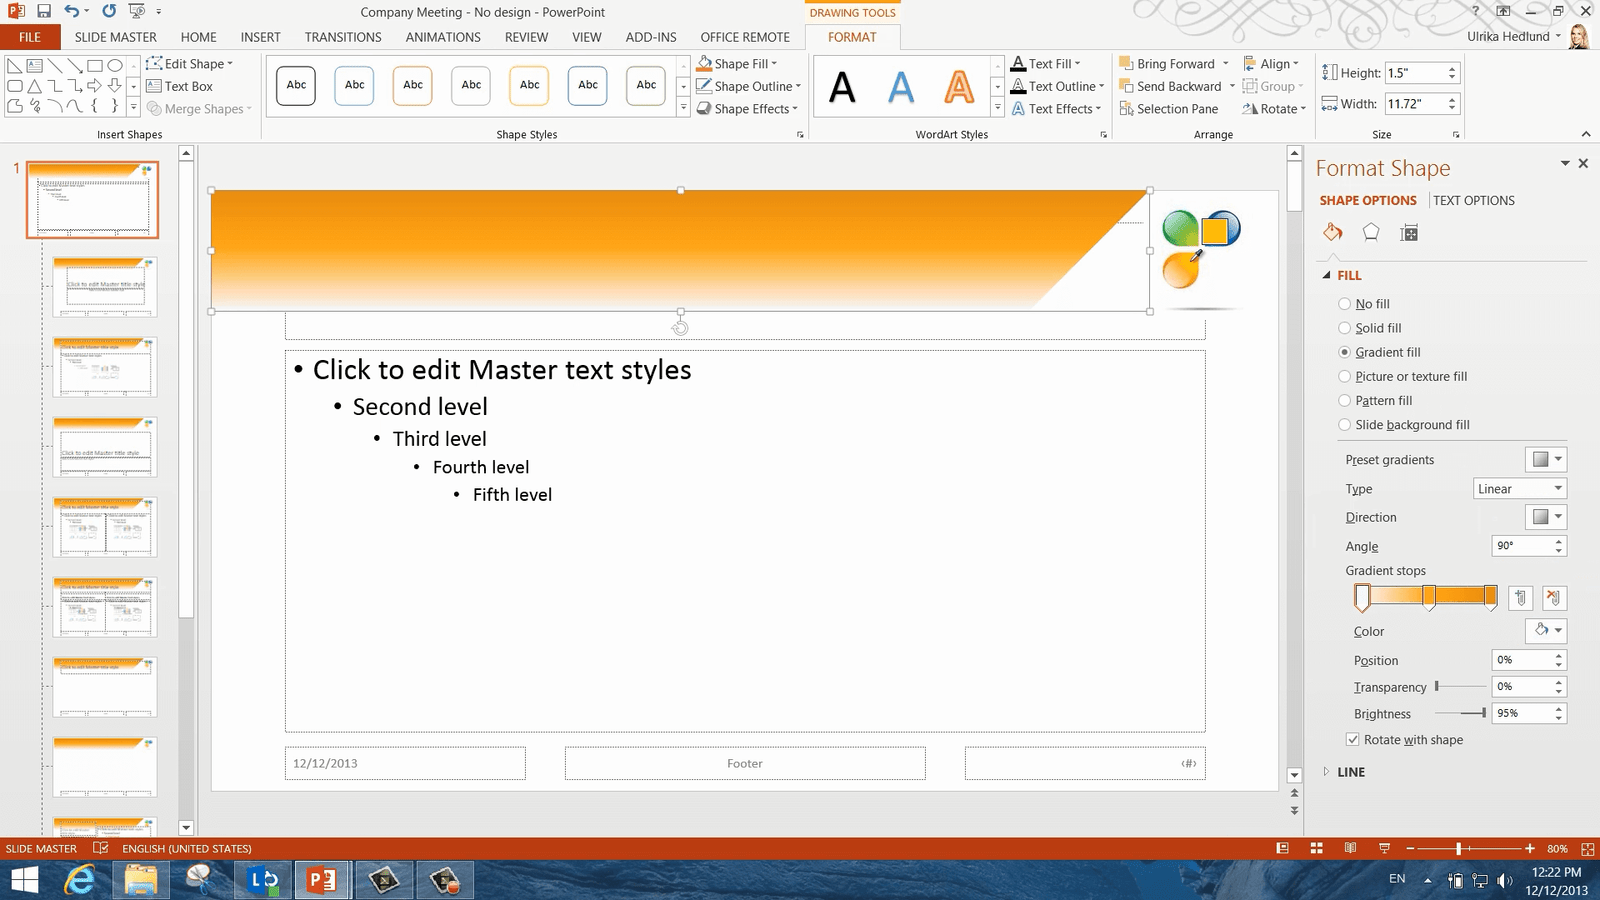
Next, I want to add an orange background shape behind the title. I’ll click “INSERT”, “Shapes” and select a rectangle. I’ll draw a rectangle at the top of the slide, I’ll click “Shape Outline” and select “No Outline”. Next, I’ll insert a Right-triangle. I’ll hold down the “Shift” key as I draw it to make sure to keep two angles at 45 degrees. Again I’ll click “Shape Outline” and select “No Outline”. I’ll click “Rotate” and select “Flip Vertical”. I need to position the triangle perfectly and the new alignment guides in PowerPoint 2013 help me do that. Now I want to merge these shapes into one so I’ll mark both shapes and on the “DRAWING TOOLS”, “FORMAT” tab I’ll click “Merge Shapes” and then “Union”.

How to Pick Color using the Eyedropper in PowerPoint 2013?
Now I want to change the color of my newly created shape so that it goes in line with the colors of our logo. I’ll Right click and select “Format Shape”. In the “Format Shape” pane, I’ll expand the “FILL” option. Instead of using the “Solid fill” I’m going to choose a “Gradient fill”. I’ll leave it as a “Linear” gradient. I only need to have three gradient stops so I’ll just mark one and click delete, then I’ll move the second one more towards the middle. I’ll mark the first gradient stop, click the color icon but instead of selecting one of the suggested colors I want to pick a color from our logotype. In PowerPoint 2013 Microsoft has introduced the “Eyedropper” so that you can easily apply colors that you have elsewhere in your slide.

I’ll click the “Eyedropper”, and as you can see my mouse pointer turns into a little dropper with a color square and a text box showing me the unique color combination for that color. Here I’ll pick a dark orange color and click. I’ll do the same for the second “Gradient stops” picking a medium orange color and finally I’ll click on the third “Gradient stops” and select a light orange color. Okay! Now I’ll just close down the “Format” pane.
As you can see, the shape is covering the title, so I need to send the shape back. I’ll right-click and select” Send to Back”. Then I’ll just move the text box and resize it a bit so that it’s better aligned to my shape. To change the color of the title I’ll go to the “HOME” tab and in the Font section, I’ll change the color to white.
How to Change Fonts in the PowerPoint Design?
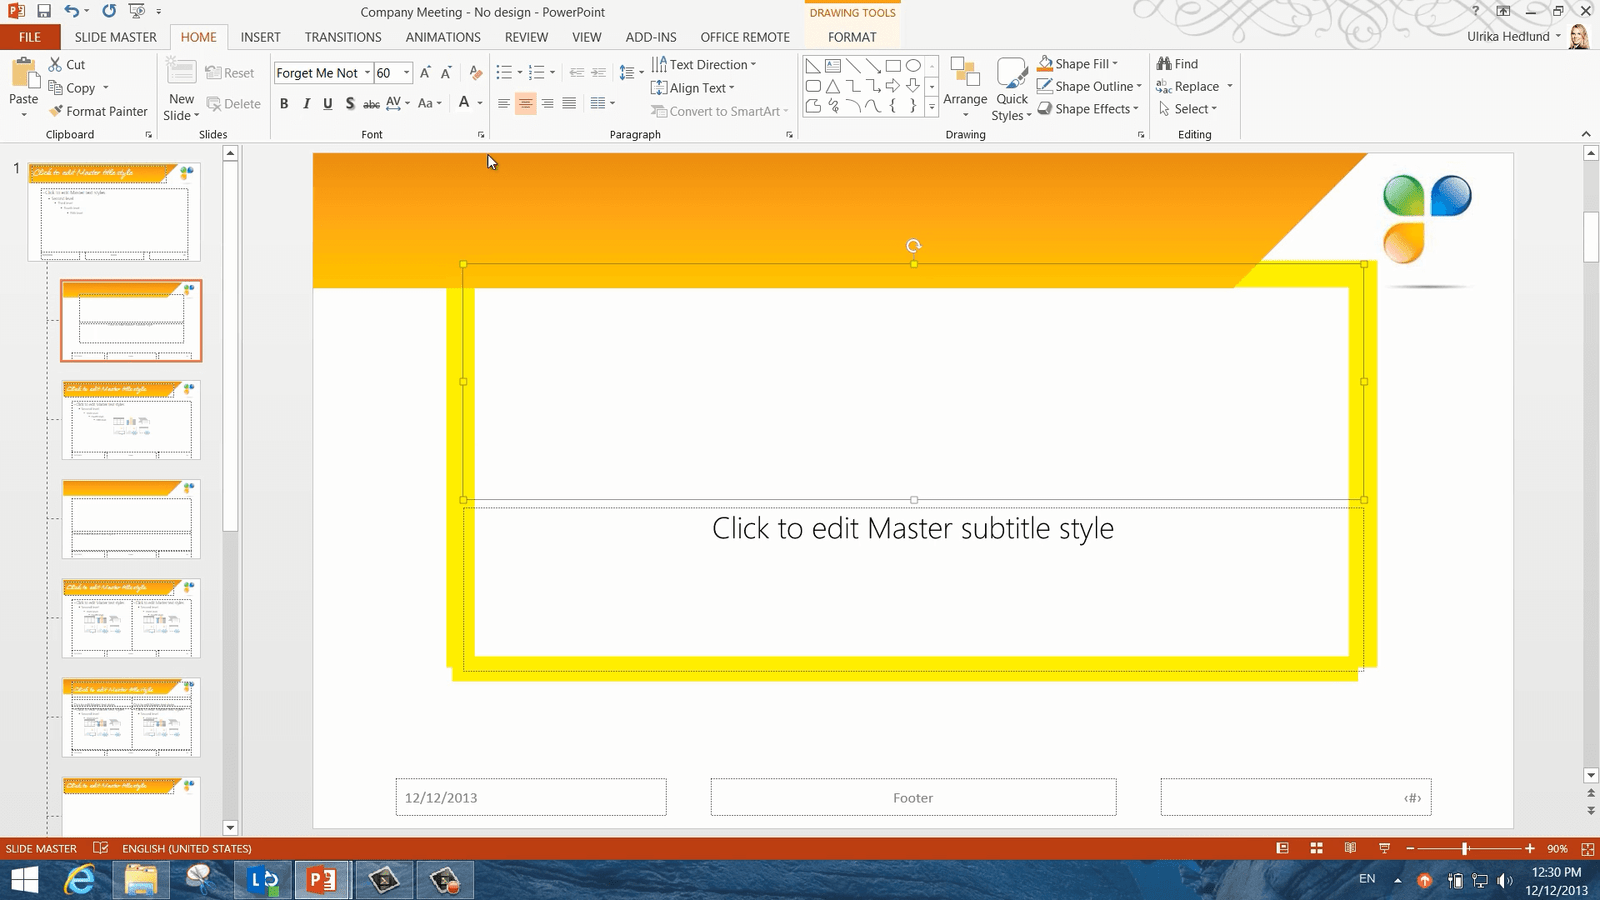
Now I want to change the font of the title. You can easily see what different fonts would look like using the Live preview. To match our corporate identity better I’m going to use a font called “Forget me not” that we have in our logotype. This font isn’t included in Windows by default.

You can purchase and download fonts from a number of sites online. I normally use a site called MyFonts.com where you can easily search for fonts based on certain criteria.
It’s important to note that in order for these fonts to display correctly in your presentation they fonts need to be installed on the computer. So if you send the presentation to someone who doesn’t have the font type installed, it will be replaced by another font.
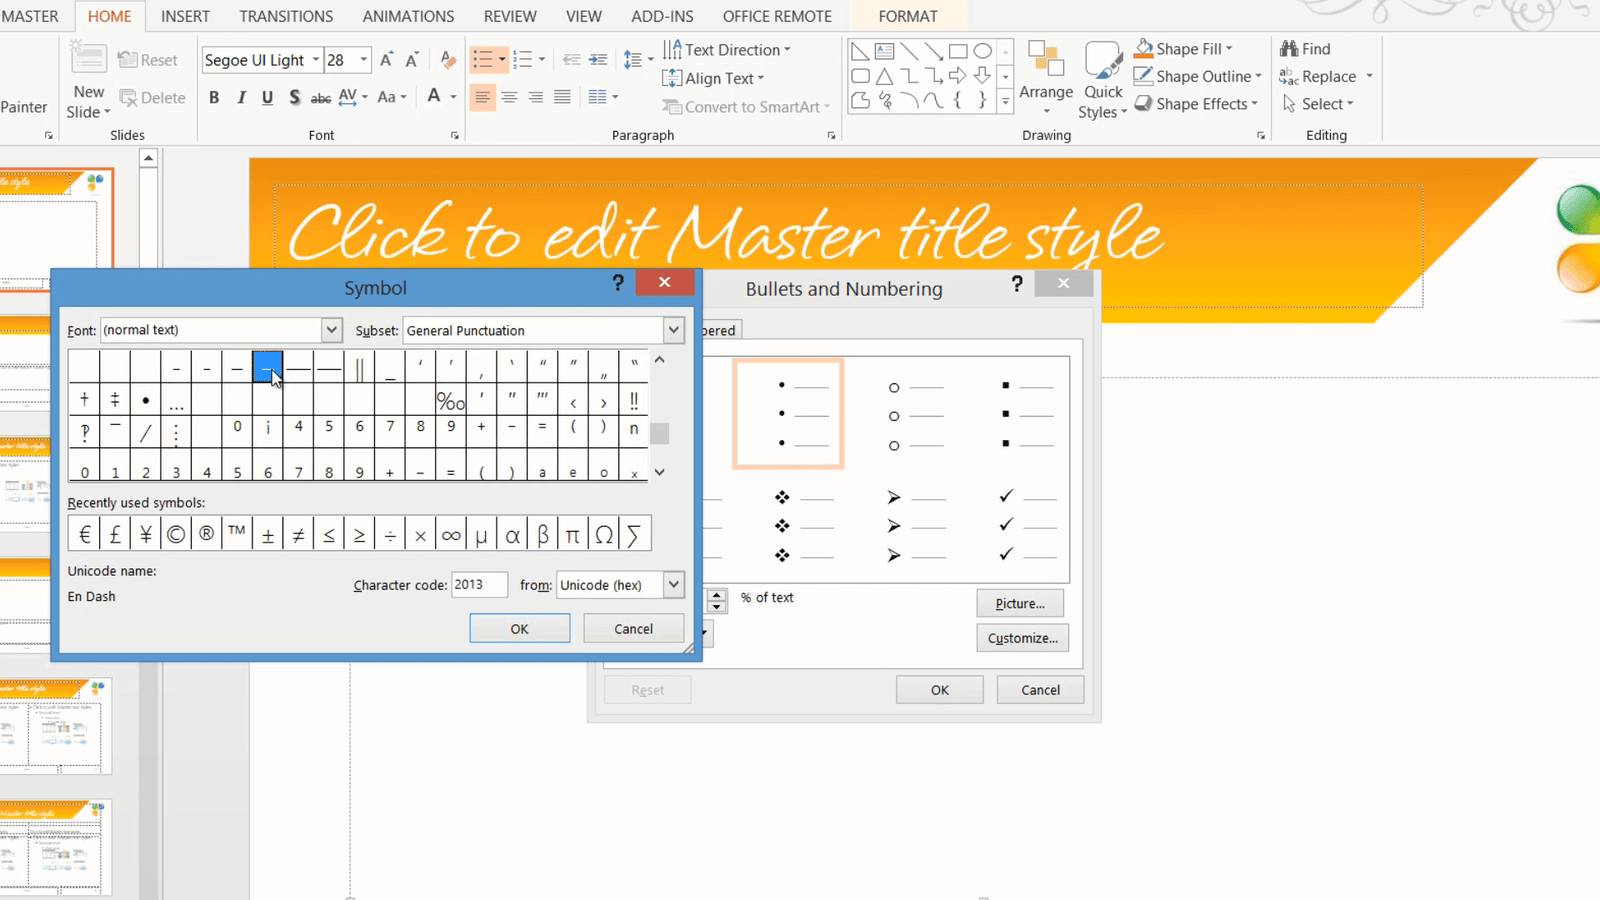
Now I want to change the font for the slide text as well. I’ll mark the text and here I’ll select a built-in font called “Segoe UI Light”. I also want to change the first level bullet. I’ll place my marker on the first row, click “Bullet”, “Bullets and Numbering” and then “Customize”, and then I’ll just select a simple dash and click “OK” twice.
I want the title slide to have a different look and feel so that it looks like this.

First I’ll change the title color by marking the title text box and on the “HOME” tab I’ll change the font color to a dark grey color.
I’ll also make it a bit smaller by clicking the “decrease font size” button. I’ll click the “Slide Master” tab and in the Background section I’ll mark the option to “Hide Background Graphics”. I’ll insert our full logo by clicking “INSERT”, “Pictures” and selecting our full logo. I’ll resize it by pressing “Shift” on the keyboard while pulling the corner to keep the proportions. I want to have the same orange shape here so I’ll go back to the “Slide Master” and copy it by pressing “CTRL-C” on my keyboard. I’ll paste it in by pressing “CTRL-V”. I’ll just resize it a little bit for the title slide. Now I need another orange shape for the bottom. I’ll click “INSERT”, “Shape” and again select a rectangle, I’ll draw it at the bottom of the slide. To copy the same color formatting of the top shape, I’ll mark it, go to the “HOME” tab, and click “Format Painter”. Now I’ll just point to my shape to copy the formatting. There!
Now we can close down the Master View to see what this presentation looks like. To close the Master View, click the “SLIDE MASTER” tab and then “Close Master View”. There! Now the presentation looks much better!
How to Change the Theme Colors in PowerPoint 2013?
The final thing I have to change is the color theme. To apply a new color theme to a presentation click the “DESIGN” tab and in the “Variants” drop-down select “Colors”. Here I can select among a number of pre-defined color combinations with colors that work well together. Here I can also choose to create new theme colors.

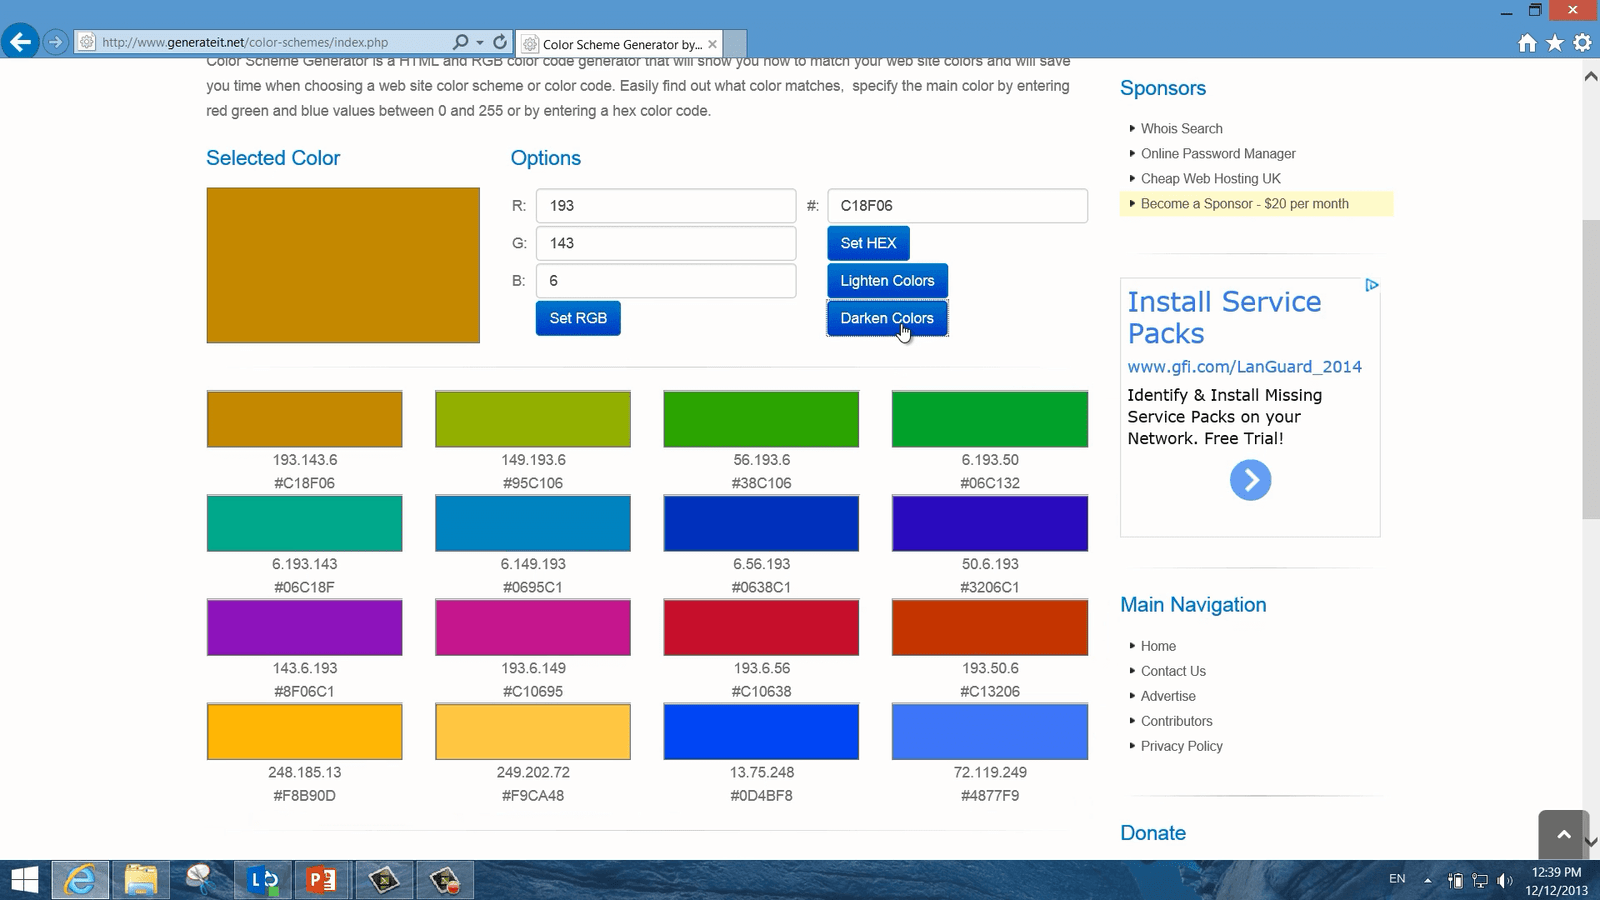
I’m going to change these colors, and again, I want colors that work in harmony with the orange color that is dominating the slides. You can find tools online that help you find matching colors. Here I have a site called “Generateit” where I have entered our orange color and it is giving me colors that go in harmony with that. I’ll just choose to darken the colors a bit and then I’ll note them done.
I’ll click the first “Accent” color but unfortunately, I don’t have the “Eyedropper” here so I’ll just have to enter the RGB codes of the colors from the site for each of the “Accent” colors manually.
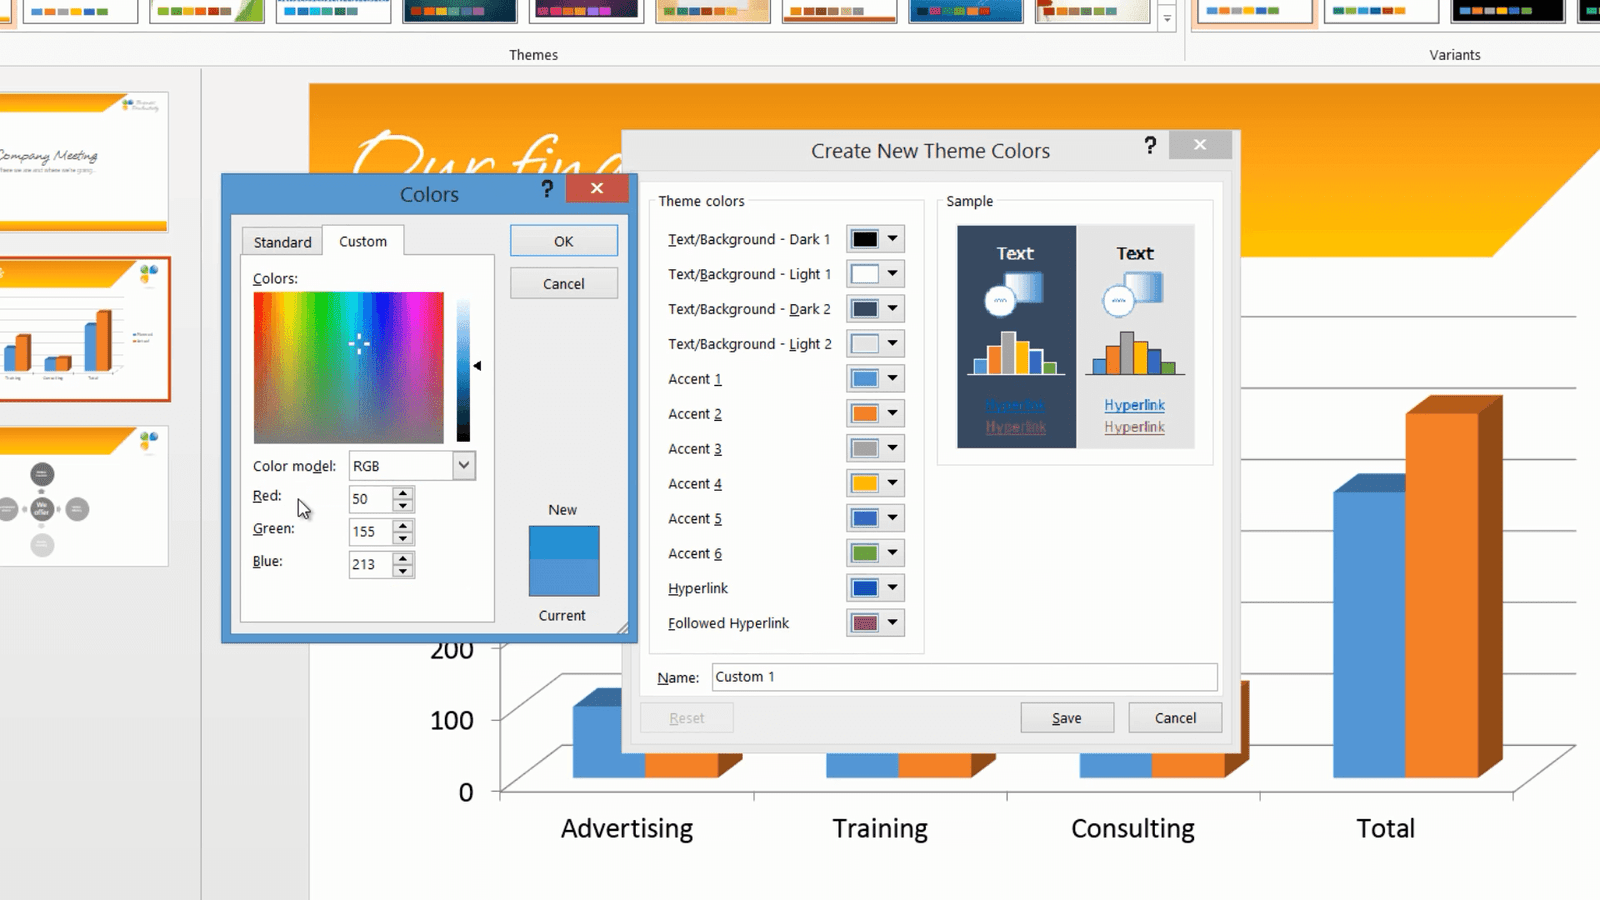
When I’m done with all the colors I’ll give the color combination a new name, “Corporate Colors” and save it. There! To apply this color combination to the Slide Master I’ll open up the “SLIDE MASTER”, click “Colors”, right-click my newly created color combination and click “Apply to Slide Master”.
How to Save your PowerPoint theme?
There! Now that I’m happy with the corporate theme I’ll close down the Slide Master and save the theme. To save a theme that you’ve created, click the “DESIGN” tab, open up the design theme gallery, and choose “Save Current Theme”.
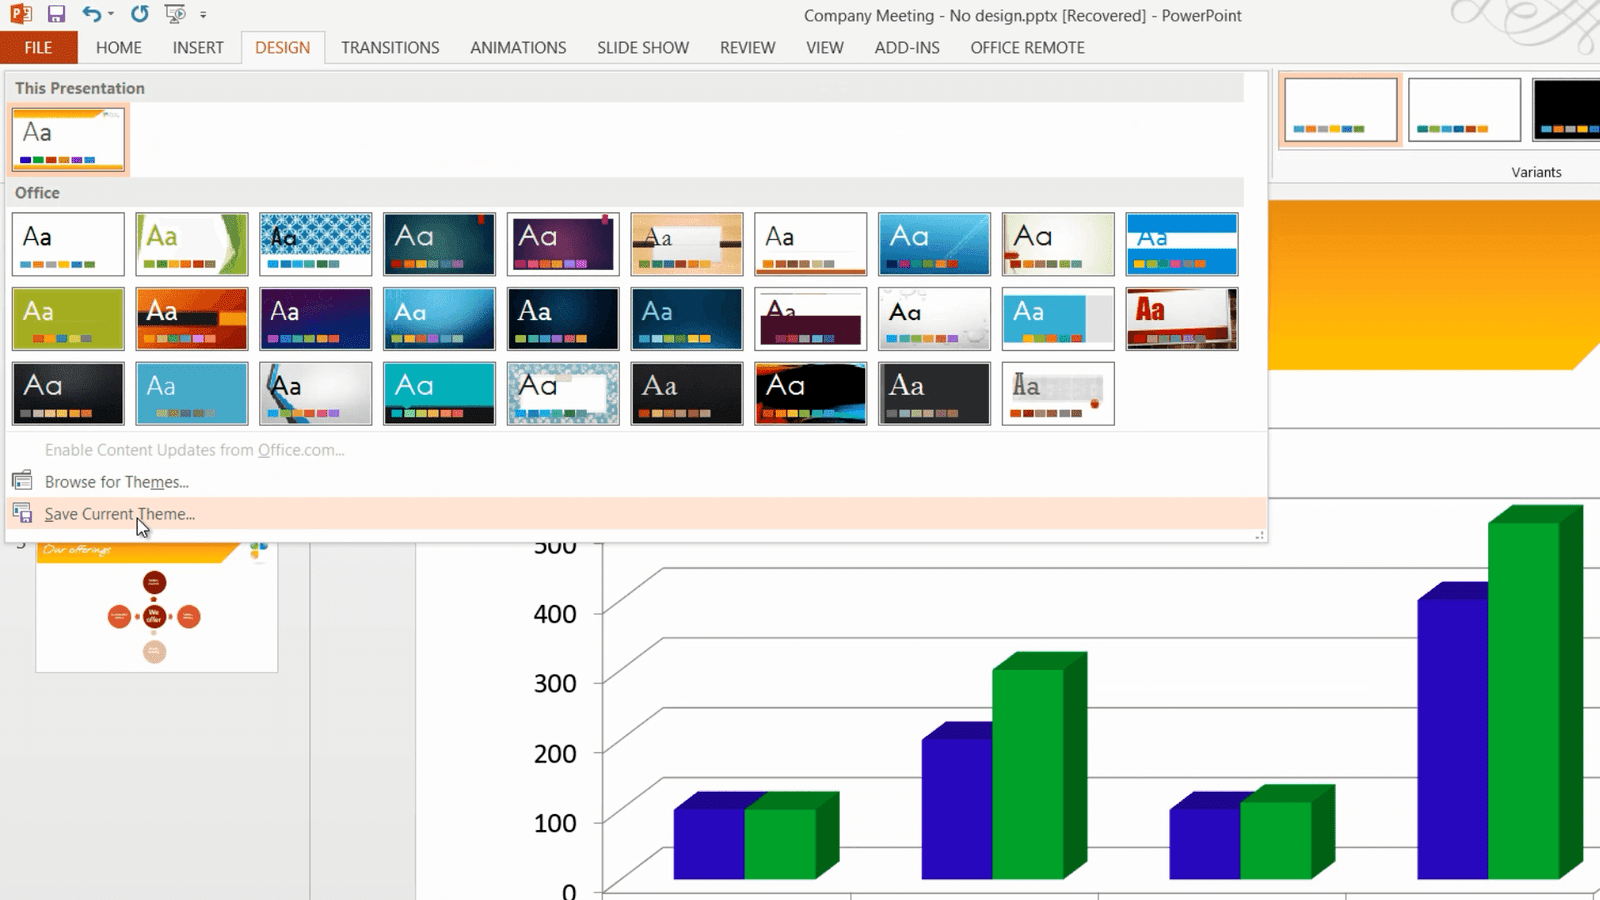
I’ll give it a name “Corporate Theme” and then “Save”. Now I have the corporate theme design saved in the design library and I can easily apply this to any new presentation I want to create. Every time I create a new presentation I can access the theme by clicking “CUSTOM” and then selecting “Document Themes”.

If you click the little pushpin next to your theme, it will be available on the first page every time you create a new presentation.
There now in less than ten minutes, I have created an attractive corporate PowerPoint theme.
How to Use SmartArt In PowerPoint 2013 to Create Eye-Catching Presentations?
Introduction
When you give a presentation it’s important that the PowerPoint slide is only there to support your message. Instead of using just text in your slides, it’s really powerful to use graphics.
In PowerPoint 2007 Microsoft introduced something called SmartArt and even though it’s been in every version of PowerPoint since then, very few people know how to use it effectively. The beauty with SmartArt is that you don’t have to waste time drawing shapes yourself, this is automatically done for you.
To show you how this works, I’m going to use a presentation that I’ve created on the topic “Brand Management” and I’m going to convert the texts in this slides to eye-catching graphics.
Introduction to SmartArt graphics in PowerPoint 2013
Here I have a presentation about brand management. As you can see, I only have text in my slides.

I’m going to use SmartArt graphics in PowerPoint 2013 to convert the text into graphics that look like this. As you can see, the slides are much easier to digest and the graphics help to communicate the message of each slide.

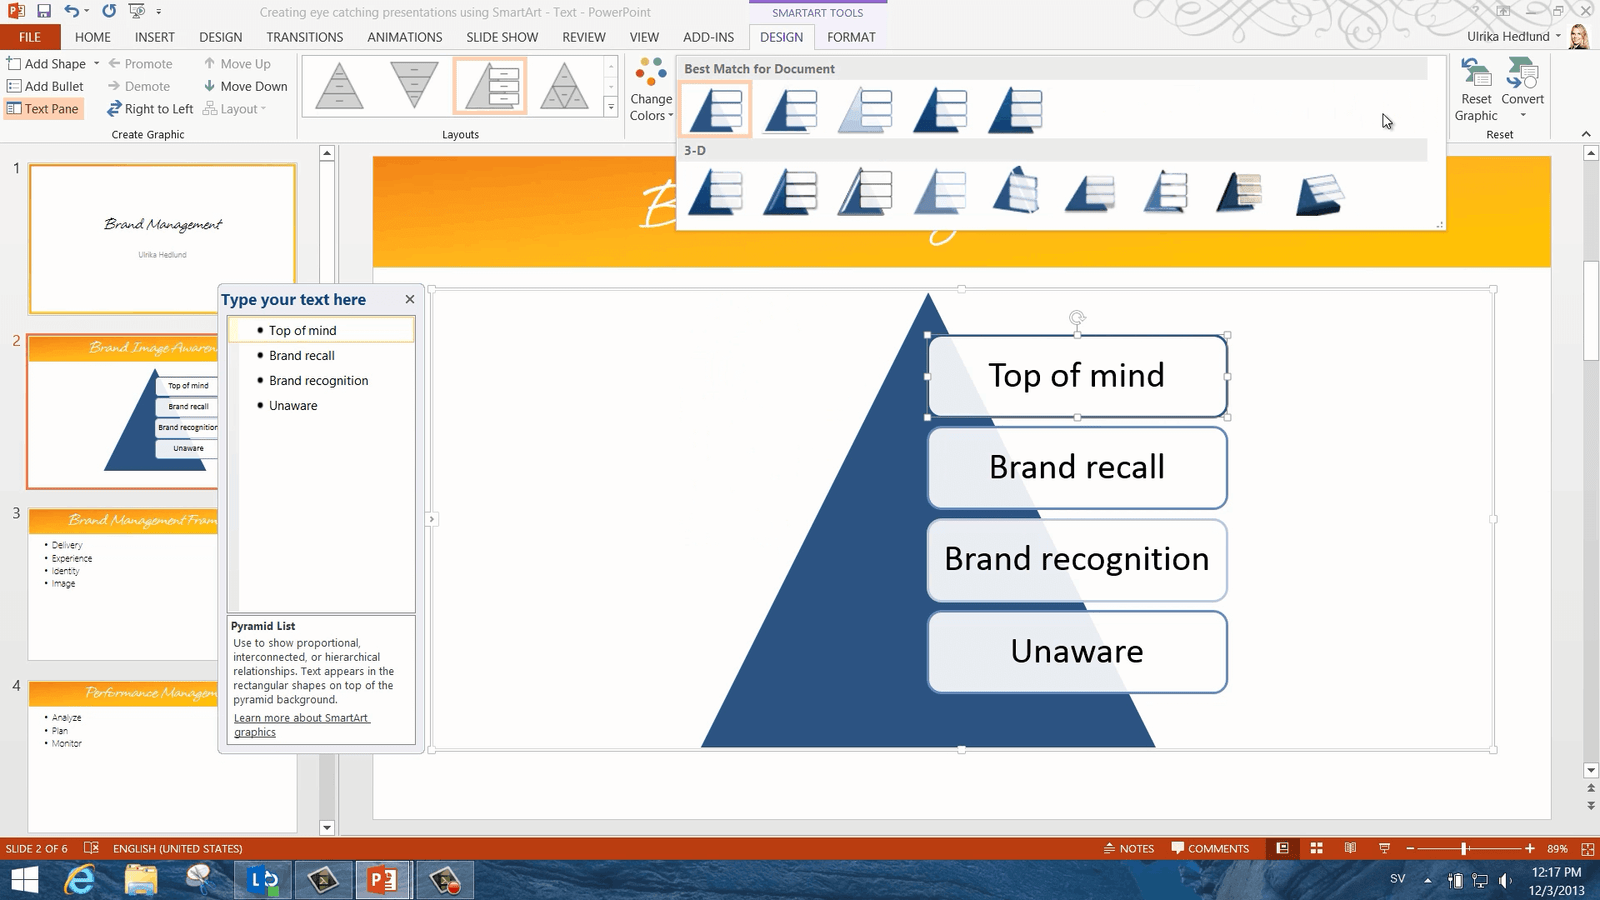
How to Convert text into SmartArt in PowerPoint 2013?
The message of this first slide is that very few brands are top of mind. Most of the brands are totally unknown to us. So to illustrate this I will turn this text into a pyramid. To convert text into SmartArt, mark the text, right-click and select “Convert to SmartArt.” Here I’ll select the pyramid graphic. A pyramid is inserted for me with the text in my slide. The “SmartArt Tools” Menu opens up and here I’m given more options to modify my SmartArt graphics.

Under the “DESIGN” tab I can change the layout of the pyramid. I get a live preview of what the different layouts would look like. Here I’ll just stick to the original layout. In the “SmartArt styles” section I can change the color, so here I’ll just change it to a darker blue. I have a gallery of different designs that I can apply to my SmartArt graphics. I’ll select a nice 3D-design for my pyramid.
How to work with individual shapes in PowerPoint 2013 using SmartArt?
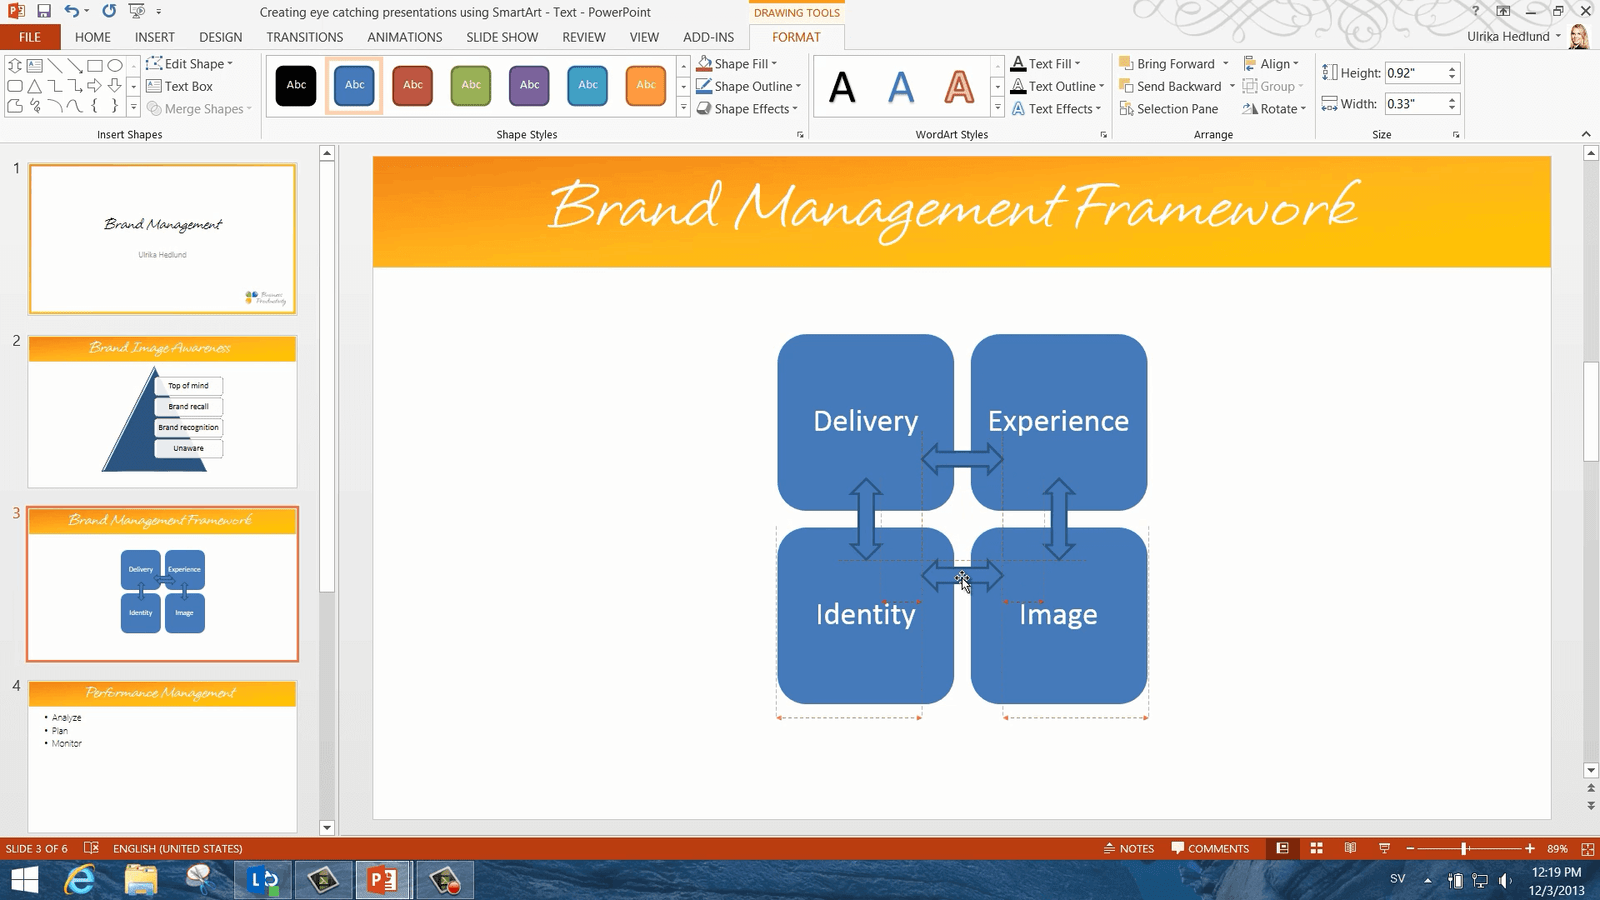
On this next slide, I want to show how these four elements affect one another so I’ll turn the text into a matrix. I’ll right-click again and select “Convert to SmartArt” and here I select the “Basic Matrix”. Even though this is a good start, I’m not 100% happy with this graphic. To modify SmartArt graphics further you can convert them into normal shapes. To do that have the SmartArt graphic marked and under the “SmartArt TOOLS” “DESIGN” tab, click “Convert to Shapes”. Now the graphic has been converted to individual shapes that I can work with independently. I’ll right-click and select “Group” and then “Ungroup”. Now I can remove the background square by marking it and pressing “Delete” on my keyboard. I’ll insert an additional arrow shape by clicking “INSERT”, “Shapes” and then selecting a Block Arrow. In PowerPoint 2013 Microsoft has introduced alignment guides, these are really useful when you are positioning objects. The red lines appear automatically as soon as you are aligning objects or text next to each other. I’ll copy the arrow using the keyboard shortcut CTRL+C and then paste it in using the keyboard shortcut CTRL + V. I’ll position this arrow next to the first, again being helped by the alignment guides. I’ll copy and paste again and this time I want to rotate the arrow 90 degrees. I’ll go to the “DRAWING TOOLS”, “FORMAT” menu and in the “Arrange” section I’ll click “Rotate Right 90 degrees”. Now I’ll position the final two arrows in my shape with the help of the alignment guides. There, now it’s done!
How to Use the SmartArt Cycle Process in PowerPoint 2013?
The text on this next slide can be converted into a cycle process. I’ll mark the text, click “Convert to SmartArt” and select a simple cycle process. Whenever you want to add more text to your SmartArt graphics you can do so by typing in the text box. Here I’ll add one more step in the process by adding “Change”.

I’ll change the order of the steps by clicking “Move up”. I can also change the direction of the arrows by clicking “Right to Left”. Again, I’ll go to the “DESIGN” gallery and select a nice finishing.
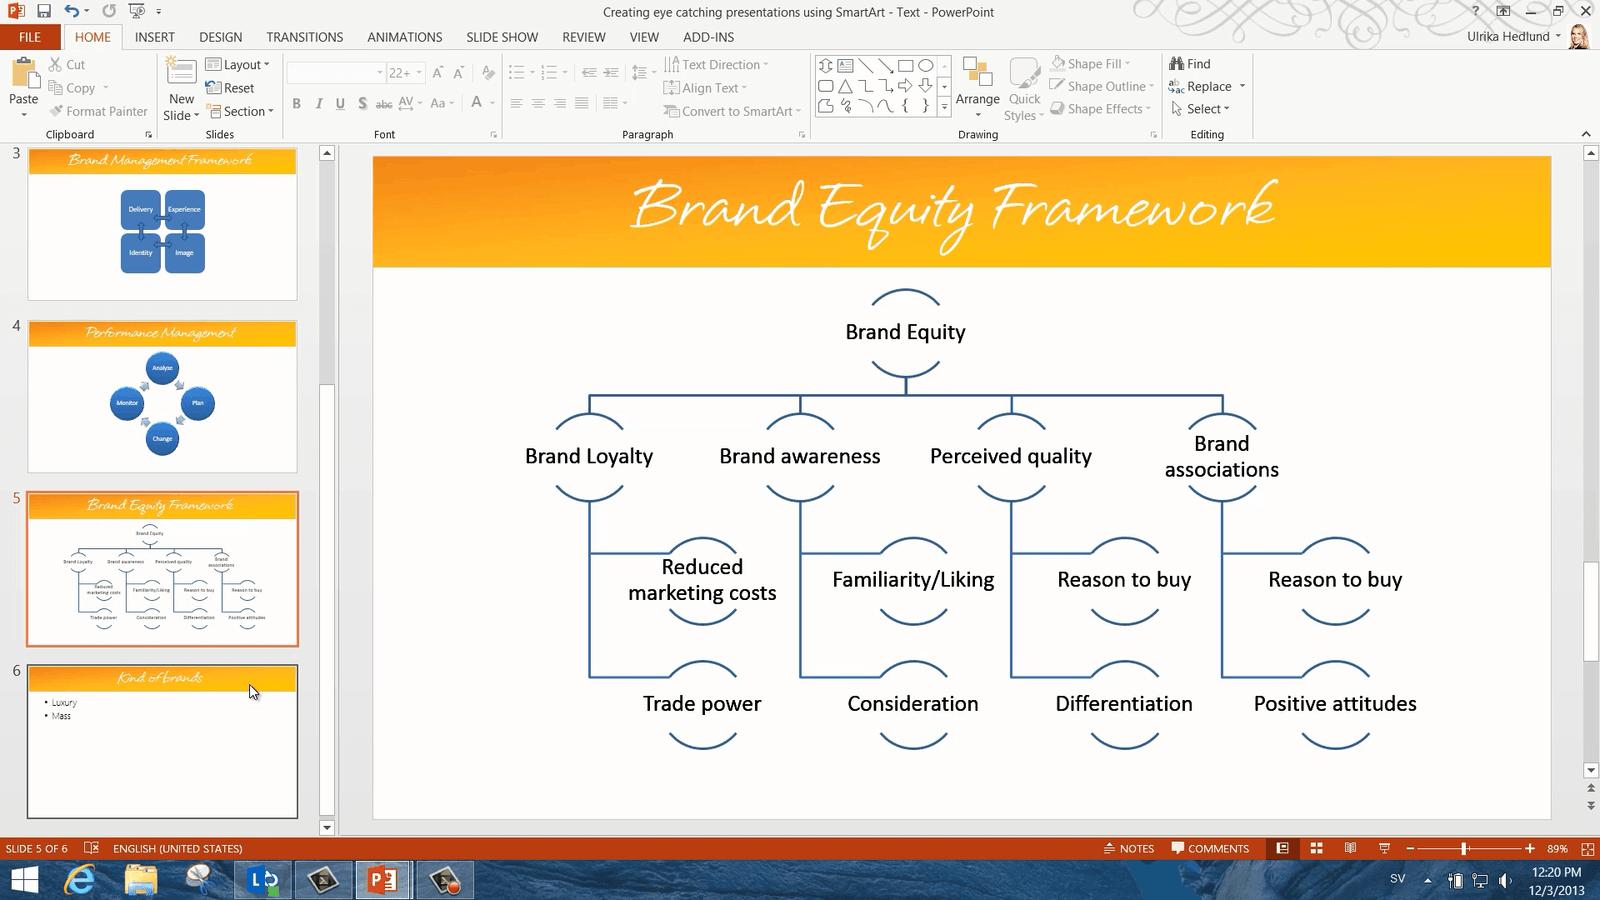
How to Use SmartArt Hierarchy in PowerPoint 2013?
This next slide is just filled with a lot of text. I’m going to turn this into a hierarchy and this is one of my absolute favorites. I’ll mark the text, right-click and select “Convert to SmartArt”. Here I’ll click “More SmartArt Graphics”. Here you can see all the SmartArt graphics grouped into various categories. I’ll go to the “Hierarchy” category and select the “Half Circle Organization Chart” and click “OK”.

And there we go! Now isn’t that great! Can you imagine how long it would take me to do that by hand?!
How to Create a SmartArt in PowerPoint 2013 from scratch?
Up until now, I’ve only shown you how to convert text into SmartArt. Before I end, I want to show you how you start from scratch so I’ll delete the text on this slide. To insert SmartArt from scratch either click the “SmartArt” icon on the slide or go to the “INSERT” tab and click “SmartArt”.
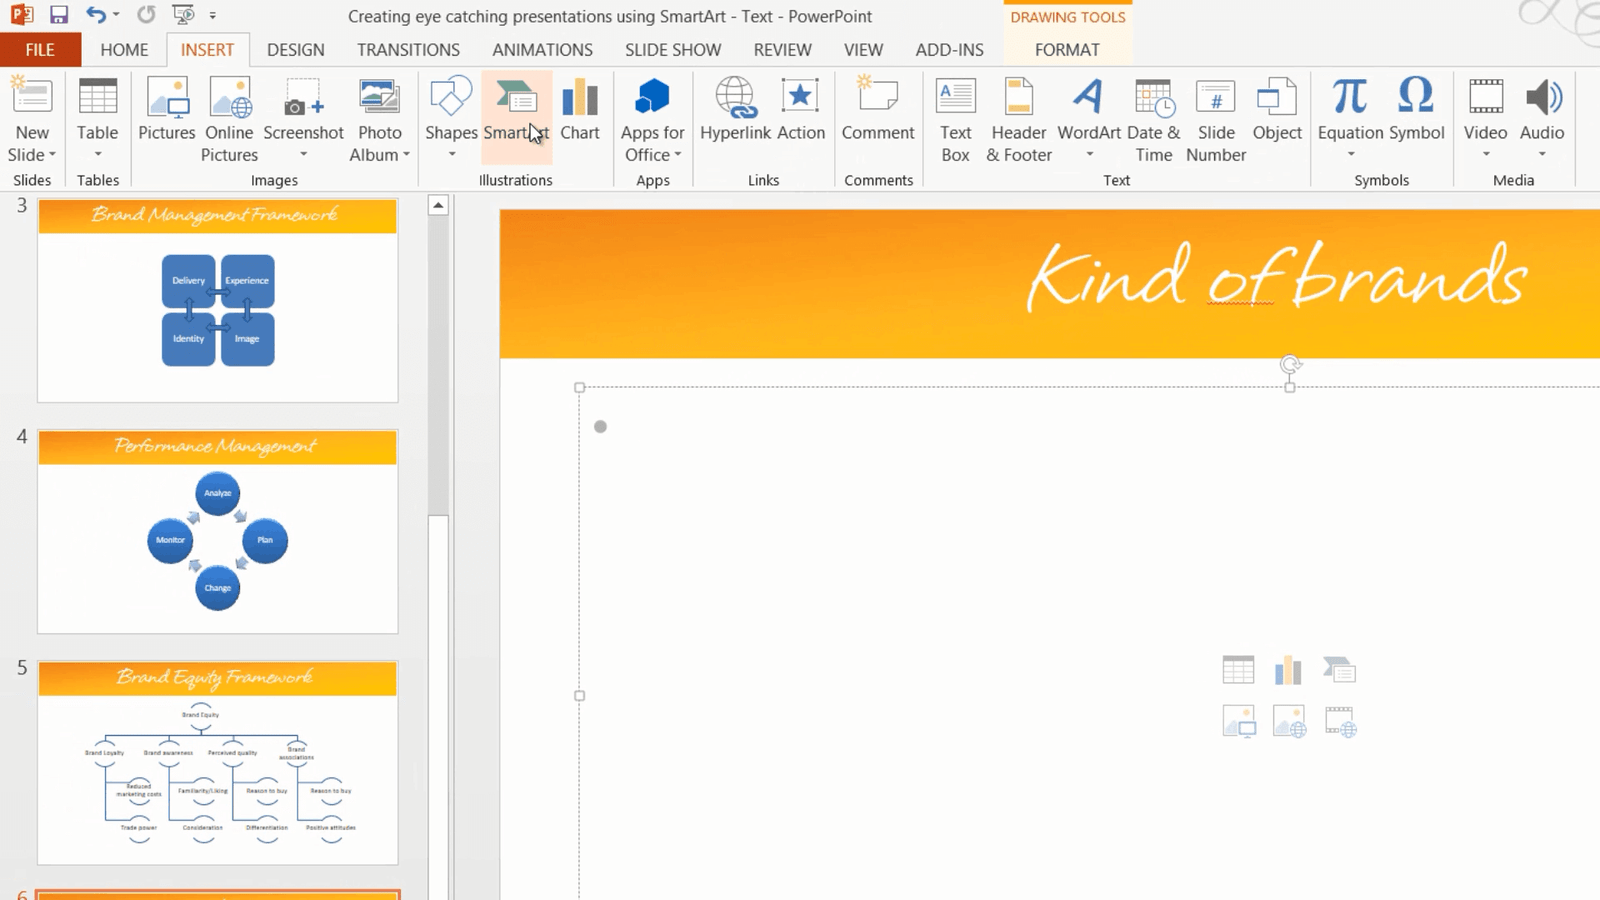
Here I’ll select a “Relationship” graphic with two counterbalance arrows and click “OK”. Now I’ll enter my text in the text box. This SmartArt graphic can only take two lines of text. If I try to add a third, you’ll see a red cross indicating that it will not be visible in the SmartArt graphic.

So I’ll just delete the third row. As a final touch, I’ll add a 3D design to the graphics and resize it by dragging the right corner while holding down the left mouse button. Now I’ll center the SmartArt by going to the “HOME” tab, click “Arrange” “Align” and then “Align Center”.
There now let’s have a look at the final result. In just a few minutes, I’ve created eye-catching slides using SmartArt graphics in PowerPoint 2013.
How to Collaborate on PowerPoint 2013?
Introduction
Quite often you need to collaborate with others on a presentation. If you don’t have a good set up for how to work together you can easily end up with multiple versions of the presentation, waist the time and a lot of confusion. In PowerPoint 2013 collaborating on a presentation is much easier. Now you can simultaneously edit a presentation in real time, you can easily see comments from one another and you can view and edit the presentation on the go from any devise.
How to prepare a customer PowerPoint presentation?
Here I have a presentation that we need to finalize before our customer meeting tomorrow morning. I’m going to share this with my colleague Peter and Sarah an external vendor who does a lot of our artwork so that we can work on it together at the same time. First I’ll add some comments to the presentation so that everyone knows what to do.
How to Add Comments to A PowerPoint Presentation?
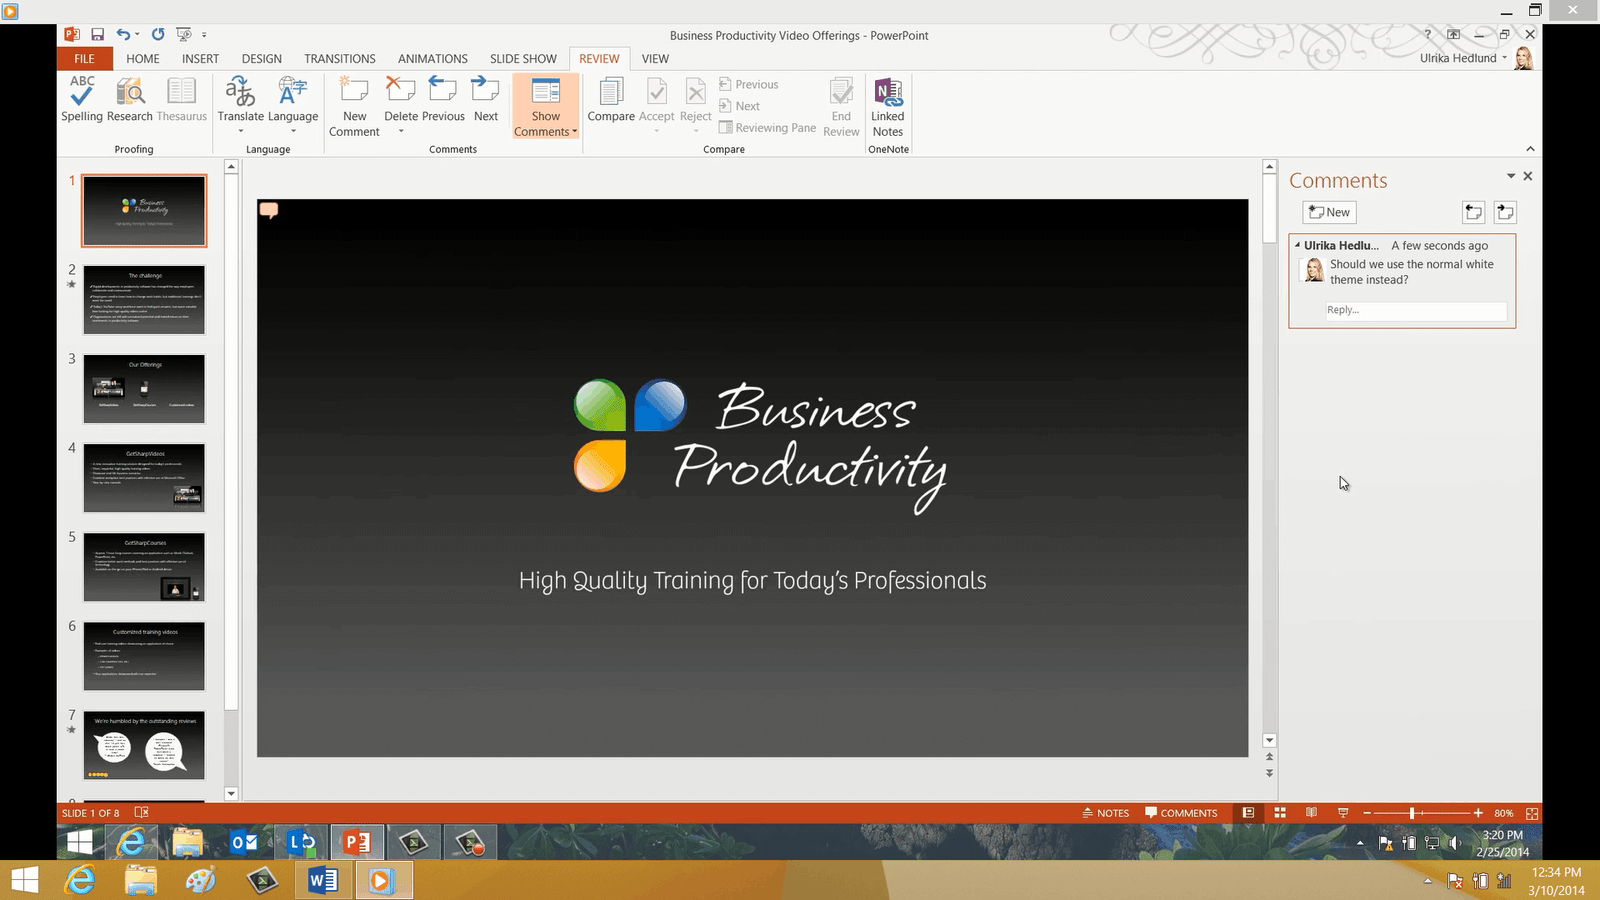
To add a comment to a slide click the “REVIEW” tab and then “New Comment”. The Comments Pane opens up where all the comments for each slide will be visible. I’ll write my comment in the text box “Should we use the normal white theme instead?” And as you can see the profile picture I’m using for my Office account is added to my comment so that it’s easier for everyone to see who wrote the comment.
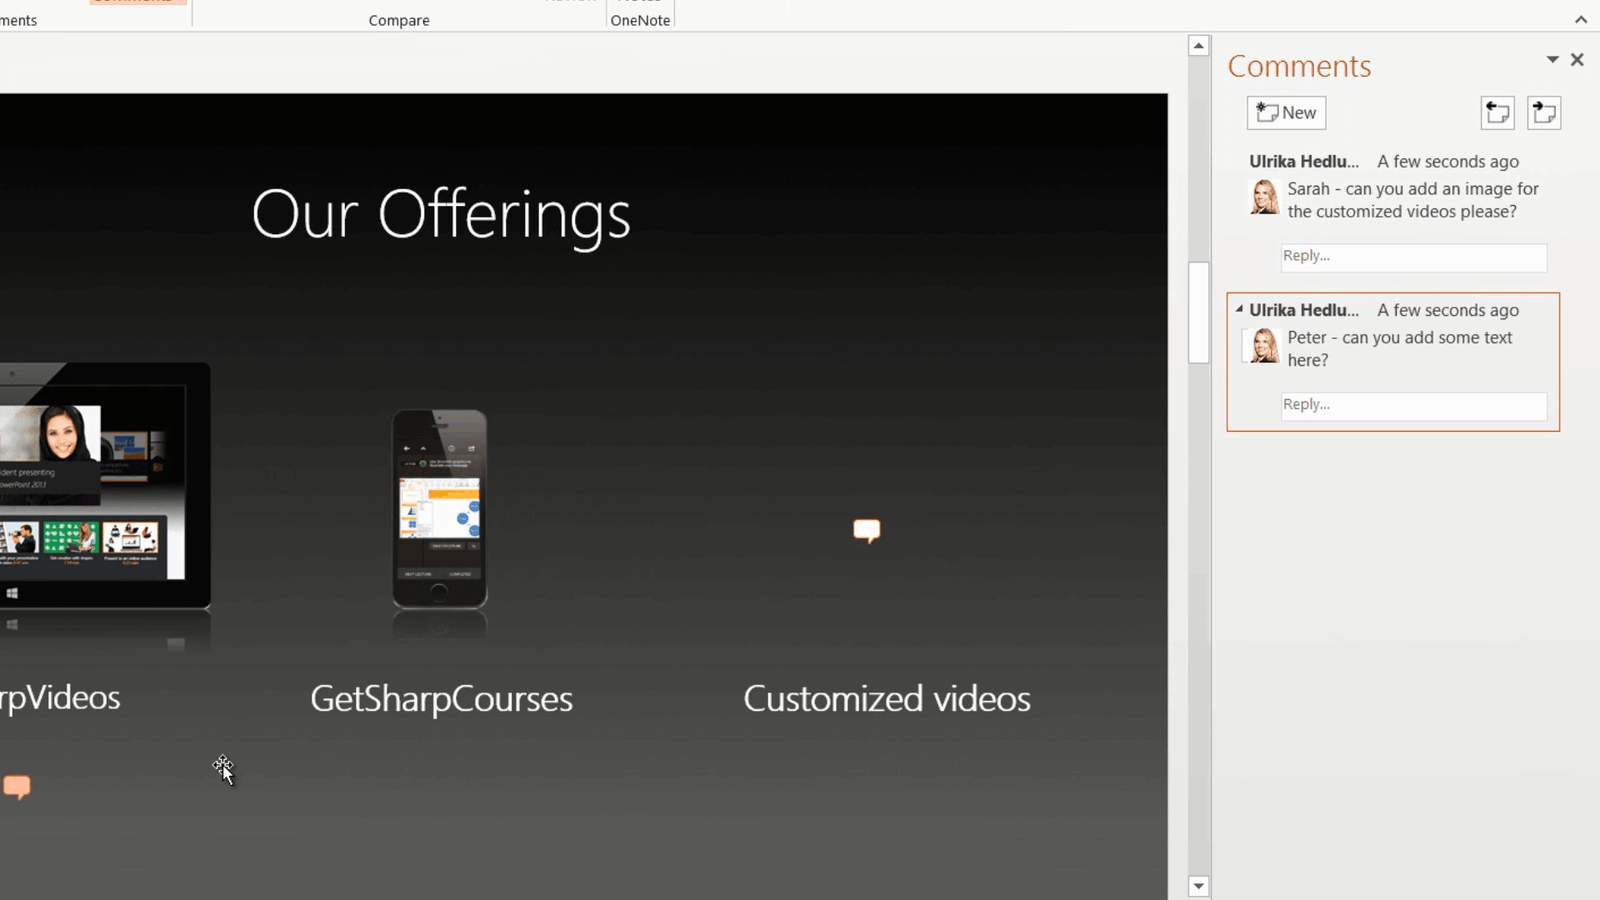
I’ll go to the third slide where I want Peter and Sarah to add some content. I’ll click “New” in the Comments Pane and ask Sarah to add an image for our customized videos. Every time you add a comment to a slide a little speech bubble appears on the slide

I’ll drag the speech bubble to the place in the slide I’m referring to. I can add multiple comments to one slide. I’ll add another comment to Peter asking him to add some text. Again, I’ll move the speech bubble to show where I want the text added. In previous versions of PowerPoint, you had to click each comment separately to see what is said, you get a much quicker overview of all the comments in PowerPoint 2013 since you see all the comments at once in the Comments Pane. When I click one of the speech bubbles the comment is highlighted in the Comments Pane.
How to Share a PowerPoint 2013 presentation on OneDrive?
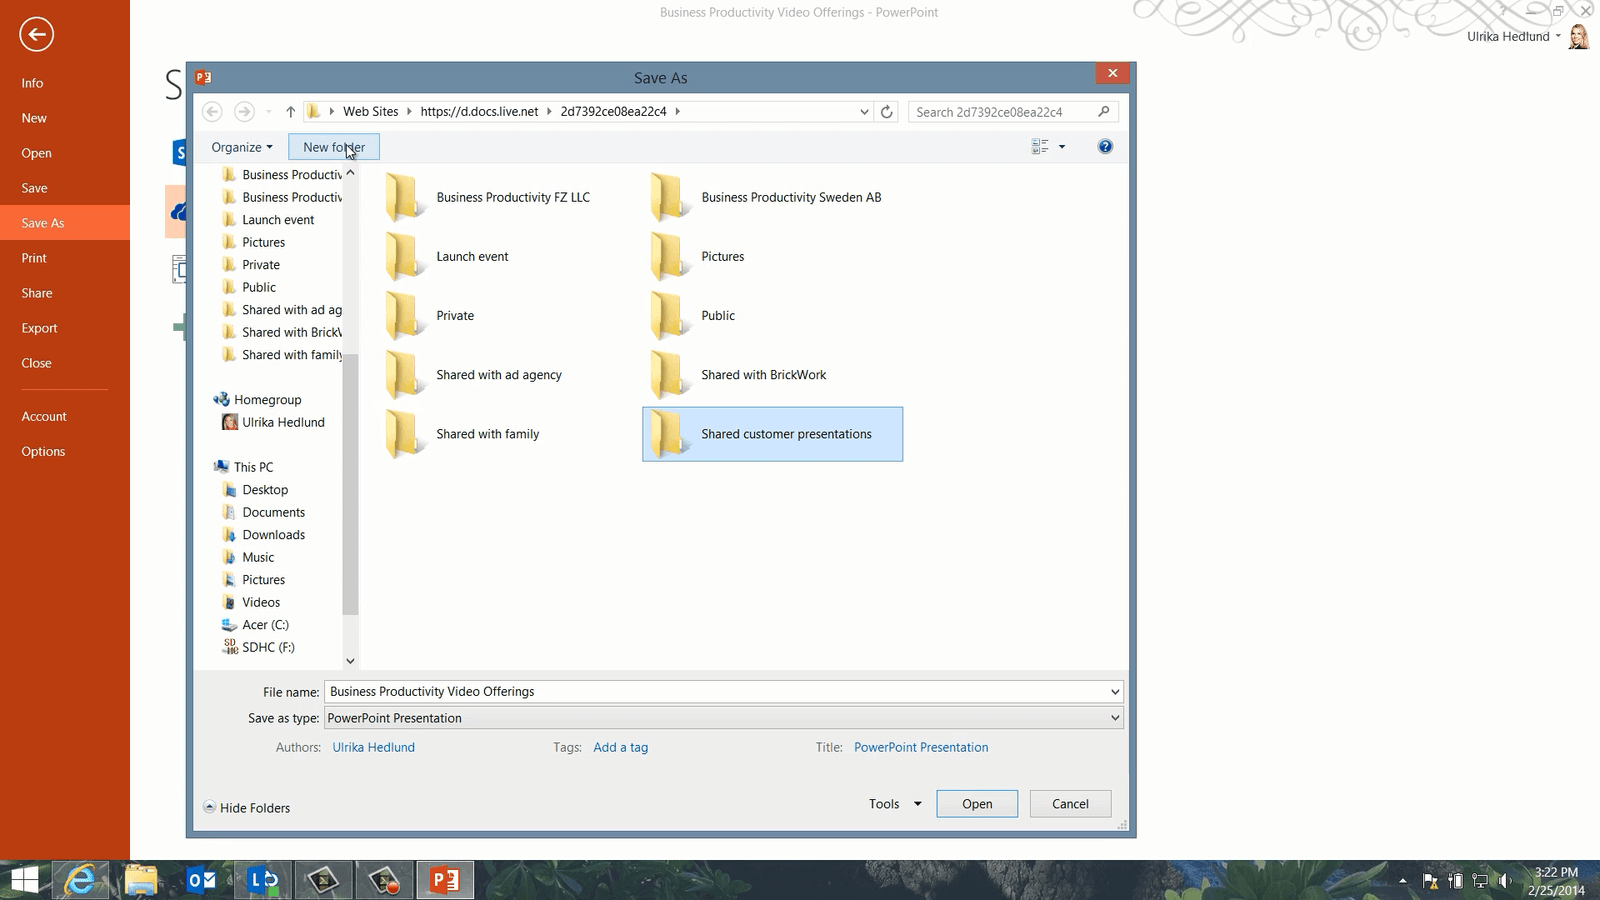
Now I want to share this presentation with everyone so that we are all working on the same file. In order to collaborate on this document, I need to share it in a place where everyone can access it. I’ll click “FILE”, “Saves As” and since I’m sharing this with an external vendor and our SharePoint site is only set up for our internal employees I’ll save it to OneDrive. OneDrive is Microsoft’s cloud storage service available to everyone for free it was previously known as SkyDrive.
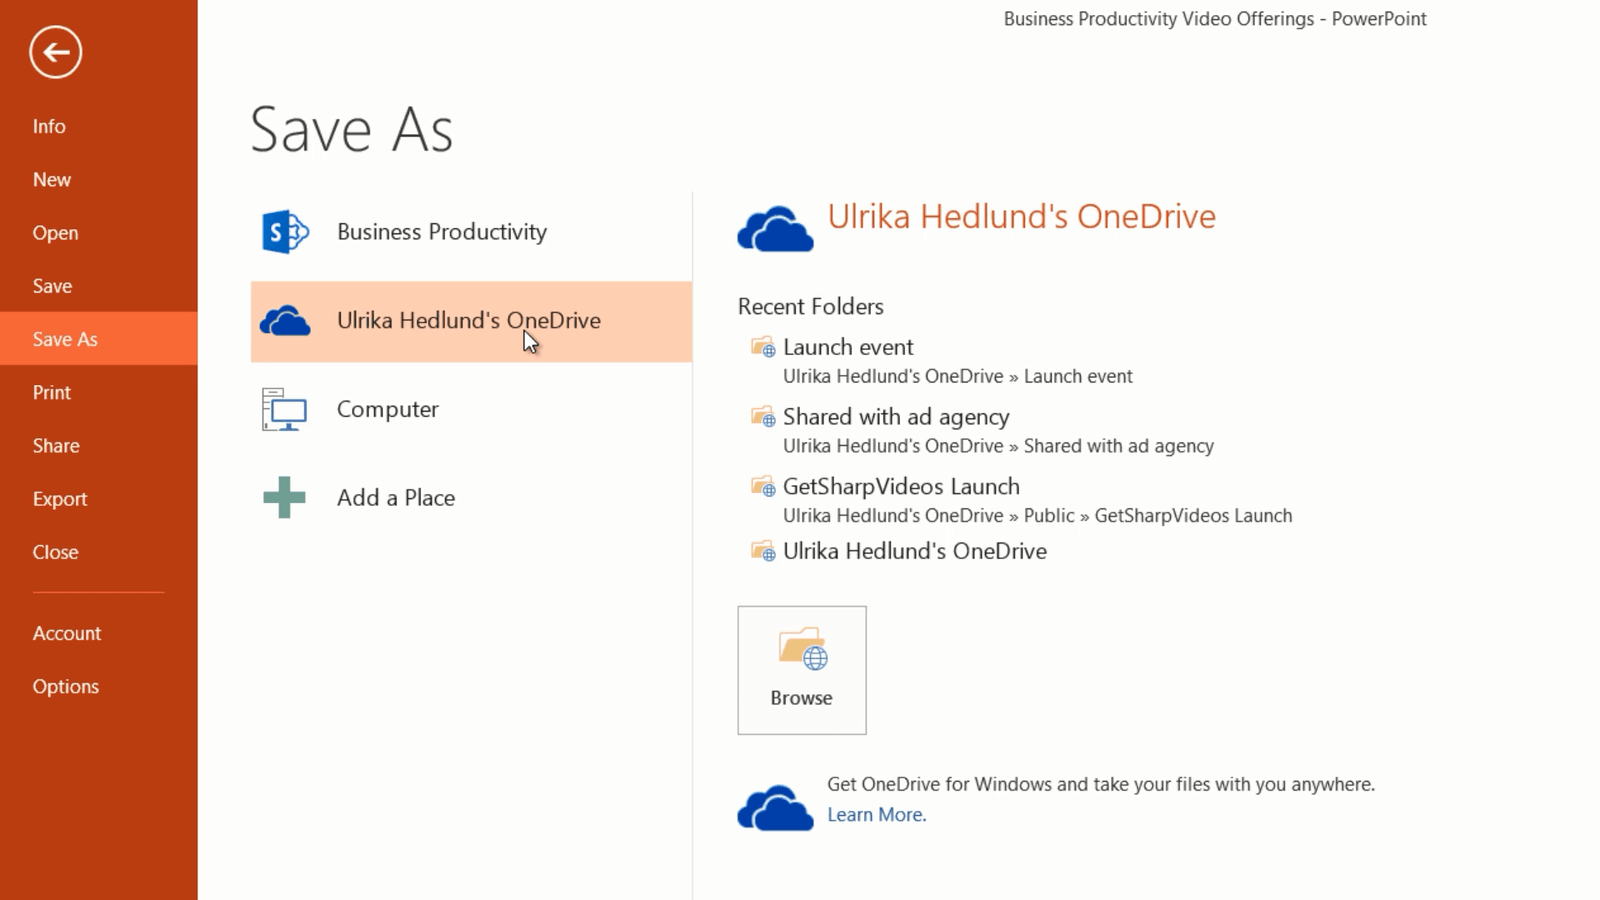
I’ll click “Browse” and then I’ll click “New folder” to create a new sharing folder for the three of us. I’ll name it “Shared customer presentations” and then I’ll save the presentation to the folder.
Next, I need to share the presentation with Peter and Sarah. I’ll click “FILE” again, “Share” and then “Invite People”. I’ll start typing Peter and just select one of the suggested email addresses. Since we are going to work on the presentation together I’ll keep the default which is “Can edit” and then I’ll click “Share”.
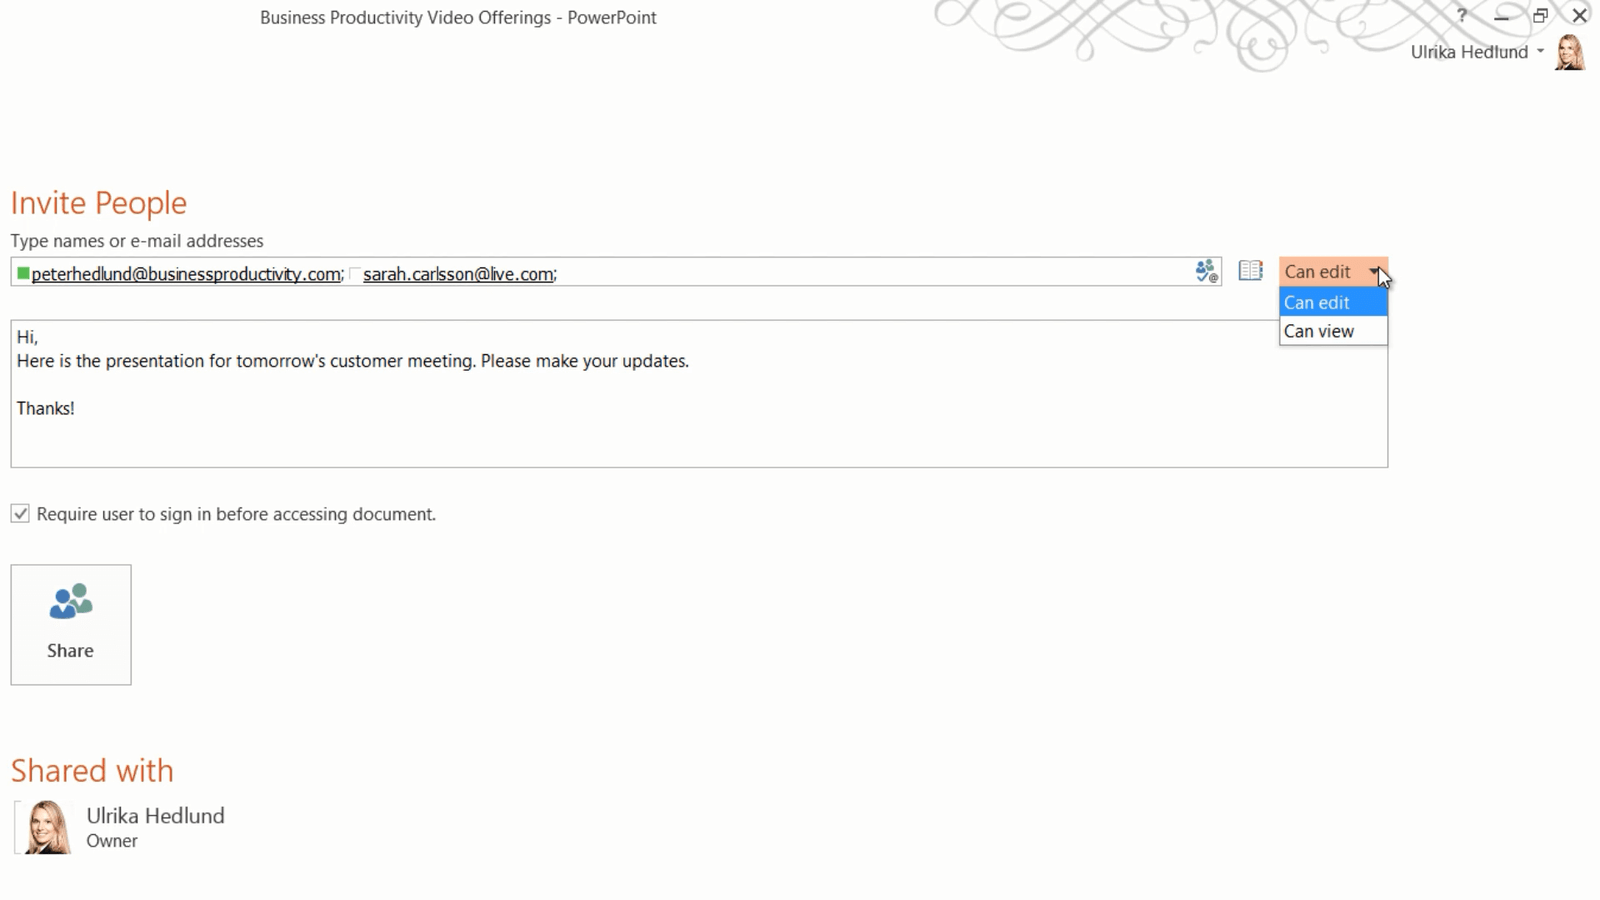
An email invitation with the link to the presentation is sent to them. Under the title “Shared with” I can see who has access to this document and what permissions they’ve been given. At any point in time, I can add more people, remove people or change people’ permissions. Now that I have shared the file with the others, I can continue to work on the presentation for tomorrow’s meeting.
How to Access Presentations with PowerPoint Online?
Let’s switch over to Sarah to see what this looks like for her. Sarah is traveling and accessing her email on her iPad. Here is the email that was sent when I shared the presentation with her. She can open up the file by clicking on the link.

She is asked to sign in using her Microsoft Account so she clicks “Continue”. The presentation opens up in PowerPoint Online in Slideshow mode. She can see that there is a comment added to the first slide. To see the comment she clicks on “COMMENTS”. The Comments Pane opens up and she can see the comment I added on the first slide about the theme used for the presentation.

To reply to the comment she clicks “ADD COMMENTS” and PowerPoint Online opens up in editing mode. She can see that I’m currently editing the document. She writes a reply and says that she recommends changing the theme to the white since it is better with images. She continues to walk through the presentation and replies to my comment regarding the image. “Sure, I will add it when I get to the office”.

Let’s switch over to see what my screen looked like at the same time. When Sarah opens up the presentation in editing mode on her iPad I get a notification on my screen that Sarah is editing the document.

The little people icon at the bottom of my screen shows that two people are currently editing this document.

To get the latest changes from the server I’ll click the Save/Refresh button. I’m informed that I can access earlier versions of the document by going to the “FILE” tab. I’ll click “OK” and then go to the first slide. Here I can see Sarah’s comment about using the white theme instead. I’ll go to the third slide and I can see her comment about adding the image later. Content that Sarah is on track I’ll go ahead and change the theme of the presentation. While I’m working on the presentation I get another notification that Peter is editing the document.
If I click the little icon with people the names of the people who are editing the document appear.

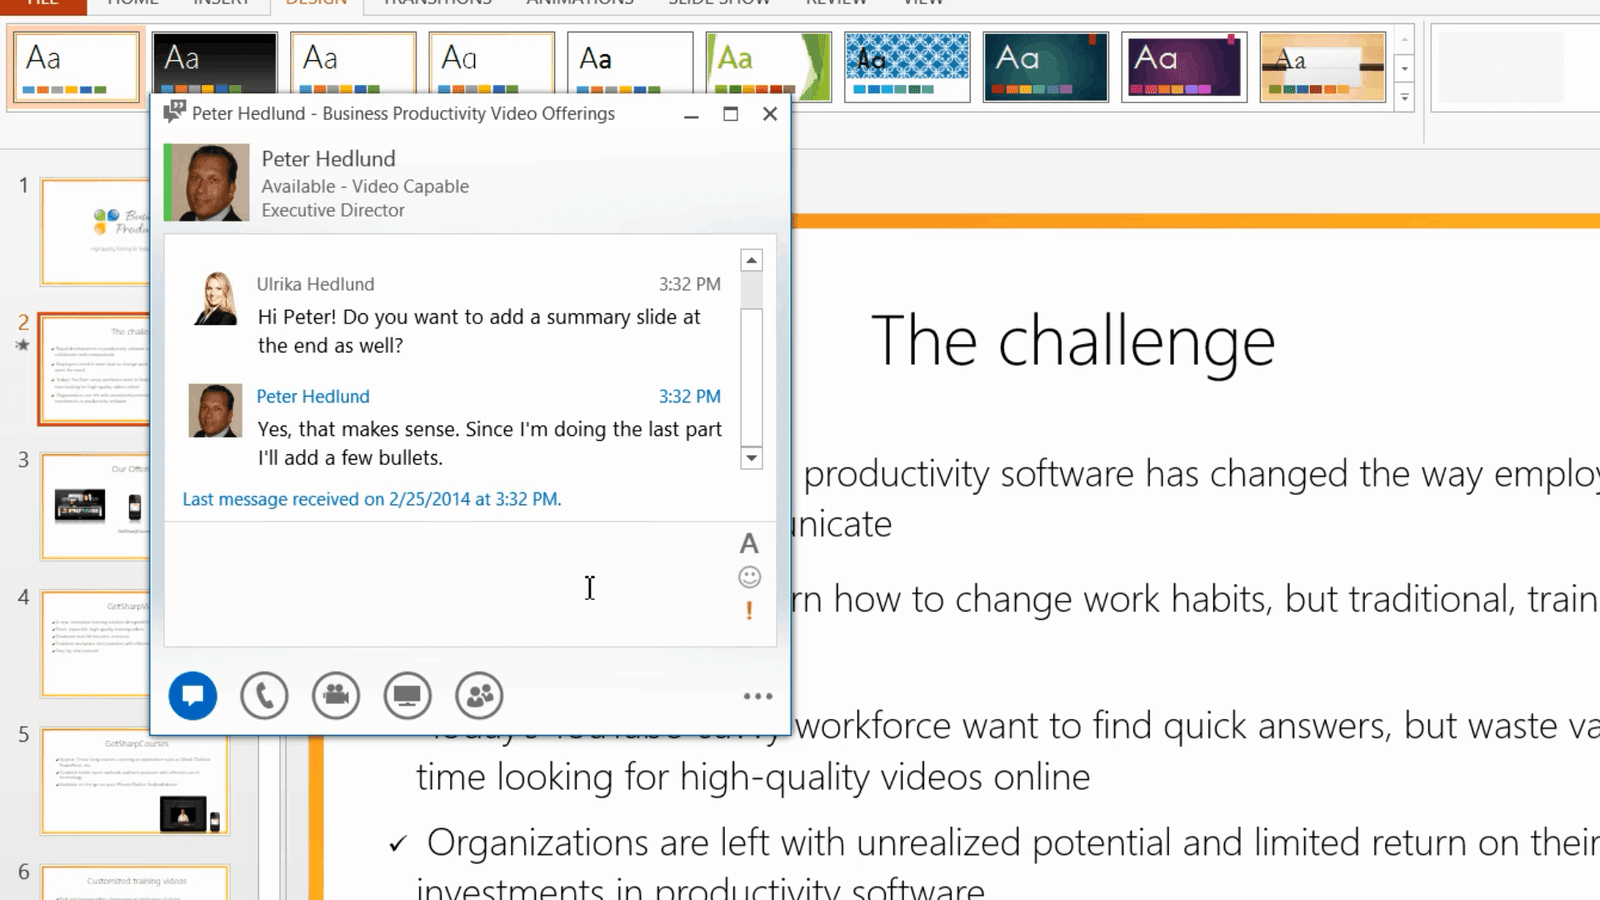
I’d like to ask Peter if he wants to add a summary slide and since I can see he is online I’ll just click the message icon to send him an instant message using Lync.
Hi Peter! Do you want to add a summary slide at the end as well?
And he responds:
Yes, that makes sense. Since I’m doing the last part I’ll add a few bullets.
Great!
After a while, I can see that Peter has stopped editing the document. I’ll click Save/Refresh again and I can see that Peter’s added a summary slide as he said as well as the text I asked him to add to slide number 3. Great!
Now I’ll close down the presentation and just wait for Sarah to add the final image.
How to Access a PowerPoint Presentation from Anywhere?
Before I go to bed I just want to open up the presentation to check that everything looks ok before our big presentation tomorrow morning. On my mobile, I’ll open up OneDrive. Here I can see the folder I created called “Shared customer presentations” and in it is our presentation.
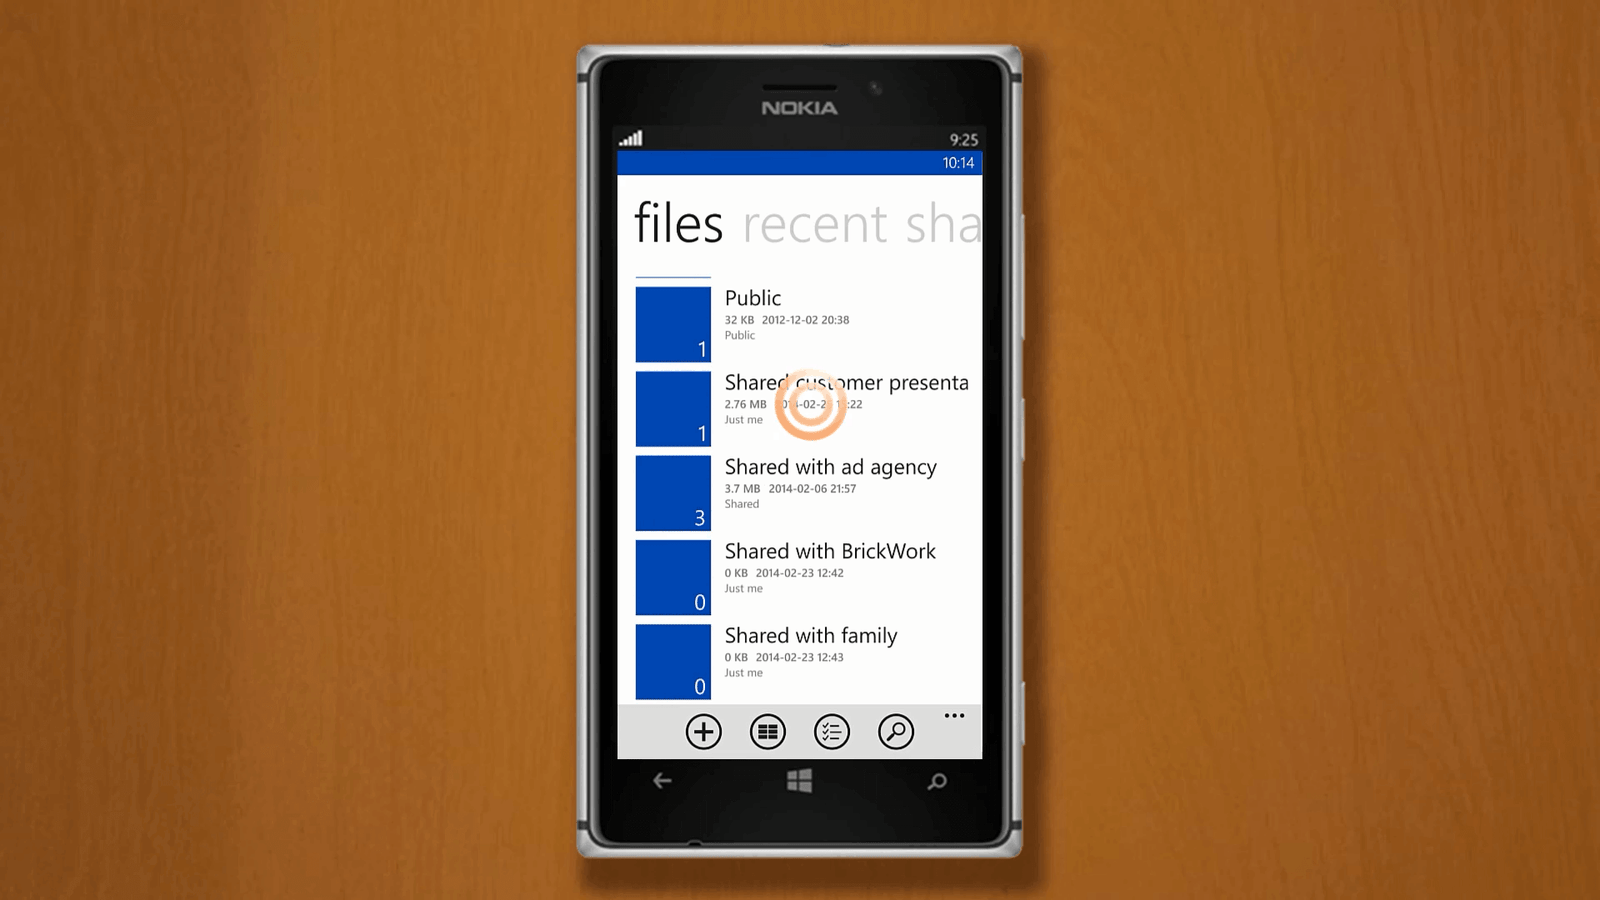
When I click the presentation the file is downloaded to my phone. The presentation opens up in slideshow mode. To move forward I just swipe the screen. I want to make a change to the title of this slide. To edit the presentation I’ll tap on the screen and then click the “edit” button.

I can select which part of the text I want to edit. Here the title is highlighted which is the one I want to change so I’ll just go ahead and add an “s” so that the title says “The Challenges”. I’ll go back to SlideShow mode. On the next slide, I can see that Sarah has added the image I asked her for. Great, now we are all set for the presentation tomorrow morning. Instead of staying up all night I can go to bed since we’ve all been able to effectively collaborate to finalize the presentation.
How to Captivate your Audience with Animations in PowerPoint 2013?
Introduction
Adding motion to your presentation is a great way to capture your audience attention. You can easily do this by using animations. If used effectively animations can add great focus and emphasis to your slides. Now I am going to show you how you can add different types of animations to your text and objects, I’ll show you how you can change the settings of the animations to get the result to you want and finally how you can use the Animation painter to copy animations from one object to the other.
How to Add Animation to PowerPoint 2013?
Here I have a presentation for a company meeting. I want to add some animations to these slides so that I can focus my audience attention on the item I’m currently speaking about.
On this first slide, I have the agenda. Instead of showing the full agenda all at once I want each line item to appear when I click as I walk the audience through the agenda.
To apply animation to text, mark the text box and on the “ANIMATIONS” tab click “Add Animation”.
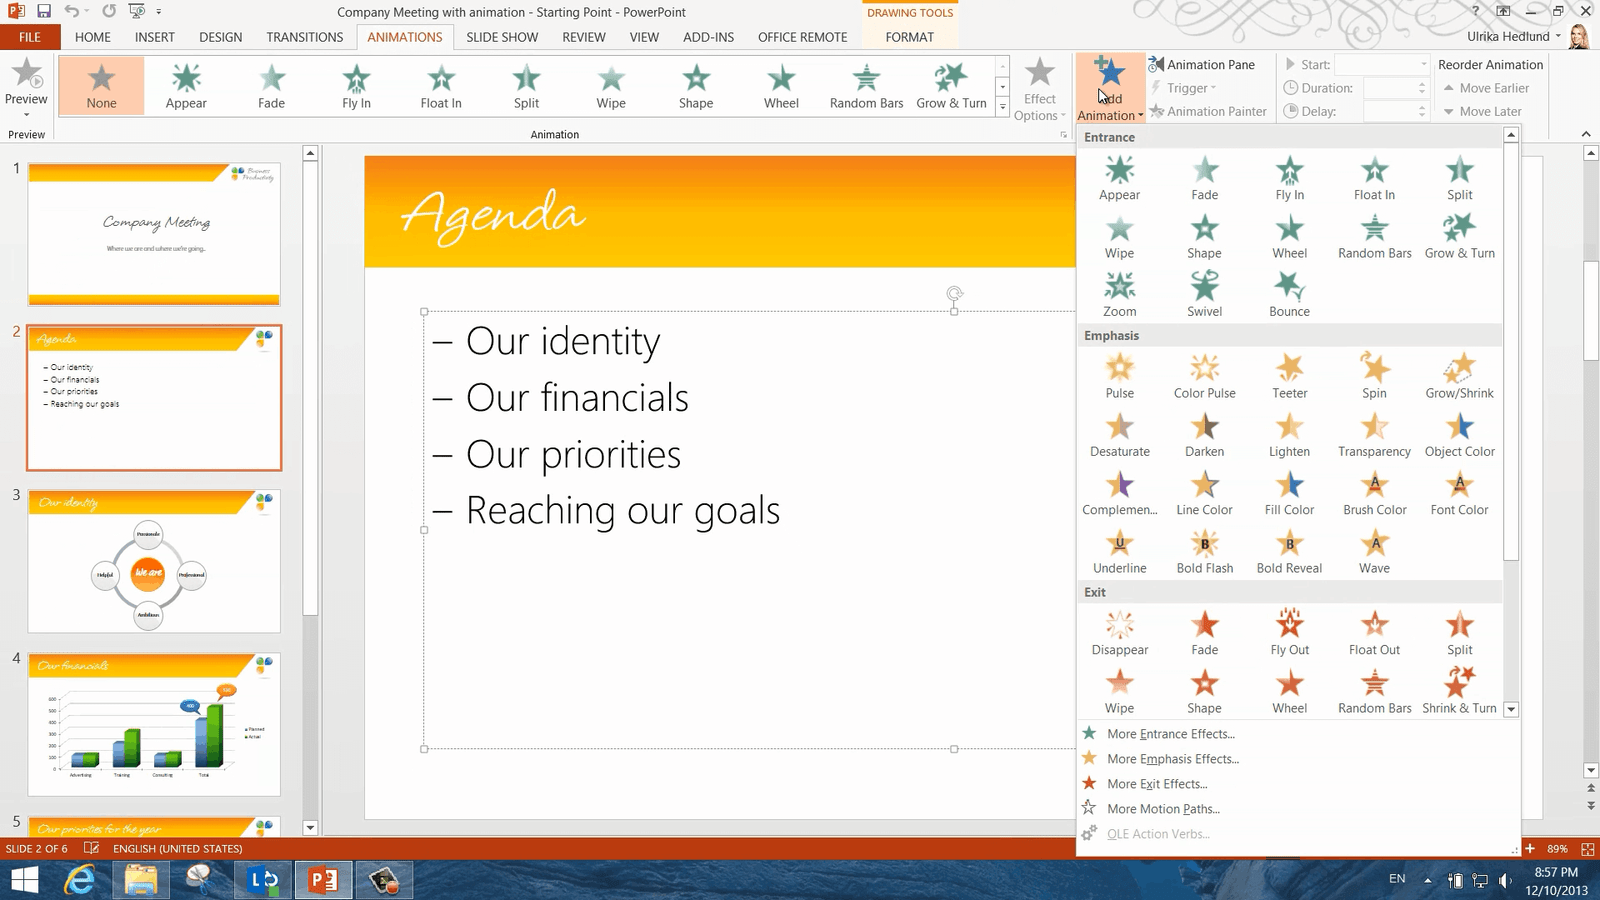
The animations are grouped into four different categories, entrance, emphasis, exit animations, and finally motion paths. Here I want to apply an entrance animation. Let’s apply the “Fade” animation. When you are working with animations I recommend that you open up the “Animation Pane”. On the “ANIMATIONS” tab click, “Animation Pane”, I’ll click the little arrow to expand the group so that I see each row separately. When you add animation to your slide a little star will appear next to the slide in the thumbnail view. You will also see numbers next to the text showing the order they’ll appear in. You can easily change to another animation by just selecting one in the “ANIMATIONS” gallery. Here I’ll change to “Wipe”, but instead of having the text wipe up from the bottom and up, I’ll click “Effect Options” and select “From Left”. To preview your animation you can click the “Play” button in the “Animation Pane” or see them live click to start the slideshow. Now the agenda items appear one by one, just as I wanted.

On this second slide, we have our company identity with our values. I want each circle containing a value to appear as I mention them. To apply animation I’ll mark the circles by holding down “CTRL” on my keyboard. Make sure to mark the objects in the order you want them to appear on your slide. I’ll click “Add Animation” and here I’ll select the “Zoom“ animation. Now all the circles will appear all at once but I want them to appear one by one. So having the animations marked in the “Animation Pane” I’ll go to the Start drop-down menu and select: “On Click”. Now you can see that the objects will appear one by one in the order that I want them. Let’s look at this again in Slide Show mode. Perfect!

How to Animate A Chart in PowerPoint 2013?
On this next slide, I have a chart with financial results. Here I want to add some suspension so that I show the bars one at a time. Finally, I want to show the total planned result and the actual result with a little effect to show that we performed much better than planned.

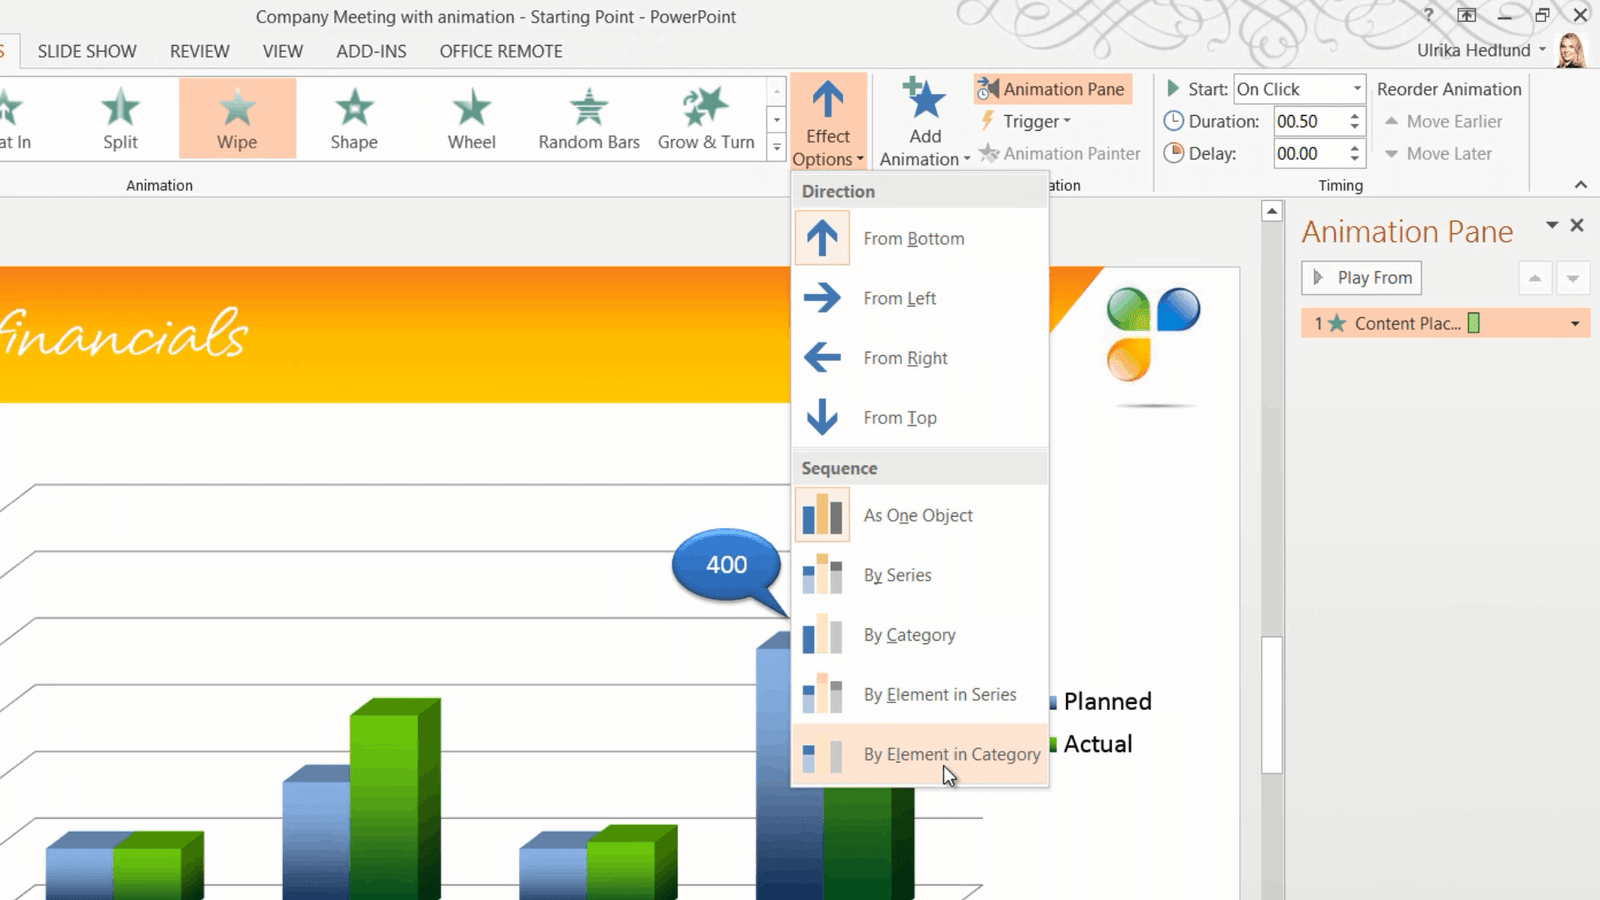
To add animation to a chart mark the chart and click “Add Animation” I’ll apply the “Wipe” animation which is good for charts. The direction is automatically set to “From bottom” which looks best when you have standing bar charts like this one. But now I want to change the animation so that the whole chart does not appear all at once. Under “Sequence” I’ll select “By Element in Category”.
I’ll expand the animations by clicking the little arrow and then I’ll play the animation to see what it looks like. As you can see the chart gridlines and legend are animated which I don’t want, so I’ll just mark the first item in the animation pane and click ”Delete” on my keyboard.
Now for the text bubbles. The first one I’ll just add a simple “Entrance” animation for it to appear. I want it to appear after the Total Planned bar, so I’ll just mark it in the “Animation Pane” and drag it up and position it under the 7th bar animation. I’ll click on the little arrow and select to have the animation “Start After Previous”.

For the second bubble showing our great results, I want an entrance animation with more emphasis. I’ll click “Add Animation”, “More Entrance Effects”. Here I’ll choose “Float Up”. I’ll change the timing of this one as well to have it “Start After Previous”. There! Now let’s see how this turned out. I’ll show the bars for advertising, training, consulting and then finally the planned total result of 400 and then our actual result of 510 rising up. Great!
How to Add Animations to Multiple Objects in PowerPoint 2013?
On this next slide with the priorities for the coming year, I have a lot of objects and a lot of text that I want to animate. First I want to show the group called “Quality Content” with the three elements. Next, I want to show “Customer Contact” with a similar animation and then finally the “Reach”. Let’s go to the slide and start adding these animations. To see the objects on the slide, I’ll go to the “Home” tab and click “Select” and then “Selection Pane”. Here I can see all of the objects and the order that they’re in.
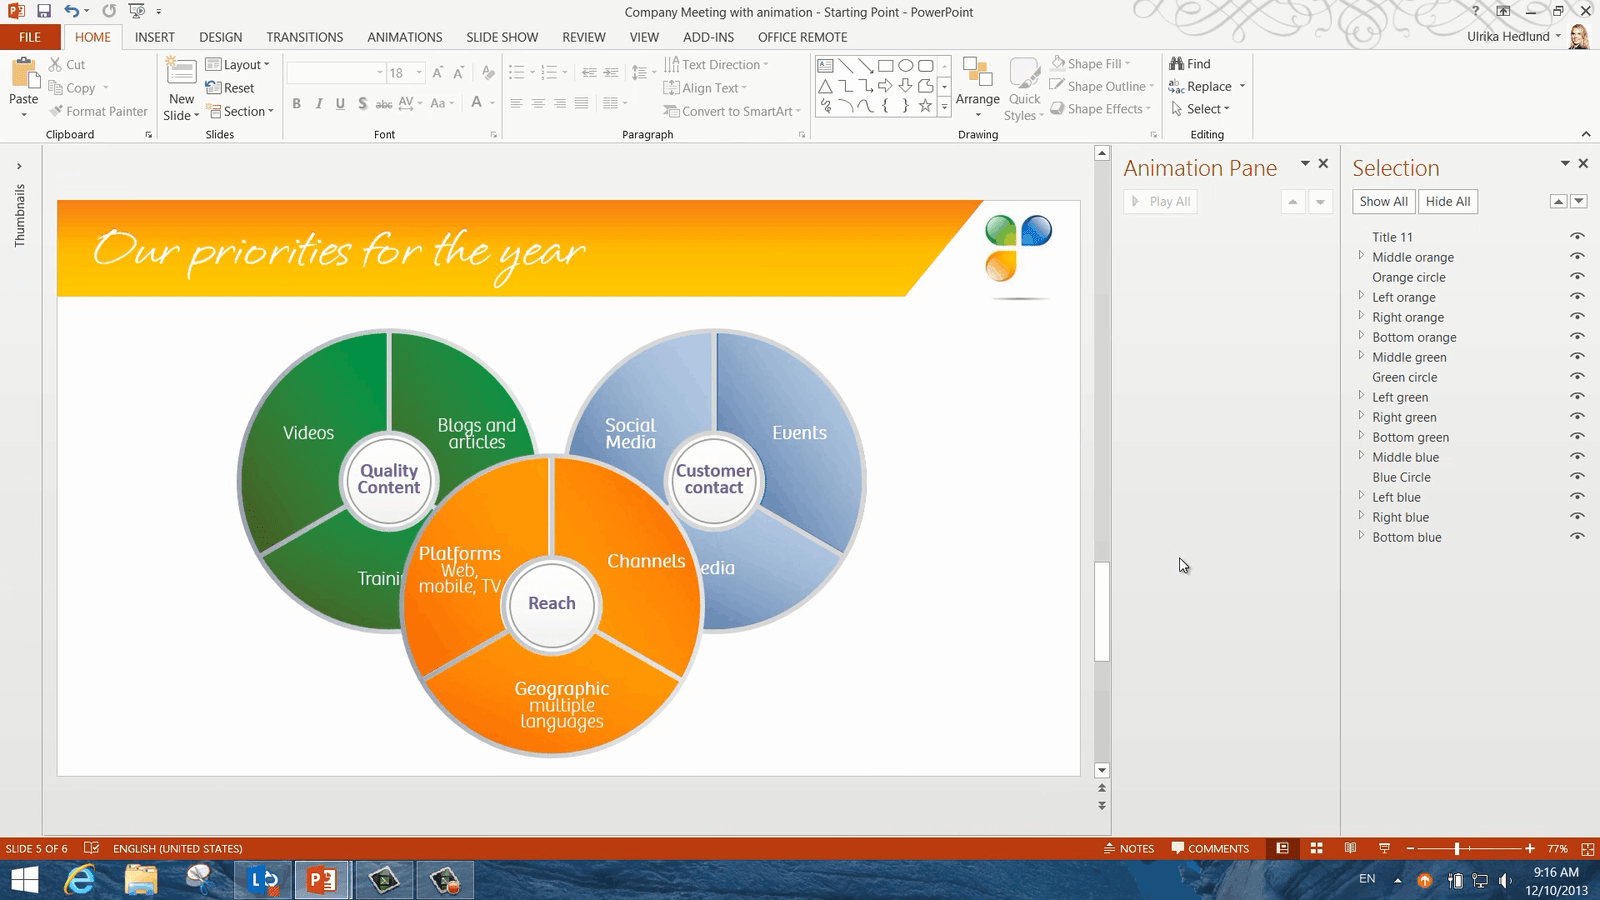
I’ll close down the “thumbnail preview” to get some more space on the screen. I want to start by animating this first priority group. Instead of marking the object in the slide, I can go to the selection pane and click on the object “Middle green” here. I’ll go to the “Animations” tab click “Add Animation” and add the “Fade” animation. Next, I’ll mark the “Green circle” in the selection pane, click “Add Animation” and select “Zoom.” I’ll change the timing to start “After Previous”. Finally, I want the pieces of the circle to appear, so I’ll hold down “CTRL” on my keyboard and then mark them in the order that I want them to appear. I’ll add the “Fade” animation. I want them to start after one another so I’ll change the timing to “Start after previous”.
Instead of manually applying animations all over again I’m going to use the “Animation Painter” to copy the animations to the two other priorities. To copy animations from one object to another you need to click on the actual object in the slide so I’ll close down the “Selection” pane. To use the animation painter first mark the object with the animation you want to copy, then on the Animations Tab click the “Animation Painter”. You will see a little brush next to your mouse pointer. Now point to the object where you want to apply the same animation. Now I’ll just go one by one and apply the same animations. There! Now let’s have a look at this. First priority is “Quality Content”, then “Customer Contact” and finally “Reach”. Perfect!

How to Create Custom Animations in PowerPoint 2013?
I’ll open up the thumbnail preview again and go to the last slide. On this last slide, I want to show that if we are all in line with our priorities we can reach our goals.
I’ll go back to the previous slide and mark the priority circles by holding down “CTRL” and then I’ll copy them by pressing “CTRL C” on the keyboard. I’ll go to the next slide and press “CTRL V” to paste them in. I’ll remove the existing animations by marking them in the “Animation Pane” and clicking “Delete” on my keyboard.
To apply a custom motion path, mark the object, click “Add Animation” scroll down to “Motion Paths” and select “Custom Path”. Your mouse cursor will turn into a cross. Position the cross where you want the animation to start then click the left mouse button multiple times along the motion path you want to create for your object. To end the motion path, double-click. I’ll add the same custom motion path to the other circles. I’ll mark all the custom paths and then change the timing to start “With previous”. Now I also want the circles to become smaller and smaller and finally disappear into the net. So I’ll mark all the balls, click “Add Animation” and select “Grow/Shrink”. I’ll click “Effect Options” and choose “Tiny”. I want this to happen at the same time as they are moving into the basketball net so I’ll change the start option to “With previous”. Finally, I want them to disappear so I’ll click “Add Animation” again and from the “Exit” group I’ll select “Disappear”. I’ll change the timing so that this animation starts after previous.

Okay, let’s preview this and see if we got it right. Great, we are done! In just a few minutes we have added animations to our presentation to captivate our audience.
How to Use Transitions in PowerPoint 2013?
Introduction
Sometimes you want to add more drama to your presentations. Perhaps you are introducing a new product that you want to reveal to your audience, or you’re presenting dramatic price reductions that you really want the audience to take notice of. You can do this by adding slide transitions. In PowerPoint 2013 Microsoft has introduced a number of new slide transitions. Now I’m going to show you how you can use these transitions in PowerPoint 2013 to add a better flow and more drama to your presentation.
Reviewing the final result using transitions
Here I have a presentation that I held at a Business Women Forum about my life and how technology helps me every day. The presentation walks through a typical day from morning till evening. To add a bit more drama to this presentation I’ve applied transitions to the slides.
First, I’ve added a subtle fade transition to give the audience the feeling of being let in on a secret. To the next slide where I show the start of my morning with my mobile showing the time, I’ve added a clock transition to re-emphasize the feeling of waking up and looking at the clock to see what time it is. To the rest of the slides when I walk through the day I’ve added a push transition from the bottom up. Again, I want to strengthen the feeling of time elapsing throughout the day.
Here I want to take the audience back in time to show them how I took notes before using pen and paper. I’ve added a turning cube transition to show that. To emphasize the message that I no longer use pen and paper, but instead a stylus on my tablet I’ve added a more dramatic “Fraction” transition.
Let’s go to the end to see the entrance of the summary slide. Since this is the end of the presentation and the summary slide, it’s very likely that the audience will lose focus and start getting ready to leave the room. I have a final announcement that I want to make to the audience, so I’ve added some more dramatic transitions here at the end to catch their attention. First, I’ve added a “Fall over” transition to show that I’m now switching to another topic. Then I’ve added a “Curtains” transition to reveal the gift for all attendees of free access to our PowerPoint 2013 course on Udemy. Finally, I’ll end again with a subtle “Fade” transition.
How to Apply Transitions in PowerPoint 2013?
Now let’s look at how to apply these transitions. Here is the same presentation without any transitions. To add a transition to a slide, I’ll mark the slide where I want to add the transition and go to the “TRANSITIONS” tab. Here I have a full gallery of different transitions, from “Subtle”, to “Exciting”.
![]()
There are a number of new transitions here that you can try out. Some of them stand out quite a bit so you want to make sure not to get carried away. Only use transitions that help emphasize your message. To apply the transition, I’ll click “Fade” in the “Subtle” section. You can see a little star next to the thumbnail slide that shows that this slide has an animation or transition applied to it.
![]()
To preview the transition I’ll click “Preview”. I’d like this transition to be a bit slower. So I’ll just increase the duration to 1.50 seconds. I’ll click “Preview” again to see the final result.
How to Change Transition Effects in PowerPoint 2013?
On the third slide with the mobile showing the time I want to add a clock transition. I’ll mark it and select the more exciting transition “Clock”. If you click “Effect Options” you can see different ways in which you can modify the transition. For instance, in this case, I can choose to make it “Clockwise”, “Counterclockwise” and finally “Wedge”. I’ll choose the default one which is “Clockwise”.
![]()
How to apply a transition to multiple slides in PowerPoint 2013?
To the majority of the slides, I want to add a transition that shows time passing throughout the day. To add the same transition to multiple slides I’ll first click the “Slide Sorter” to see all my slides. I’ll mark the first slide in the range that I want to add the transition to, hold down the “Shift” key and then mark the last slide in the range. Now I’ll select the transition “Push”.
![]()
I’ll go to the “Effect Options” to see the different options for this transition. Again I’ll leave the default which is “From bottom”. Now the “Push” transition has been added to all of the slides. I’ll double-click the slide with the pen and paper to get back to the normal view. To this slide, I want to add a transition effect that makes us feel like we’re going back in time. I’ll go to the Transition Gallery and select “Cube”. I’ll click “Effect Options” and select “From Left”.
![]()
To the next slide, I’ll go to the Transition Gallery again and select the “Fracture” transition. This is new in PowerPoint 2013, it’s quite dramatic so you shouldn’t use this very often, only when you want to make a point of something.
![]()
I want to add a subtle “Fade” transition to the “Summary” slide and the “Thank you” slide. I’ll hold down the “CTRL” key and mark both Slides and then I’ll click “Fade”.
How to add Advanced Transition Effects in PowerPoint 2013?
Now to the grand finale. I want to reveal the gift to all attendees with a red curtain opening up showing the free course. To get a red curtain effect, I need to insert a red slide. I’ll right-click between the slides where I want the new slide to be located and select “New Slide”. I’ll right-click on the slide and select “Format Background” and change the color to a dark red.
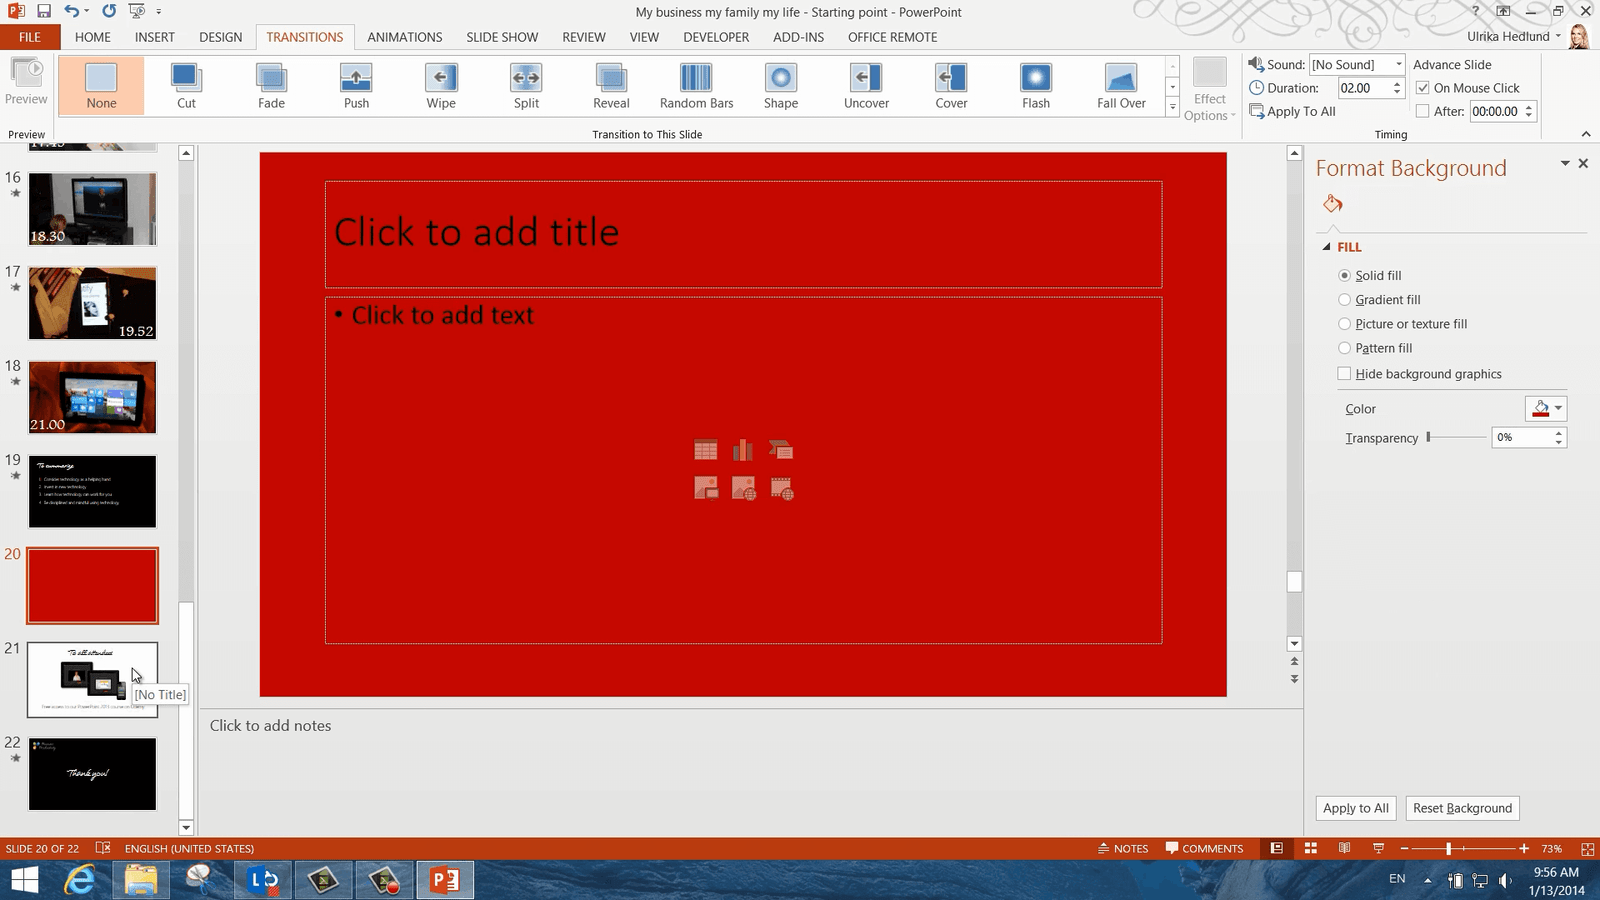
Now I need to apply the “Curtains” transition to the slide following the red slide. I’ll mark it, and under “TRANSITIONS” I’ll select “Curtains”. Now I get a theatre effect of curtains opening up. I’d like to speed it up a bit, so I’ll change the duration to 4 seconds and then “Preview”. Perfect!
![]()
Now I need to do something about the red slide I added. To add the effect of the summary slide falling down, I’ll mark the red slide and add the “Fall Over” transition. There!
![]()
Now I want to see the full ending in presentation mode. I’ll click the “Summary” slide and then “Slide Show” mode. The summary slide falls down and then the curtains reveal the free gift to all attendees. Perfect! In just a few minutes I’ve applied transitions to my slides to add more drama to my presentation.