How to Use Transitions in PowerPoint 2013?
Introduction
Sometimes you want to add more drama to your presentations. Perhaps you are introducing a new product that you want to reveal to your audience, or you’re presenting dramatic price reductions that you really want the audience to take notice of. You can do this by adding slide transitions. In PowerPoint 2013 Microsoft has introduced a number of new slide transitions. Now I’m going to show you how you can use these transitions in PowerPoint 2013 to add a better flow and more drama to your presentation.
Reviewing the final result using transitions
Here I have a presentation that I held at a Business Women Forum about my life and how technology helps me every day. The presentation walks through a typical day from morning till evening. To add a bit more drama to this presentation I’ve applied transitions to the slides.
First, I’ve added a subtle fade transition to give the audience the feeling of being let in on a secret. To the next slide where I show the start of my morning with my mobile showing the time, I’ve added a clock transition to re-emphasize the feeling of waking up and looking at the clock to see what time it is. To the rest of the slides when I walk through the day I’ve added a push transition from the bottom up. Again, I want to strengthen the feeling of time elapsing throughout the day.
Here I want to take the audience back in time to show them how I took notes before using pen and paper. I’ve added a turning cube transition to show that. To emphasize the message that I no longer use pen and paper, but instead a stylus on my tablet I’ve added a more dramatic “Fraction” transition.
Let’s go to the end to see the entrance of the summary slide. Since this is the end of the presentation and the summary slide, it’s very likely that the audience will lose focus and start getting ready to leave the room. I have a final announcement that I want to make to the audience, so I’ve added some more dramatic transitions here at the end to catch their attention. First, I’ve added a “Fall over” transition to show that I’m now switching to another topic. Then I’ve added a “Curtains” transition to reveal the gift for all attendees of free access to our PowerPoint 2013 course on Udemy. Finally, I’ll end again with a subtle “Fade” transition.
How to Apply Transitions in PowerPoint 2013?
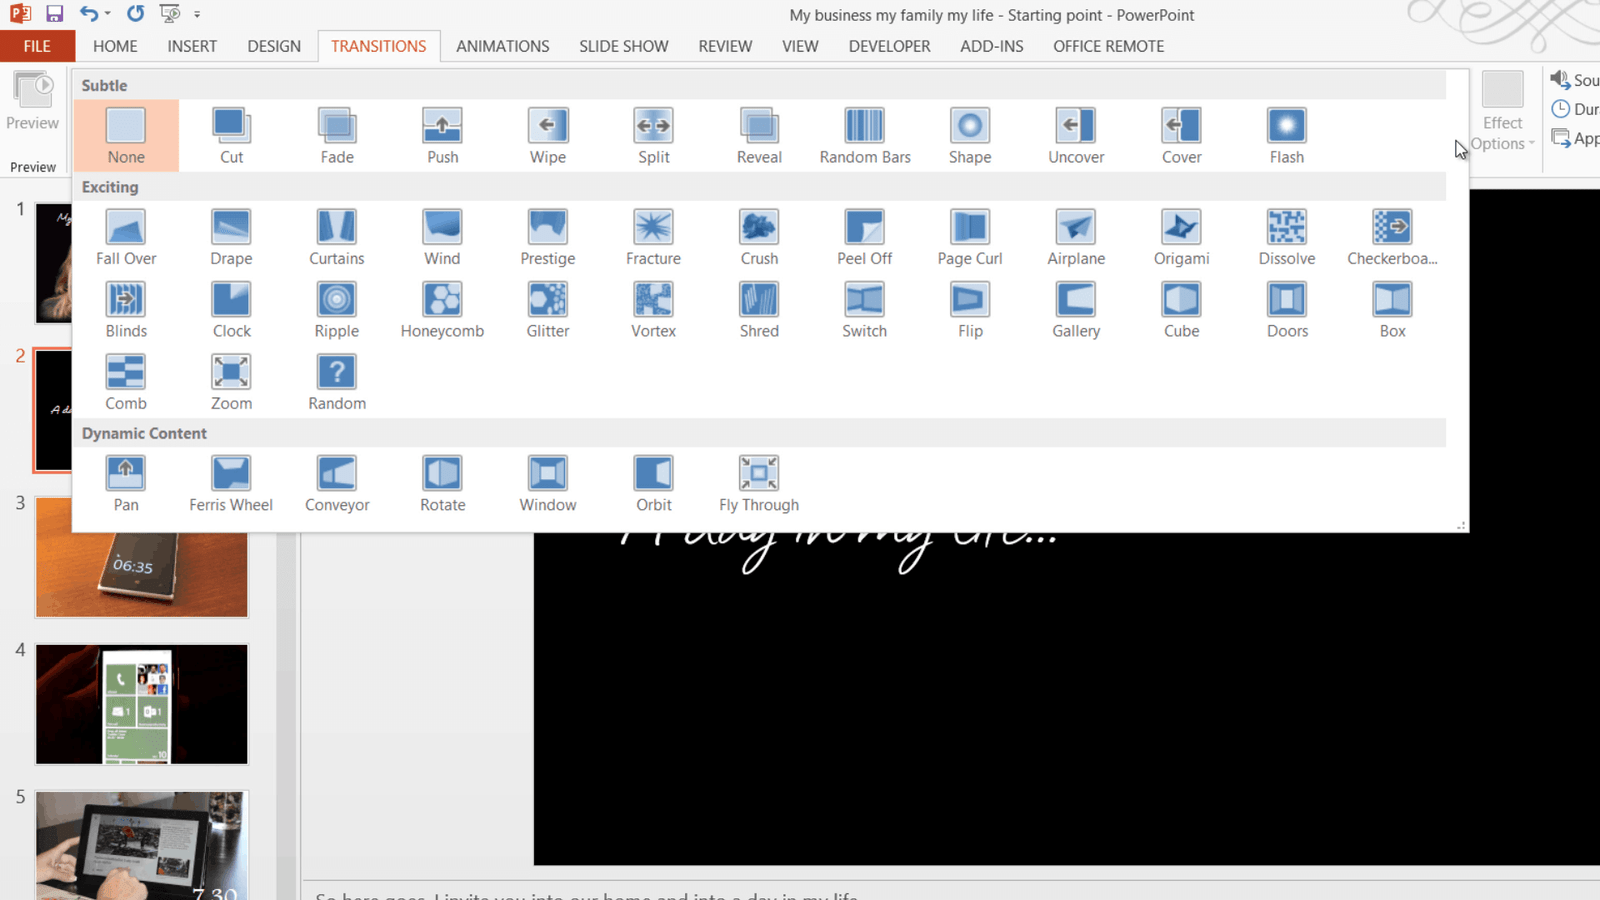
Now let’s look at how to apply these transitions. Here is the same presentation without any transitions. To add a transition to a slide, I’ll mark the slide where I want to add the transition and go to the “TRANSITIONS” tab. Here I have a full gallery of different transitions, from “Subtle”, to “Exciting”.
There are a number of new transitions here that you can try out. Some of them stand out quite a bit so you want to make sure not to get carried away. Only use transitions that help emphasize your message. To apply the transition, I’ll click “Fade” in the “Subtle” section. You can see a little star next to the thumbnail slide that shows that this slide has an animation or transition applied to it.
To preview the transition I’ll click “Preview”. I’d like this transition to be a bit slower. So I’ll just increase the duration to 1.50 seconds. I’ll click “Preview” again to see the final result.
How to Change Transition Effects in PowerPoint 2013?
On the third slide with the mobile showing the time I want to add a clock transition. I’ll mark it and select the more exciting transition “Clock”. If you click “Effect Options” you can see different ways in which you can modify the transition. For instance, in this case, I can choose to make it “Clockwise”, “Counterclockwise” and finally “Wedge”. I’ll choose the default one which is “Clockwise”.
How to apply a transition to multiple slides in PowerPoint 2013?
To the majority of the slides, I want to add a transition that shows time passing throughout the day. To add the same transition to multiple slides I’ll first click the “Slide Sorter” to see all my slides. I’ll mark the first slide in the range that I want to add the transition to, hold down the “Shift” key and then mark the last slide in the range. Now I’ll select the transition “Push”.
I’ll go to the “Effect Options” to see the different options for this transition. Again I’ll leave the default which is “From bottom”. Now the “Push” transition has been added to all of the slides. I’ll double-click the slide with the pen and paper to get back to the normal view. To this slide, I want to add a transition effect that makes us feel like we’re going back in time. I’ll go to the Transition Gallery and select “Cube”. I’ll click “Effect Options” and select “From Left”.
To the next slide, I’ll go to the Transition Gallery again and select the “Fracture” transition. This is new in PowerPoint 2013, it’s quite dramatic so you shouldn’t use this very often, only when you want to make a point of something.

I want to add a subtle “Fade” transition to the “Summary” slide and the “Thank you” slide. I’ll hold down the “CTRL” key and mark both Slides and then I’ll click “Fade”.
How to add Advanced Transition Effects in PowerPoint 2013?
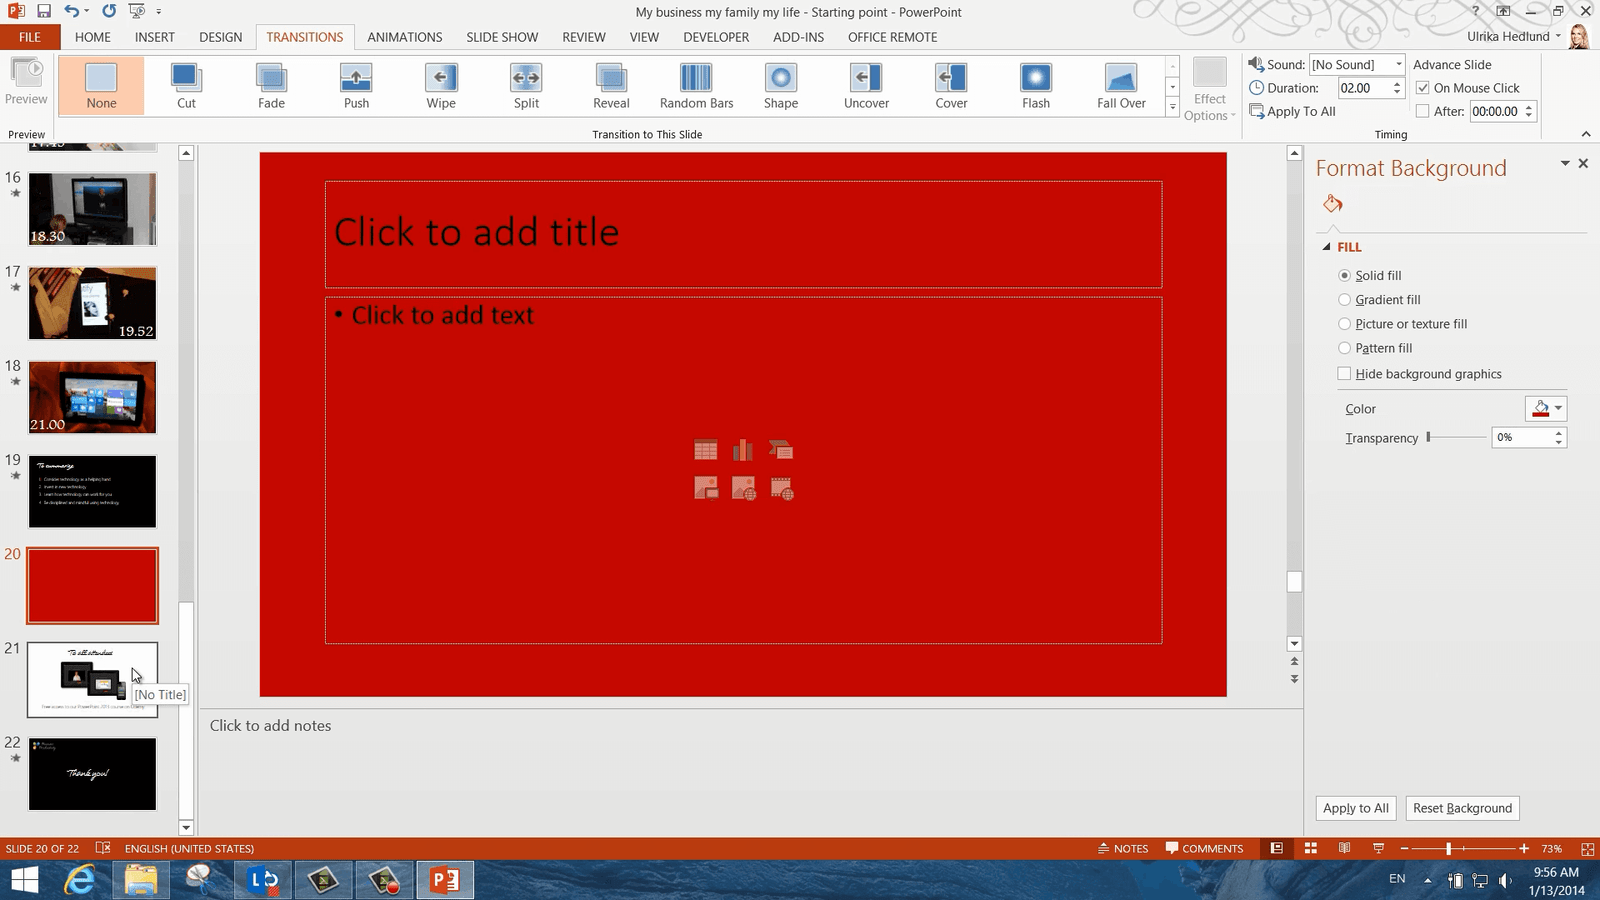
Now to the grand finale. I want to reveal the gift to all attendees with a red curtain opening up showing the free course. To get a red curtain effect, I need to insert a red slide. I’ll right-click between the slides where I want the new slide to be located and select “New Slide”. I’ll right-click on the slide and select “Format Background” and change the color to a dark red.
Now I need to apply the “Curtains” transition to the slide following the red slide. I’ll mark it, and under “TRANSITIONS” I’ll select “Curtains”. Now I get a theatre effect of curtains opening up. I’d like to speed it up a bit, so I’ll change the duration to 4 seconds and then “Preview”. Perfect!
Now I need to do something about the red slide I added. To add the effect of the summary slide falling down, I’ll mark the red slide and add the “Fall Over” transition. There!
Now I want to see the full ending in presentation mode. I’ll click the “Summary” slide and then “Slide Show” mode. The summary slide falls down and then the curtains reveal the free gift to all attendees. Perfect! In just a few minutes I’ve applied transitions to my slides to add more drama to my presentation.


Leave a Reply